We’ve all been there . . . in the costume room . . .sizing the cast into costumes, and you have THE.PERFECT.DRESS. Only . . . . you juuuusssttt can’t quiiiiittteeee get it zipped up. And, even if you could . . .you don’t want to count on being able to do it during a rush costume change . . or . . . nightmare of all . . . risking the zipper ripping out during the performance.
Here is one way to fix that small problem.
Find some fabric that is the same color as the original garment.
The first place to look is on the inside of the dress . . .lining anyone? You can always “steal” a piece from the lining, and replace it with something different. No one knows if the lining is the same color up by the waist band as it is at the bottom of the skirt. (If the lining is particularly thin, you may need to back it with an interfacing–a piece of old sheet or other random fabric would work well–see the picture of the lime green dress below.
No lining? Well, then that leaves either a regular fabric store, or going to a resale/thrift store and looking for something close.
While you have the cast member there, inside the dress, have a second person hold the dress closed as best as possible. Then, make some measurements, how much the gap is at the top of the zipper, and then how far down you need to go before you can close the zipper. Usually you will have a triangle shape.
The first thing you will want to do is take the zipper out of the area that needs to be made larger. Do this by removing the stitching (not cutting the fabric itself). Depending upon the dress fabric, the length of the alteration and the style of the dress, for some upcycles it may be easier to loosen just the top portion of the zipper. For others, it might be easier to take the whole zipper out and replace it. Keep in mind, that if the dress has beads, you can’t sew them with a machine, so that portion needs to be hand sewn (or the beads removed). (I am not going to show how to put a zipper in . . there are bazillions of tutorials online for that).

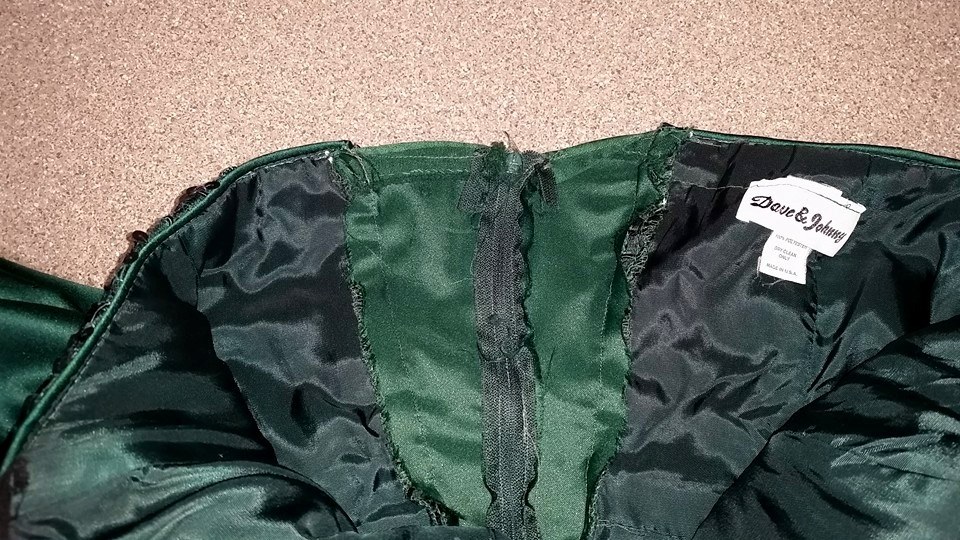
This is actually a dress that I found altered this way in a Thrift shop. You can see the original top is a lace & sequin fabric, and the inset is just green satin. I honestly bought the dress in large part for the visual of this alteration. I was pleasantly surprised at how little I was “bothered” by the non-matching material in the bodice. And truly, onstage, the back of a garment is seen a relatively small amount of time, if at all. The second picture is the inside view. Note when this alteration was done, all of the excess fabric was trimmed out, leaving just the wedge-shaped pieces.
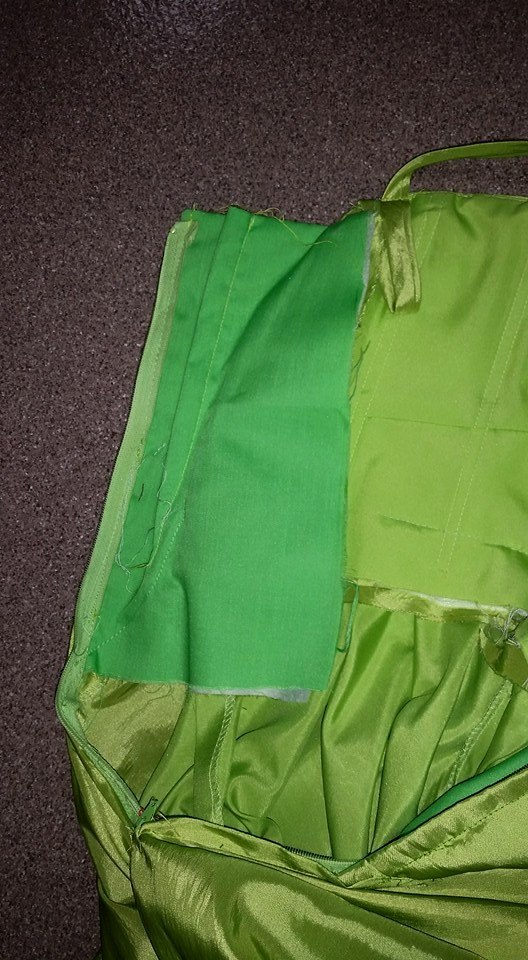
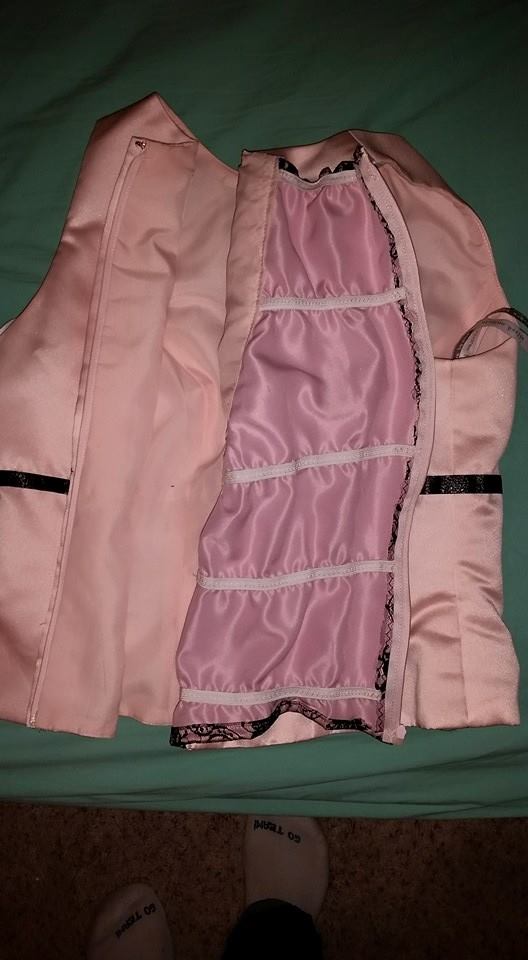
The volunteer who did several of these dresses for the show, came up with a slightly different way to do it. She cut out rectangles of fabric, finished the top edges, and then sewed the zipper between the two pieces.
At that point, the zipper could then be pinned in to the dress. If you leave the excess fabric, this makes it really easy to alter the size of the dress again in the future. Just take the stitching out, and resew it in for the desired size.
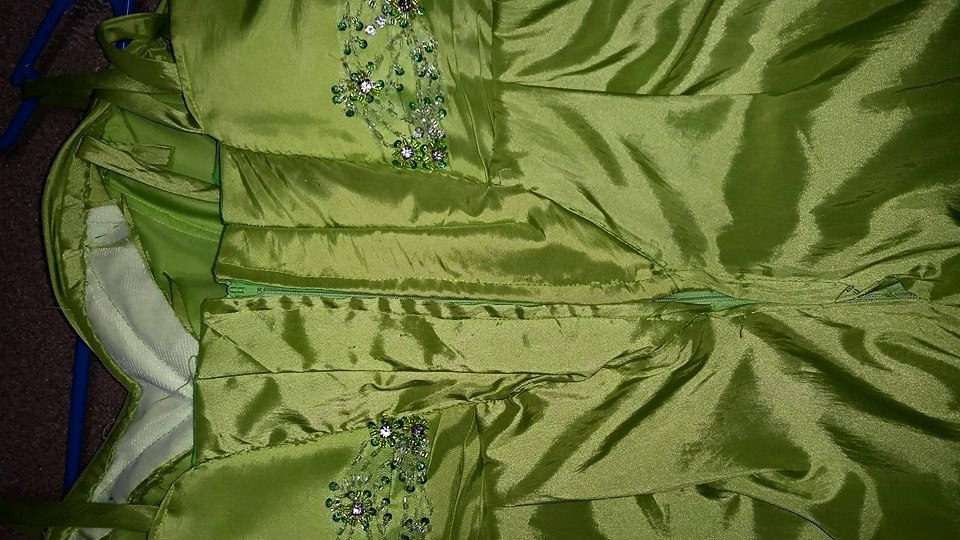
 This dress was actually size for a cast member who subsequently dropped out before the show. You can see that a tuck was taken in the rectangle to make it a little smaller for the new cast member. This dress was handsewn to the wedge because of the beading . . . which made taking the extra tucks/darts an easier option that altering at the inset seam.
 You may need to fudge around a bit with how the new fabric inset and the original dress meet at the zipper at the bottom of the inset. Every dress will be a little different. As I mentioned earlier, for some projects it might be easier to remove and then replace the entire zipper, and others, you just match it up and sew it together. In all likelihood it won’t be “perfect”. My best advice . . .take it out from under your sewing machine, put it across the room or down the hall, 15-20 feet away is good, and THEN look at it. Perspective changes from across the room!
Addendum: This is a comment added by a volunteer who did a number of these dresses: “As a volunteer who used this method–the transition where the zipper goes from the added piece to the dress is tricky, takes some pinning. However, on stage that rough spot just doesn’t show. If there is time, finish one side by sewing the extra piece to the dress, then re-fit the costume and sew the second side”.
This dress was originally a modern day Prom dress. It was strapless, with a deep sweetheart neckline, a wrapped, slightly dropped waist, and a very full skirt. This dress was upcycled by cutting the skirt off and sewing it to the top (using pleats). A “filler” piece was also made and sewn into the bodice for modesty. Finally, straps were added. The petticoat was removed and sewn to an elastic waistband to make a versatile removable petticoat.


The final example of this sort of modification is on a purple velvet dress.
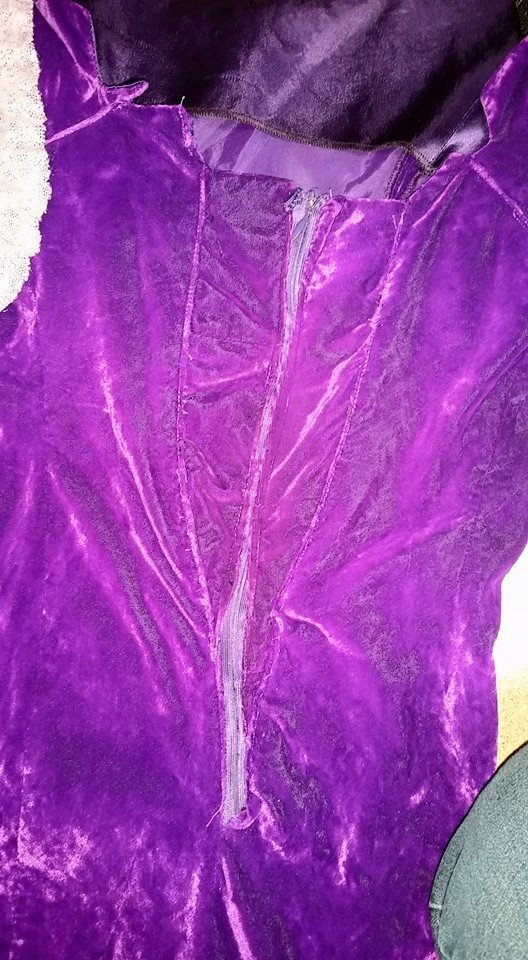
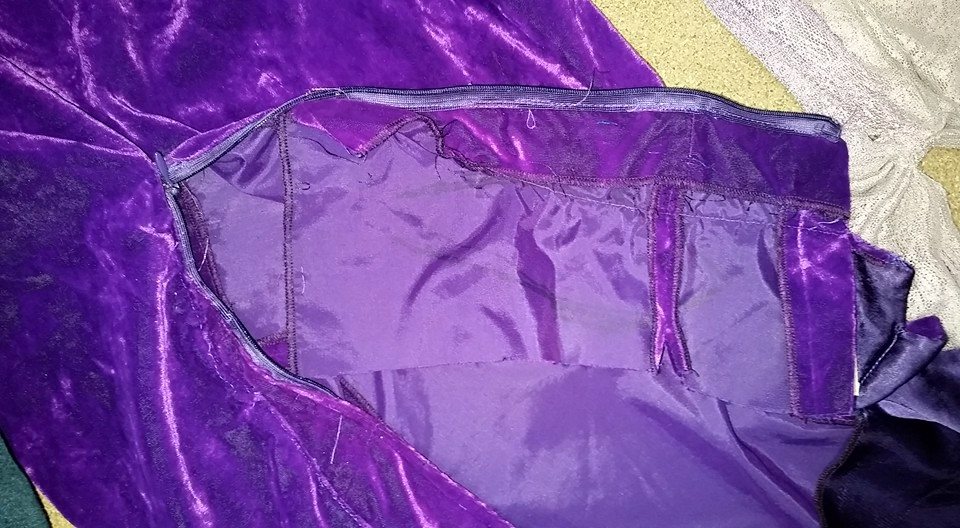 The seam that is running perpendicular from the zipper in the second picture is the original side seam of the dress. This dress was shortened, and the fabric from the bottom of the dress was used to make the inset area. Again, you can see the rectangular shape of the inset, with the extra fabric remaining in the dress for a potential future alteration. If the fabric from the bottom of the dress had not been available, I probably would have either used a purple poly-cotton woven fabric or possibly fabric to match the bow. Either way, by embellishing the back with the bow, the alteration doesn’t show.
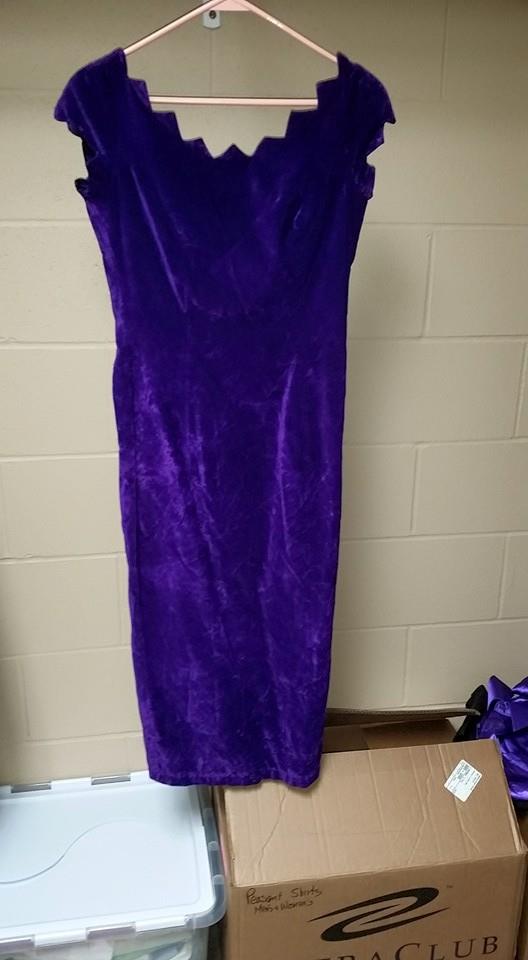
This dress was really fun because of the detailing at the neckline:

The finished dress front & back. A bow was added to the back to give it a 1950’s flair. The bow is sewn on one side, and attaches with hook & loop tape on the other. (The dress is looking a little limp, as it just came back from being washed. We wash all of our costumes on cold, delicate and hang dry. A little time with a steamer, and it would look less limp. Spray starch and an iron is also another good way to spiff costumes up when you’ve pulled them off the rack, if the fabric type allows)

This last one is a variation on a theme. This was originally a top & skirt ensemble. The top had a separating zipper in it. To make it larger, the zipper was removed on one side, and an inset of fabric added, and then the one side of the zipper was replace. The volunteer who did this added the elastic to help with fit. Just another potential way of doing an alteration.

Cost of these dresses: Hunter Green $15 (no alterations done by us); lime green $0 (donated), purple dress: $6 for dress, and lace for the bow about 50 cents (paid $10 for a 10 yard bolt at a Thrift store), pink top/skirt $3, black lace skirt $1.50.
Addendum:
Here is a picture of an adaptation sent to me by a reader. She removed a peplum, so had the waist seam open anyway. She added the extra width in the back to either side of the zipper. She then replaced the skirt, with ad additional overskirt added.


As a volunteer who used this method–the transition where the zipper goes from the added piece to the dress is tricky, takes some pinning. However, on stage that rough spot just doesn’t show. If there is time, finish one side by sewing the extra piece to the dress, then re-fit the costume and sew the second side.
LikeLiked by 1 person
Thanks . . .I will edit a little bit to the post.
LikeLike
Thanks, this is really great info to have. I especially like the idea of leaving extra fabric in the inset for future flexibility. I’ll be costuming the prom scene in Footloose soon and I bet this tip will come in handy!
LikeLiked by 1 person
Tonight I attempted an alteration based on this information and I’m really pleased with the results! I needed to add 7″ to the bodice of a prom dress and I was able to do it without taking out the zipper. If I knew how to load a picture here I would do that!
LikeLiked by 1 person
Pingback: Babette: Dress + Feathers = Costume | costumecrazed