It feels like it has been WAY too long since my last post . . . largely because that means that no costume sewing has been happening in my life, which means no “me” time :(. I am finally starting to see the light at the end of the tunnel for my current time-sink (fundraising committee for new band uniforms), which is good timing since our spring high school musical choice should be announced soon!
In the meantime, my sister is anticipating a winter production of “Annie” and so that seemed to be a good reason to do a little creative messing around.
Her youth production company plans a winter show where pretty much anyone who auditions can participate, which means, potentially LOTS of orphans. LOTS of something means trying to figure out something cheap and quick.
I did a brief online look at images of orphan costumes. They seem to be characterized by dull colors and a layered pinafore look, sometimes with a cardigan on top. Some are more “costume-y” than others. This genre of costume is actually quite well adapted for thrift store finds & upcycling. Why use new fabric and then have to try to figure out how to artificially create a worn, aged look . . when you can start with old, worn stuff in the first place?
This project has an additional challenge for me because I don’t have any young children at my house. On top of that, most of my good friends are also very close to “empty nesting” and so I lack convenient “victims” for checking out fit.
I started by going to a local thrift store and browsed around looking for inspiration. Dull, limp, vintage-looking fabric is all over the place: dresses, blouses, shirts, linens, pajamas, skirts and more! Since the base material isn’t a problem, I thought I would focus on speed, which meant looking for construction & design details that needed minimal tweaking.
PINAFORE:
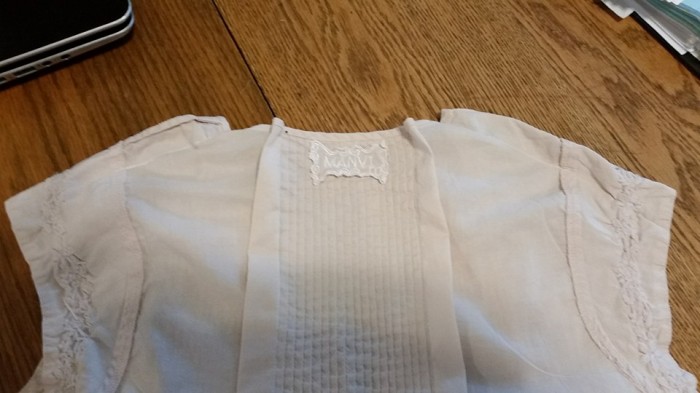
For this costume I started with a ladies size large cotton top. I really liked the pin-tuck detailing on the front & back and the little cap sleeves. It is shown below on a Junior size 4 dress form.


The length of this top was the major determinant in what size the finished costume would be. Since I don’t have any small children in my house, I sort of have to guess. My kids were also pretty much bean poles which definitely affects my perception of fit, as they generally stayed the same size for a long time, just getting taller (you’d be amazed how long you can wear 4T shorts!). I decided as long as the finished outfit was a little too small for my dress form, that would be a good place to start.
The first thing I did was make the shirt smaller across the shoulders. I wanted to preserve the pintucks so I made two pleats along the tucked area in the back.
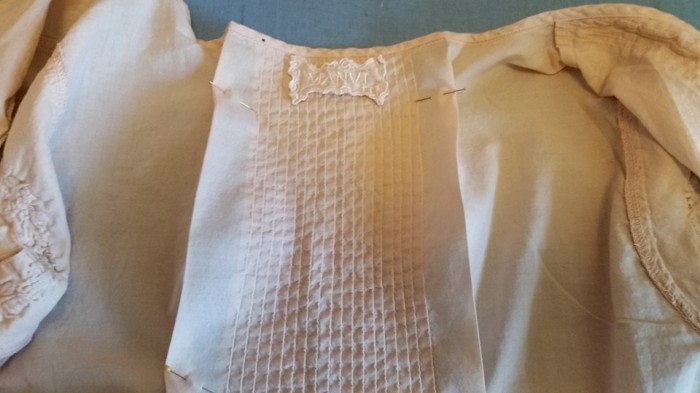
These were reflected by darts in the front. On a different shirt it would probably be easier to just make one continuous pleat from the front, over the shoulder, to the back.
Clearly, this top is too big through the shoulder and armscye area, and that needed to be made smaller. At this point, I went and dug through my patterns and found a basic pattern with a fitted top. I used this as a size reference for the neck opening, the sleeve opening and also the back and front chest size. You could also use something like a t-shirt in an appropriate size if you had one. Laying the pattern piece out on the orignial garment helped me to visualize where I was and where I needed to go, and affected the amount of fabric I was attempting to take out.


I had discovered while altering a courderoy jacket for Emmett in “Legally Blonde” that an easy trick for making the armscye smaller is to raise the garment at the shoulders. This pulls the garment up higher at the underarm and makes the sleeve narrower (my first attempt for Emmett included sewing all AROUND the armscye, which, actually makes the space BIGGER, lol. I learned.)
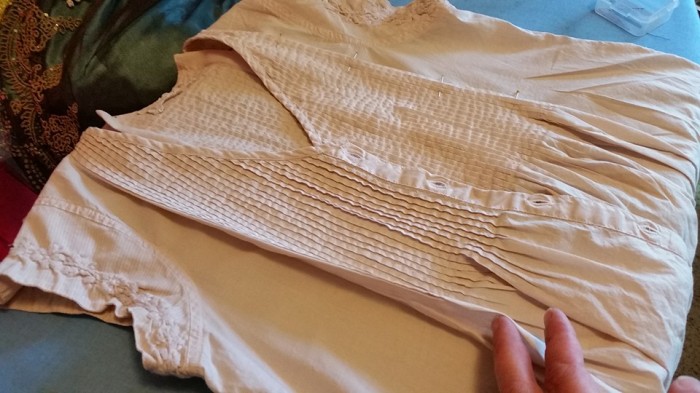
The next step was to take fabric out at the shoulder seam. The first try I went right down to the bottom of the sleeve cap, but that didn’t look good in size and shape. I picked those stitches out and ended at the sleeve seam. This makes a little inverted pleate, but it preserved the embroidery on the sleeve cap and gives it a little puff.
That was it. I am showing it here on top of a size 7 white satin floor length dress, which is the only thing I happened to have in my “stash” of an appropriate size.


THE DRESS:
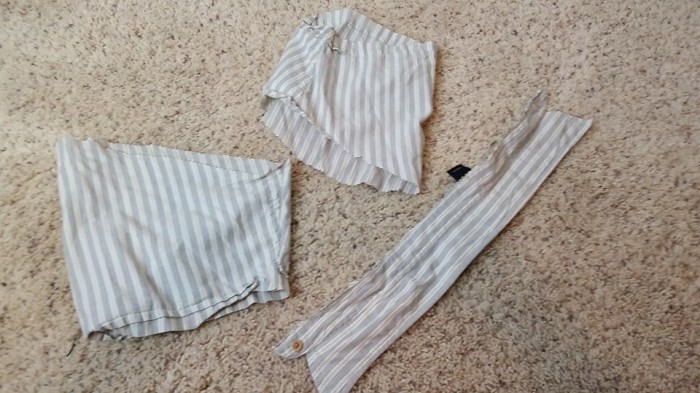
For the dress I started with a slightly textured cotton shirt in a man’s size L, with short sleeves and a small pointed collar.


The next step isn’t shown . . . basically I sat on the floor with the shirt and the pattern piece trying to figure out how I was going to get from point A to point B. I knew I needed to preserve as much length as possible, and I also wanted this to be quick. Eventually I just took my trusty scissors and started cutting.
I removed the collar and the sleeves using a pinking shears to minimize the need to finish seams later.
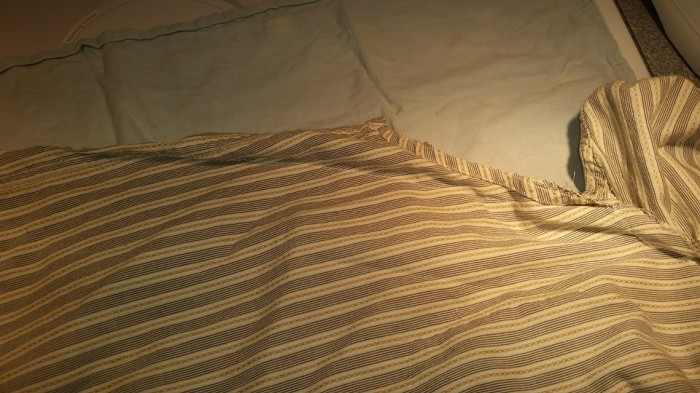
I lay the pattern on the shirt and cut out a new armscye. I did one, and then flipped it and did a mirror image for the second.


I sewed the bottom of the original armscye shut, angling it out to the original side seam to preserve as much width at the bottom as possible. This does make the dress pull a little funny, but, it isn’t visible under the pinafore (this is an “after” addendum pic, as the sleeve is already in).
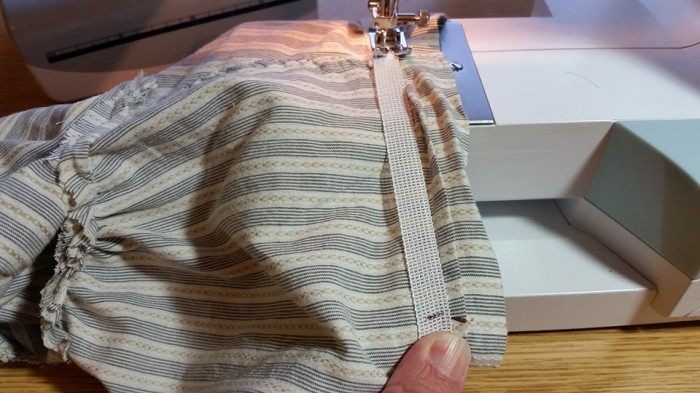
The puff sleeve was amazingly easy: I took the orignal sleeve, ran a gathering thread along the raw edge (leaving about 3″ ungathered directly at the bottom), and sewed the sleeve into the new armscye. I finished the bottom of the sleeve with a piece of elastic. The elastic was sewn into a circle, and then marked in quarters. Corresponding quarter marks were made on the sleeve. The elastic was sewn secure, and then stretched between the marks and stitched with a large zig-zag stitch. Super easy puffed sleeves!
The back was too wide, and I made this smaller with a pleat. A little stay-stitching hold it in place. You could also use some gathering. I didn’t sew the pleats down as it will mostly be covered up.
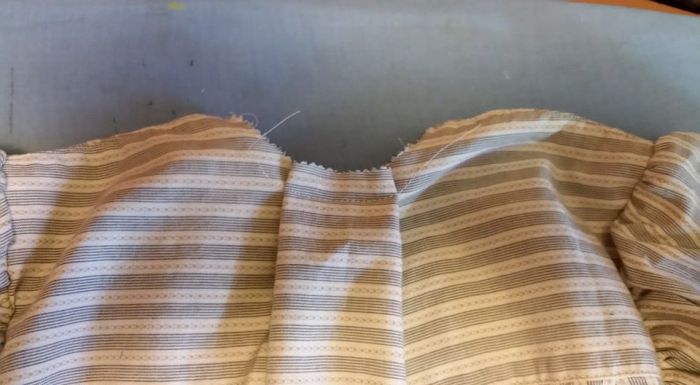
To make the front smaller, I ran some gathering stitches from an inch or so down from the shoulders to a couple inches from the center front, and then pulled up the gathers to shape the front neckline.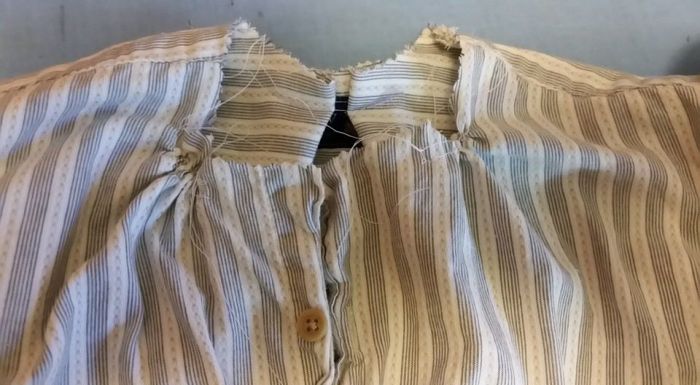
I then sewed the collar back on. I folded under the center front edges, and tapered it out to the collar band seam. This way, it preserved the button closure on the band, so I didn’t have to re-do that. I sewed from either side, and left the excess fabric at the center back unsewn (for the time being).
This next part needs a little tweaking . . but the concept isn’t bad.
There was excess fabric in the center back. I originally just sliced it straight up the center, and then zig-zagged the edges. I had this idea I would just sew it together on the back side. You could maybe do that, if you didn’t sew the collar to the shirt as far to the center as I had.

In the end, I made tapered cuts in the center back, and overlapped the two collar pieces. This actually allows the collar to “stretch” in the back to accommodate the neck curve, and, it will be most likely hidden by hair. Another advantage to this is that if the dress were too small it would be easy to open up that back pleat & collar and give a little more space across the shoulders.


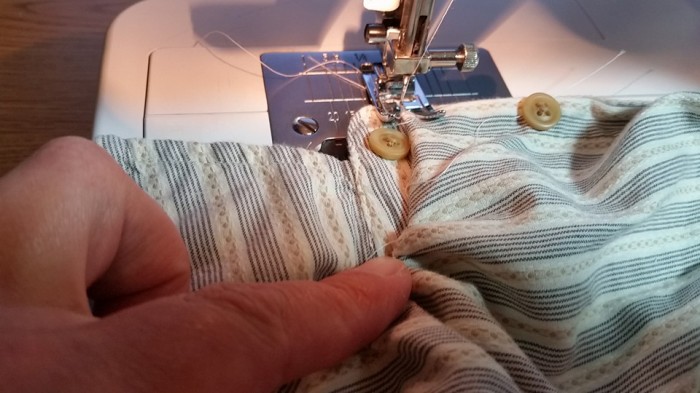
The majoritity of the dress is just zig-zagged at the level of the seam between the collar band and the collar. This mess of raw edge and gathers is hidden when the collar is flipped down. You can see on the far left, the seam allowance is folded under to expose the button hole on the collar band. Then, as the stitching progresses back a few inches, the seam allowance eventually opens up so the top edge is right along the seam between the band and the collar. It certainly would not have to be done this way, but it was quick.
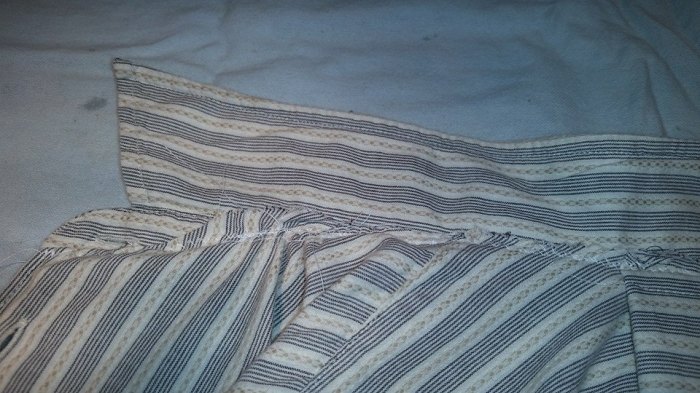
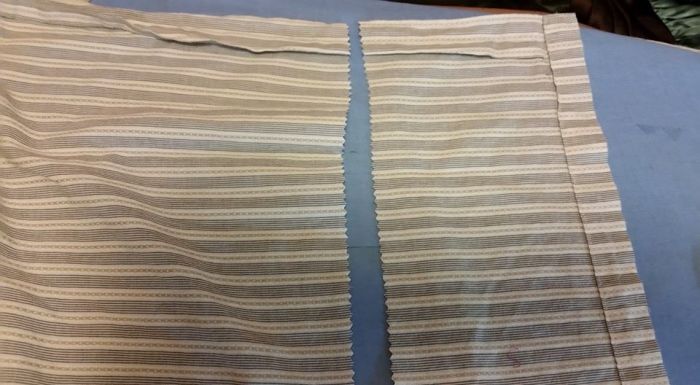
The dress needed to be a little bit longer, so I cut a 6″ piece off the bottom and spliced in stripe of contrasting fabric.
I sewed the center front seam up to the bottom button hole just to give the bottom a bit more of a completed look.
The finished dress:


As you can see, because of how I tapered the side seam, the bottom hem is a little unever, and the dress pulls a bit. However, add the pinafore, and it is all hidden:


I really need to get my black backdrop back up!
I think a rounded collar might be a bit more period looking. This could easily be done with some lace or eyelet, and what a perfect opportunity to use one of those ratty looking vintage pieces a person has sitting around. You could also shape the collar using a tight zig-zag applique stitch and trimming the excess fabric.
Time: This outfit took a little over 2 hours to make.
Cost: shirt: $1.59, striped shirt: $3.79.


Missed your posts. You did a great job. It isn’t as easy as you would think to get those orphans right. The ruffle is a good idea. It makes the dresses swing and sway with all the dancing they do. I had ruffles – not for that purpose – but on stage they really worked. Drab shabby ruffles and not too full but they looked good.
Annie is a sneaky play to costume. I picked it the year I needed a not too crazy costume show and it turned out to be way more work than I had thought. Lots of changes – even the orphans – because they eventually need party dresses. The maids (I had 25) needed outfits. The winter scenes – the singing group needed outfits – Annie needed quite a few after she was adopted. Grace – lots of changes. Rooster and whats her name and Ms. Hannigan needed more than one or two a piece. But, we could have scaped those tickets – total sell out with people in the aisles and people begging for a ticket or two.
Have you any idea what show you are doing this year. I am doing Footloose which I have done before so that makes it easier. I know exactly what I need.
LikeLike
I know what the director is looking at . . but no decisions yet :). That is OK. I have been on the leadership committee to raise $ for new band uniforms . . we are trying to raise $60K in less than 6 months, plus got a new band director this year. We are getting there, but it has been pretty time consuming! All that behind-the-scenes stuff like emails, volunteer coordination, social media posts, etc. Plus, work has been crazy busy, so I pick up extra shifts when I can (I am a Neonatal Intensive Care Nurse in “real life”. Interesting comments on “Annie” . . I will be sure to tell my sister to read your insights. She will be excited to hear about your ticket success as well. A popular show is always good 🙂 They did “Cinderella” last spring and did quite well. “Footloose” is a good show 🙂
LikeLike
Pingback: Orphan Dress #2: Old Pj’s and a Dress Shirt (Concept Costume) | costumecrazed