I recently saw a youth summer production of “Little Mermaid” and I was inspired by some of the fun costumes that I saw. Of course, once I see some costumes and get inspired, then I have to try to make some myself!
The base garment I used for this upcycle was a vintage woman’s double-breasted jacket in a size 20T.


As always, the first thing I did was wash the garment on cold, gentle cycle and then hang to dry. Afterwards I had a few little problems, including a lining that shrunk a little and shoulder pads that wadded up.


I chose this jacket because I liked the way I could close the lapels and how the collar looked when it was flipped up.


I will point something out now–when you are working with this sort of jacket, the lapel line is not straight. This can be very deceptive visually when you are trying to upcycle. I suggest making note of how far apart the collar sits, and also the angle of the lapel, as well as the center front vertical line at this point. You may want to take this into consideration when you are mentally planning your front embellishments.
The decided that I wanted to make a waist-length jacket, and I decided to try hemming at the height of the pockets. In retrospect, I wish I had made it a 1/2″ shorter and just folded the pockets up and ignored them completely. But, I didn’t, so here it is:
I marked the jacket along the mid-pocket line using a heat-sensitive pen. These are great because when you iron the fabric, the markings disappear. Then I pinned it up temporarily, just folding out the excess fabric, and tried it on to visually verify that I like that length.


I decided it was good, so I folded the pocket flaps in and zig-zagged the slit shut.

Then I cut off the jacket and the lining separately. While I had the bottom of the jacket open, I went up inside to replace the shoulder pads. I had some old ones I had saved from a previous project.


When I made the hem, I caught the lining in the stitching line, and made sure it had a little “give” to keep it from pulling.
Hemmed and with new shoulder pads:


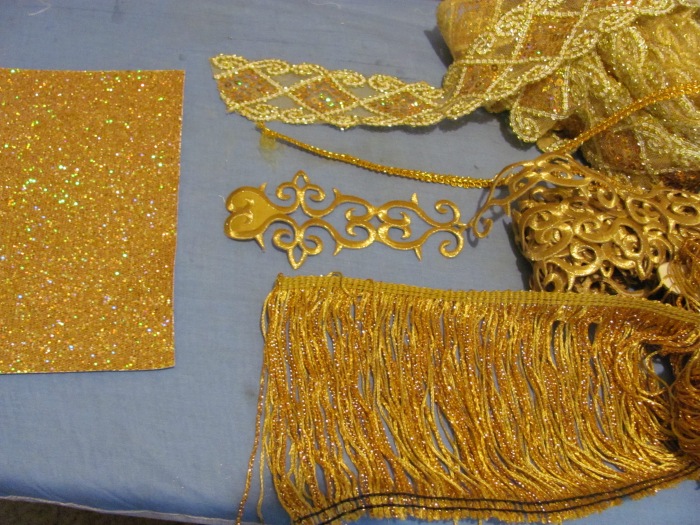
Next comes the fun part! Decorating! I had some iron on gold-embroidered trim I had purchased before “Cinderella” I never got to use. I paired that with gold fringe, gold glitter “leather”, and gold gimp braid.
The gold iron on braid went on the collar and the front of the jacket. I used a teflon ironing sheet between the iron and the trim for ironing.


I had to do a lot of measuring from the shoulders and side seams as the front lapel was really messing with my brain. I used a heat-sensitive pen . . . it works great because you can mark on the costume, and then iron away the marks (this awesome tip came from someone who reads my blog–thanks Nancy!). I added some velcro to the top for closure.

Next I made epaulettes. I drafted a paper pattern. I cut it out of glitter “leather” and cut a second mirror image out. I trimmed the end with fringe, and outlined it with gimp. Then I stitched it to the neckline. If it is inclined to flip-up when being used, it could be secured with some velcro, magnets, snaps, or some hand stitching.


I cut the buttons off the sleeves and added some rows of gold gimp braid. (You can see I also added some to the collar edge).

I made a sash out of gold satin. I cut a strip 8″ wide and stitched it on the long side right-sides-together. I turned it right-side-out and stitched the open ends together at an angle.


This was fine . . but it needed a bit more bling, so I added some gold and white metallic/sequin trim to the front of the sash.

Done! I think this jacket would work great for a Prince to wear to a Royal Ball. The same concept could used to make a Drum Major jacket, or a military jacket. The back hangs a little full, but my male dress form is a little small for it. This would be an easy fit once someone was going to actually wear it.


What I learned: I LOVE the iron on gold embroidery. I did learn to be a little more careful when cutting it in pieces. Some of my cut edges are fraying a bit. I added some drops of fray stopping solution to these, so hopefully that will keep it intact. It is hard to get the trim to adhere completely without a heat press. I will need to go over a few places with my small craft/quilting iron.
Instead of trying to make a centered design, I could have used the side darts as the “line” and made a vertical embellishment. I could have replaced the buttons with gold ones (or painted them, etc) and added a few mock ones up the front for a different look.
If you are interested in watching a video tutorial you can find one here. This jacket will also be for sale in my Etsy shop.
Thanks for reading . . . and as always . . . Happy Costuming!


Wow! Both to the costume, the video and the Etsy shop. I think it is going to be such a success! I love the way that jacket just went from plain to glorious with each bling addition. I am fascinated with the iron on stuff. So glad you like the heat and gone markers as much as I do. I knew you were going to.
Do I remember you telling us about a source called Tassells or something like that where you got trim. I am going to need some this year.
LikeLike
Tassel depot . . .clearance section 🙂 I was pretty impressed with the iron on stuff. I really wanted to use it in “Cinderella”, but it just didn’t work out. I was happy to have an excuse! I found another GREAT store for specialty fabrics . . . I will have to write a post about it. My sample order came . . . so now I need to do some REAL sewing, lol. Too many project ideas, and not enough hours in the day!
LikeLike
Pingback: Dressing Baron Bomburst: Bombie Samba Jacket | costumecrazed