If you do an image search for Truly Scrumptious costumes you will most likely see either the ruffled white dress or the puppet costume. You may also see a few partial pictures of some of her other outfit: a pink suit, a peasant-themed outfit in Vulgaria, and this blue ensemble:


Initially this outfit is covered by a white car coat which Truly removes when she arrives at the workshop. This ensemble has a long A-line skirt with a flowing train, and I suspect the original is a dress (although I haven’t watched the video in minute examination). The top is quite fitted with the shaped “jacket” and contrasting blue trim.
I happened to have this blue dress in my stash which inspired me to try to create a similar outfit.


This dress has a raised waistline and a simple satin bodice. The skirt is fairly full and is bordered by a wide satin ribbon. It is prettier in person. I have always loved the hemline, and I suppose I picked it up along the way thinking it would be a great start to a Cinderella costume. For this purpose, I wish that it was a deeper blue, but, it is what it is.

I supplemented my dress with a white blouse:


And a matching blue sweater:


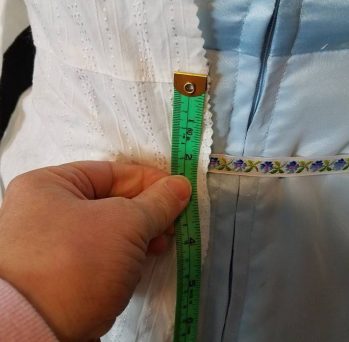
I was really excited when I found the blouse because I thought it looked like the band ended at the waist, and all I’d need to do would be a few minor tweaks. Unfortunately, upon closer inspection, the band actually sits 2″ above the waist.
But . . . I just came up with a workaround. My original thought was to make this into a one piece costume. I planned to slit the blouse up the center back, and stitch it along the dress zipper as far as I could, and then close the top with some snaps or hook & loop tape. I began by folding the blouse in half and slitting it up the center back, and then carefully cut the collar pieces from the band.

I then worked on changing the front. I cut off all the buttons (saving them for another use) and planned to sew the placket shut. However, I didn’t like the visible button holes and didn’t want to add lace or other decoration, so I took the band apart where the plackets were inserted into the horizontal band, reversed the two sides of the placket so the holes were on the bottom, and stitched everything back closed. I then added some eyelet to the neckline (which was getting a bit ahead of myself, as I should have waited until later).

The blouse DID fit . . barely . . . so I decided I would add some extra fabric in the back to give it more sizing flexibility. I also needed to lengthen the bodice about 2″ under the band. I considered just cutting the top off and hemming it, but I thought it looked unfinished, and the lower portions were flared, so I would have had to adjust the seams. Instead, I decided to use the sashes for supplemental fabric, and take advantage of the grainline to create a contrasting look–hoping to make the bottom band look like a deliberate design feature instead of a “fix”. Can you tell from a distance? Probably not, but it make me happy.

I made the bottom hem wide enough to thread elastic through to give it a little shape and snug the bottom of the blouse to the dress.


I used the other sash to made the panel for the back of the blouse. I used a bit of seam binding on the open edge to provide strength for any snaps or buttons that might be added.

And. . . now I had to splice some eyelet in at the top of this band. I decided to leave the sleeves short as it will be worn with a jacket.


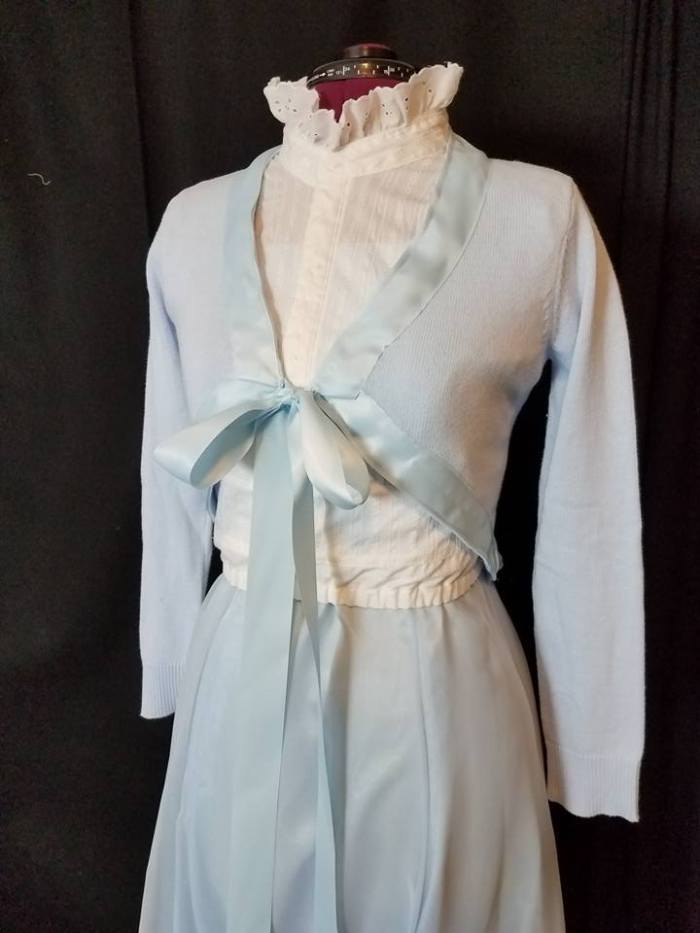
The second (larger) view of the top shows it with the back pulled tighter to create a more fitted look. I have not finished the back as I am sending this to my sister for possible use in her musical production. Once she does a fitting with her cast member, she can decide if she wants to stitch the blouse to the dress for a one piece outfit or if she wants to leave it as a separate garment.
The blue of the dress does show through the blouse a bit. I consdered making the dress into a skirt, but decided not to. That is something that could be easily done later, and this preserves the dress for another use. The blue skirt could also be attached to the blouse itself with little difficulty.
Next up: making the sweater into a jacket. I began by running a row of tiny stay stitching next to the ribbing to hopefully keep it from raveling or stretching when I cut the ribbing off.

I neglected to take pictures of the next steps . . . but basically, I just folded the sweater until I liked the shape. Then I pinned blue ribbon to the edge of the sweater, placing the pins fairly close together in any area that was stretched, like over the bust. As the ribbon was stitched in place, I made tucks and pleats to accommodate the curves and corners.


After stitching down the other side of the ribbon, I trimmed away the extra sweater.


I opted to close the sweater with a bow, instead of the button shown in the movie image. I also used a ribbon color that matched the dress because 1) that is what I had and 2) it matched the ribbon at the bottom of the hem. I do think the outfit would be more attractive with a darker ribbon. This outfit is rather blah, especially from a distance. I would be inclined to add some darker ribbon or lace to the jacket. But
This was a fun project and took about 90 minutes to complete, and using a sweater to make a historic looking jacket was a quick and easy project.
Cost: dress $6, blouse $4, sweater $0.50, plus the elastic, ribbon and eyelet.


Oh my gosh, your version looks even prettier than the one in the film!! Way to go! 😀
LikeLike
Thanks! I’m glad you like it. I’d love to try and make the hat . . unfortunately, I am making these for my sister who lives on the other side of the country (aka the highest postage rate away from me . .sadness) and those hats are better made by her costume crew than by myself.
LikeLike
I love this and made it last night but with a skirt since I couldn’t find a dress with a few adjustments. This was very helpful. I am directing a Peter Pan musical and we have an older Wendy but wanted to keep the light blue theme but have a very limited budget. So a little goodwill and amazon we are using this outfit. thank you for sharing.
LikeLike
I’m so glad this helped you out. I sooooo wish that wordpress allowed pictures in comments because I’d love to see what you created. I hope that you got your show performed before things were shut down.
LikeLike