Baroness Bomburst is a great character to costume. There are few preconceived standards (Belle she is not), and there are so many ways to play her that the possibilities are wide open. My instructions were red and black (with possibly some gray) and OVER-THE-TOP . . . think “Capitol City”. Since Vulgaria is an imaginary place, that also opens up lots of variables in terms of style and genre. I do want to disclose that I have not actually read a script (sadness), so if there are notes, or descriptions listed, I haven’t seen them. I am pulling my costume plot from video and what I have been told via the “grapevine”, so, this is just an abbreviated costume plot.
Costume Needs:
The Baroness needs three or four costumes. She first appears with the Baron as the two of the talk on the phone to their spies. Next she is seen with the Baron in a conversation with Grandpa Potts. The third time we see her in the “Choochie Face” song, (pajamas) and her last costume is for the “Bombie Samba”.
In many shows you will see her wearing the same outfit for the first and second appearances. She also may switch to a second fancy frock. However, DO check with your Director on this, because, note the following stage notes:
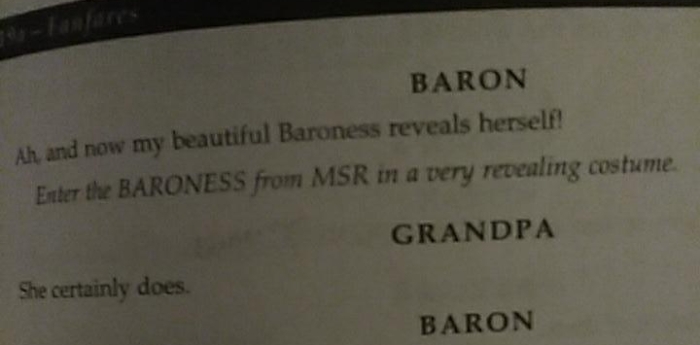
I did not know these lines existed, and if you are watching most productions online, this little joke is typically glossed over. If your Director is wants to emphasize the joke . . . you obviously need an appropriate costume. So, just something to keep in mind.
The Over-the-Top Dress:
I think that nothing really says “Royalty” better than a hoop skirt. They take up a lot of space physically, and are very fanciful and impressive, because most people have never worn one–but who hasn’t wished to? My favorite stage-size hoop is a 30″ diameter hoop. This is big enough to look good, but small enough that it isn’t hard to make a skirt wide enough to cover it, and they don’t take up too much space on stage. My sister has a collection of hoops in her costume stock, so that wasn’t an issue.
I began with this inspiration dress:


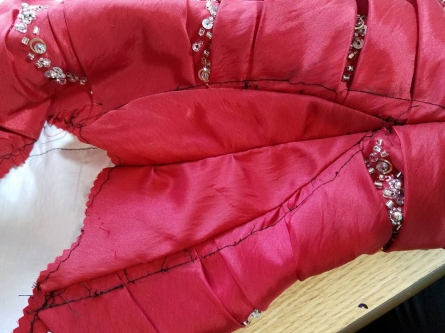
The strapless dress is made from a heavy taffeta. It has diagonal pleats with beading peeking out. The back has a corset. The mermaid style skirt has two rosettes of fabric. My plan was to remove the bottom skirt and try to turn it sideways to put the swirls on the hips. I use the top for embellishment.


I found this really fun two-piece sequin dress:


The dress had a race back dress and a back zipper. The detachable skirt had trim around the waist that matched the neck of the dress. The skirt was open in the front. I began by opening the back seam and removing the zipper.


Unfortunately, with the way that the dress was cut, I couldn’t visualize a good way to add sleeves and/or fill in the arm openings. I also didn’t have a good piece of black sequin fabric to supplement the back of the dress. So . . .on to plan B.
I found this black dress:


The dress had a deep square neck which I thought had a period feel. It also had wide shoulder straps. The side zipper was not a plus, but it could be worked around.
I began by deconstructing the black dress and cutting it off below the zipper.

Next the red dress came apart. I removed the mermaid skirt from the bottom, and my costume was already starting to take shape. (The lace sticking out the bottom is my embellished hoop that was used for Charlotte.)

I tried to use the black sequin dress and skirt . . . but I wasn’t feeling it.

While stalling (and pondering my next move), I made the underskirt. I used an inexpensive black fabric from a discount store. The fabric was divided lengthwise and attached to a top (with pleats) to make an apron style underskirt. Unfortunately, I was doing this late, and my lighting was bad, and I made the top out of a blue instead of a black. I opted to make the skirt in two tiers 1) because I had divided the fabric lengthwise to needed extra length and 2) to reduce bulk around the waist.


I added horsehair braid to the bottom of the petticoat to help it hang nicely. This is applied on the right side and then flipped over to the back and stitched in place to make a nice crisp hem. I use horsehair braid that is designed for making hats as it is much less expensive. It does not have the nice edge for shaping around curves, but, it works.

I decide to use the bodice for sleeves, so I tackled the top of the red dress next. I opened the back and removed the lining. It actually came out in one piece and could be used as a base for another project sometime in the future.


I decided large puffy sleeves could be over-the-top, and pulled out a leg-o-mutton pattern. I thought I could cut the sleeves in opposite directions so that the pleats and beading would give decorative details. The pattern was clearly too big:

So, I folded the pattern down and then traced it on some clear plastic to make a new pattern. I checked the wrist portion for size.


I lay out the pattern and traced around it with a heat-sensitive pen.


I basted around the line, watching for the beads, and moving them to the side as needed. After that I cut around the stitching line leaving a seam allowance. I went back and hand-secured the beads that were loose.


I carefully stitched the sleeves together, using the basting line as a stitching line to avoid hitting any beads. With the bulky fabric, the sleeves were too narrow (so much for checking fit!), so I spliced in an extra scrap of fabric.


The black dress had the open side zipper. I added a little bit of black satin at the top, and carefully inserted the sleeves. Later I reinforced the top of the zipper.


I added a bit of pre-gathered organza trim to the end of the sleeves.


I wasn’t real happy with these sleeves. I didn’t think that they had enough DRAMA, and I didn’t like the lace at the ends. And, it was a good thing I wasn’t happy with them, because, I put my arm in them to try to get a better feel for how they would look and move onstage . . and figured out that I couldn’t raise my arms.
So . . . I went back to the original size pattern and cut out a sleeve base from some scrap sheet fabric. I also cut out sleeve headers from some scrap petticoat net. The old sleeves were removed, opened up and deconstructed further. The sheet was used as a base, and I cut and spliced some black sequin fabric and the red bodice, to cover the form. The pieces were then all stitched to the foundation.


Don’t leave pins in!

Here are the sleeves inside and outside.


Here you can see some of the splicing. I am not taking the time to remove all of the basting threads because my sister has parent volunteers (LOVE volunteers) who will clean up all the random threads and basting). I would have used red had I realized the mess I was creating.
The sleeve seams were a bit scratchy from the sequins, so I covered them in bias tape. The wrist edge was folded under to finish the bottom of the sleeves. The petticoat net was gathered and basted to the top of the sleeves, and then they were pleated into the armscye.


Next the sleeves were re-inserted into the dress. This is done by inserting the sleeve right-side-to-wrong-side and tops-stitching along the arm opening of the original garment.

On to the decorations! I had a black lace insert in my stash. These are really inexpensive, and add a rich look. I trimmed some off the sides and layered it red sequin fabric. I pinned it to the bodice and then checked it on the dress form for proper placement and no pulling. It was then zig-zagged in place.


I put the bodice back on the dress form and tied a string around the waist. I marked this line with chalk, and then pinned the red skirt to the bodice, right sides together. I opened the side seam on the red skirt a bit, and this was positioned over the bodice side seam. It wrapped to the front and closes with a strong hook and eye.


Bodice and skirt together (front pictured below):


As mentioned, the red skirt overlaps at the zipper and hooks closed.


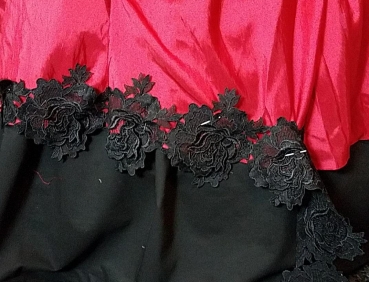
I added some wide lace to the bottom of the red skirt to soften that line. I ran short about 8″, so I spliced in some lace scraps. From a distance, you can’t tell at all.


I think the added lace really improves the skirt.

I originally wanted to put a heavier lace on, but I didn’t have enough and it was quite expensive (for me) so I didn’t want to order more (well, I did, but my sister–you know–the one with the budget–said “no”. Sigh.) This lace is fine, but it doesn’t have the same definition. Does it make a big difference? Probably not. I really tried to find a cheaper pieces that had the same scalloped effect along the top, but I was unsuccessful.
I now wish I had put some optional red stand-up ruffles around the neckline, to enhance the Elizabethan vibe, but to late now. It does need some sort of heavy statement necklace, I think. The dress will probably need a few tucks around the neckline/bodice to adjust the fit a bit.
Cost: red dress $10, black dress $6, black fabric $6, black “flashy” sequin fabric, wide black lace, horsehair braid, black lace inset, red sequin fabric, scrap fabric


Good morning! I am so glad your sister posted the link to your blog. I ended up reading every single post about Chitty. 😊 I am directing this production of Chitty Chitty Bang Bang and have been so impressed by your work. It was fascinating to read through your step-by-step process for each piece. I am also impressed by the final price tags on your upcycled costumes! It would seem your thrift stores are “thriftier” than ours. Thank you for all you have done to help make this a great show!
LikeLike
Thanks! Glad you are liking the costumes. It has been a fun experience, and definitely a different challenge, not only costuming long-distance and being the helper-bee instead of the planner, but also trying to create costumes that will blend with what they already had, and ones that other people (unseen to me) are making. I am fortunate to have access to a huge number of thrift stores. There are two in my town, 2 about 20″ away, 4 on one of my routes to work, and 2 on another. And then I also live within a 50ish mile drive from another 20ish, most of which are all largely clumped together in a metro area. Timing is everything . . the red dress for the Baroness was on 50% off . . and it is a style I wouldn’t typically buy for my “stash”, but, knowing I was helping with Chitty I picked it up when I saw it. Can’t wait to see pics of the whole ensemble together.
LikeLike
I too am very jealous of your thrift stores. We only have Goodwill and a few really tiny ones with mostly utilitarian stuff. Nothing is very cheap. Around here someone is always holding a Prom dress drive for kids who can’t afford Prom dresses. Our school had one and I felt bad like I was preventing some kid from her dream dress but I was able to pull a few for Footloose so I could alter them. I replaced the ones I took with good ones from our stock that were dark colors that wouldn’t look good on stage. I think this is why none of them show up in Goodwill.
Nacf.
LikeLike