Drop Waist 1950’s Look Upcycle Dress
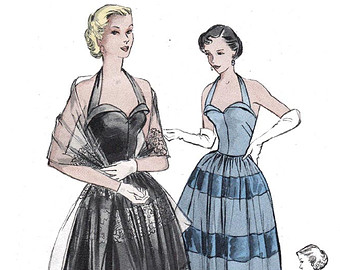
One of the most common styles of bridesmaid dress readily available at thrift stores is the strapless, wrapped-look bodice, with a floor length, flared skirt. There are variations on this theme . . how the wrap look is done, how flared the skirt is, the shape of the bodice top, corset vs. zipper . . . but the basic dress is the same.
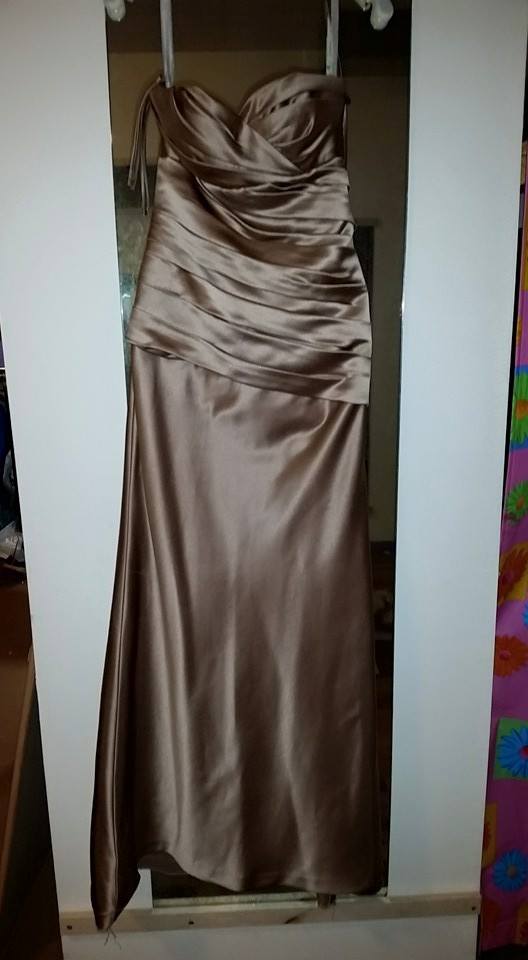
This is not the actual dress that will be featured in this post . . but it is VERY similar. The major differences are that this skirt is not quite as flared as the original dress, and this dress has a sweetheart neckline.
My original intention was to do the “basic” upcyle that we had been doing and raise the waist, and add an overskirt. However, as I did my measure and looking . . the dress just didn’t seem to want to do that. I call that “fabric whispering”. Somehow, that look just seemed “forced”. It pays to listen to your original garment . . . things often don’t turn out well when you try to force something.
At this point, when the original garment doesn’t seem to want to cooperate with the plan in your head, sometimes at that point be best course of action is to step back, hang the dress up, look at it, and rethink what you are seeing and the possibilities.
The more I looked at the dress, the more I thought it would suit a drop waist style better.
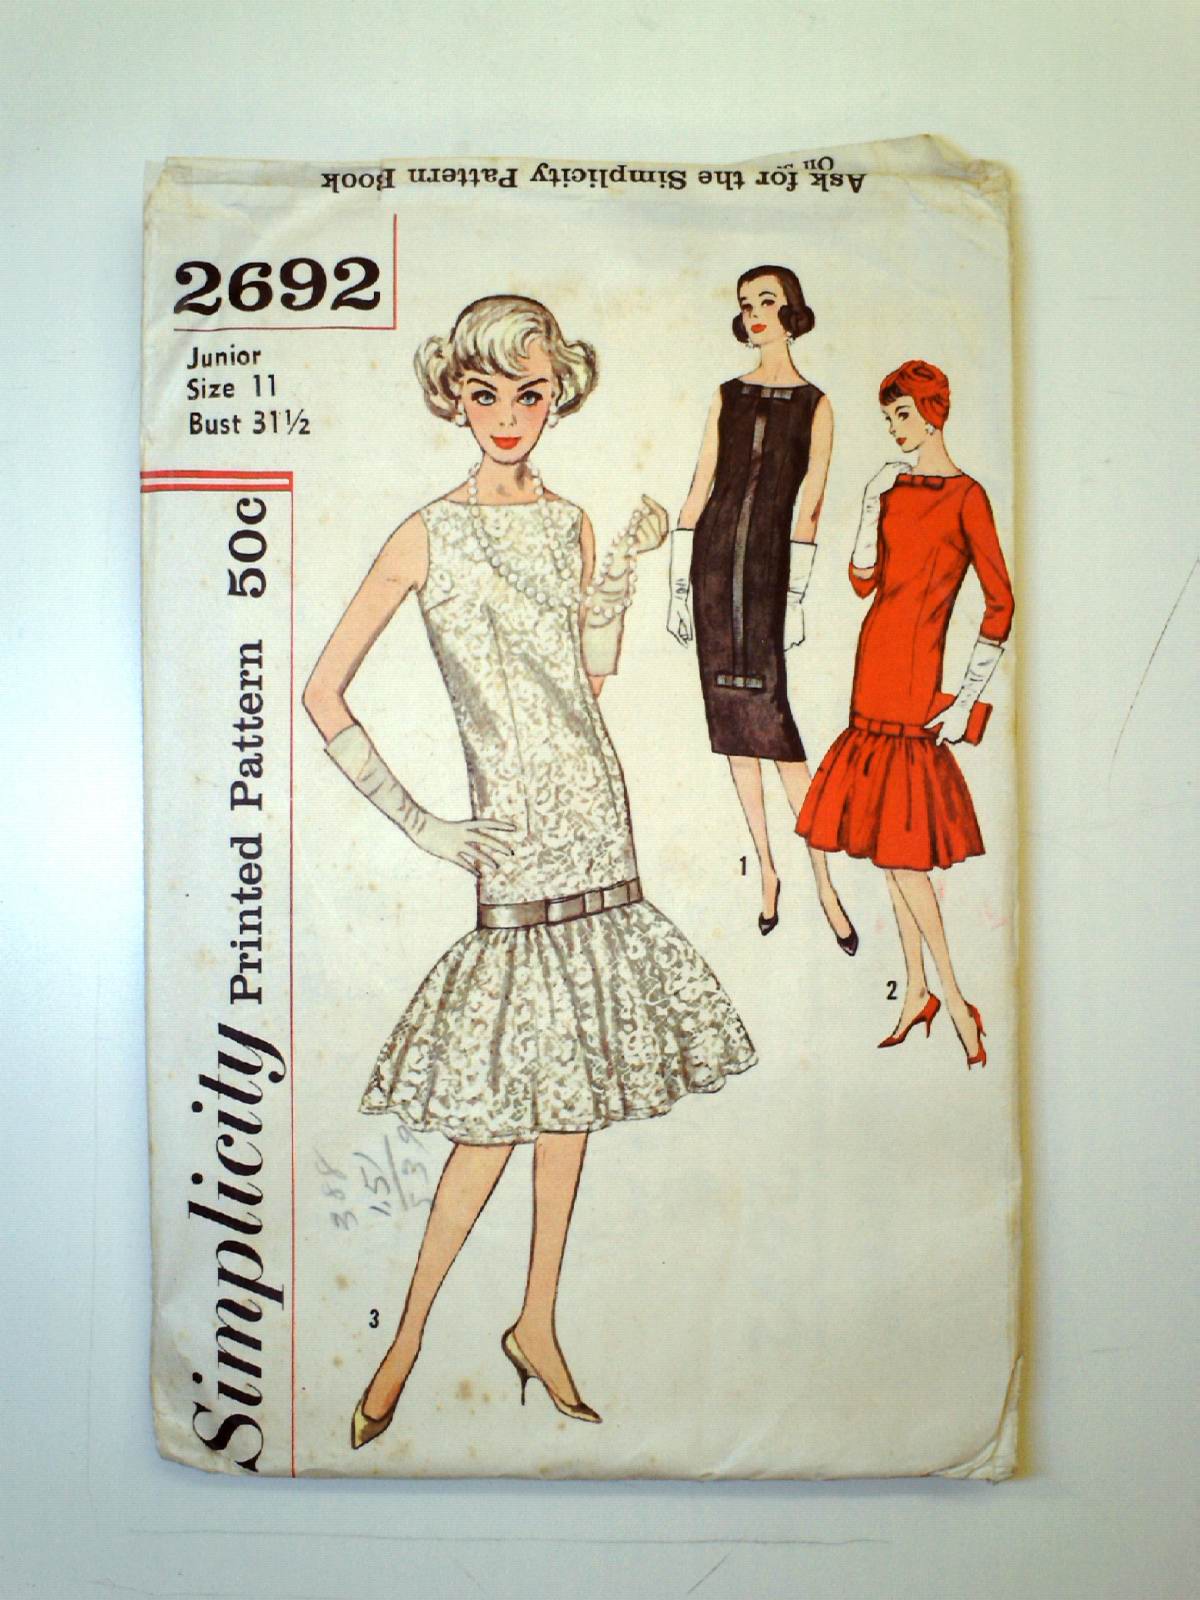
Inspirations:

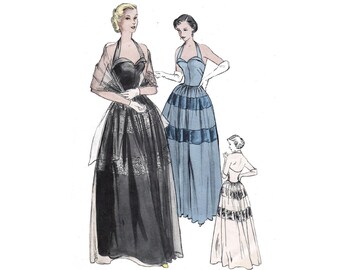
My next quandary was what to do about the skirt. The bottom had some fullness, but not enough to support either of the looks seen in these pattern images. I recalled reading about the possibility of using the dress/skirt lining to supplement the actual fashion fabric, so I decided to give that technique a try.
To make my life easier, I decided to make the length of the drop waist slightly longer than the length of the zipper.
I measured down from the top, and up from the bottom, straightened the fashion fabric and the lining so they were as flat and even as possible, marked a cutting line with a few pins, and cut the skirt off of the dress. Points to keep in mind–avoid cutting the zipper, and leave a seam allowance to sew on the skirt. I then zig-zapped along the rough edge of the bodice to help decrease fraying and random threads, as well as make it easier to sew the skirt on (since the lining was now attached to the fashion fabric).
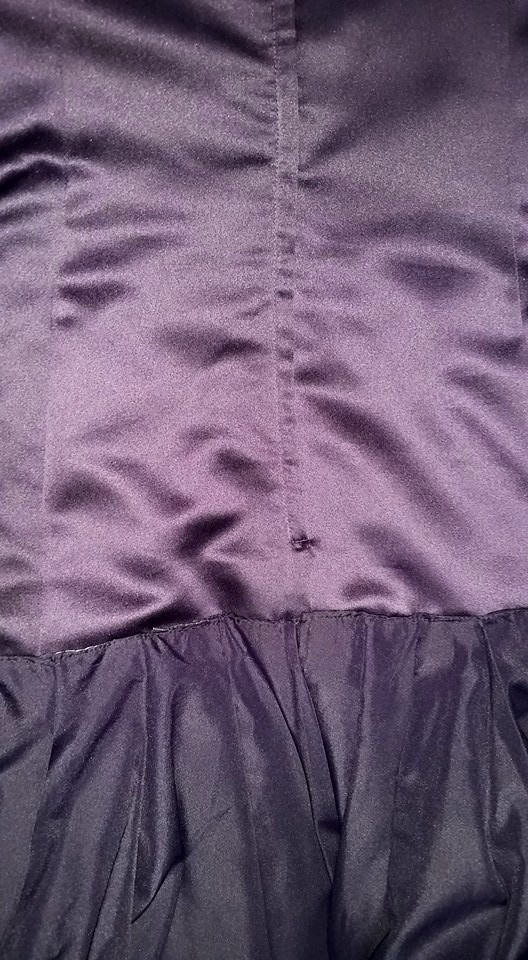
Then, using the measurements I had for the desired skirt length, I trimmed off the excess fabric from the top of the skirt and lining. I then cut the two pieces along one of the seams so that they were no longer circular, but were flat pieces of fabric, with one seam each going up the center.
I decided that I would put the fashion fabric in the front of the dress, and the lining in the back of the dress (brilliant, huh?). I sewed one seam between the fashion fabric and the lining.
I wanted the skirt to have some extra puffiness at the bottom, so I flatlined the long skirt piece with some black petticoat net (I think it was 24″ wide–I had found the roll at a Bridal/Prom consignment store). I sewing it along the top edge using a zig-zag stitch. This had the dual purpose of sewing the petticoat net on, AND, finishing the rough edge of the top of the skirt.
You can see the tulle lined skirt below. The tulle was longer than the actual skirt, so I folded it up and hemmed it so that it was shorter than the skirt fashion fabric. This gave the petticoat net some extra stiffness. There was a bit of a curve to the skirt fabric. I compensated for the difference between that and the straight edge of the petticoat net by taking a tuck here and there as need.
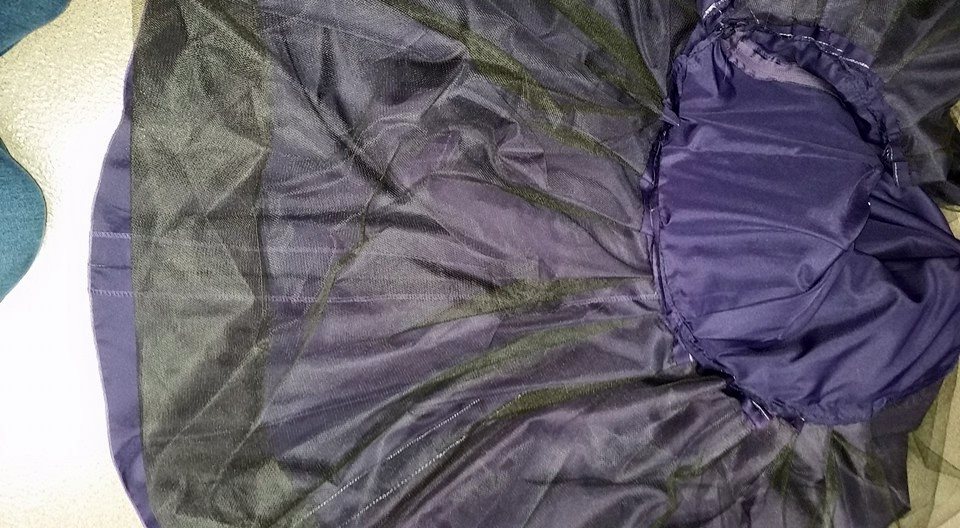
Next I sewed the open edges on the net and the outer skirt fabric together (it is now back in one big circle).
Attaching the skirt could be done in various ways. You could run gathering threads and sew the skirt to the top (right-sides-together). You could pleat the skirt on from the top, or, as I did, pleat it from the inside (right-sides-together). To do this, I lined up the center front, side seams, and center back and pinned these. Then I free-formed pleats in each of those quadrants. I like to have a box pleat at center front and go out in either direction.
Once it was pleated and sewed in, I flipped it over and top stitched down the top of the pleats. This helps the pleats lay flat, and adds to the strength of the garment. (There was some light pressing along the way).
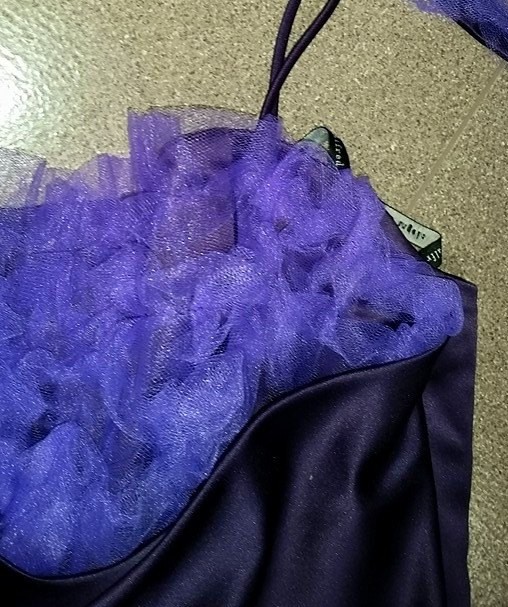
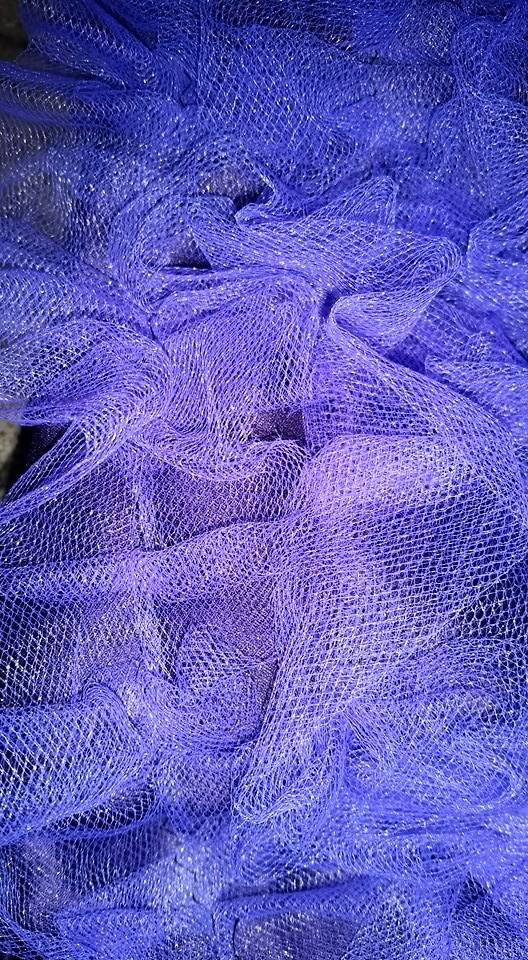
I thought the dress looked kind of plain at that point, so I added some tulle ruffles along the bodice. I picked a coordinating roll of 6″ tulle. I folded the tulle in 1/2 (double layer 3″ wide) and finger-ruffled it along, sewing down the center (making 1.5″ ruffles). I did several rows of those. I did have to “jump” my sewing machine over the boning as it wasn’t liking that.
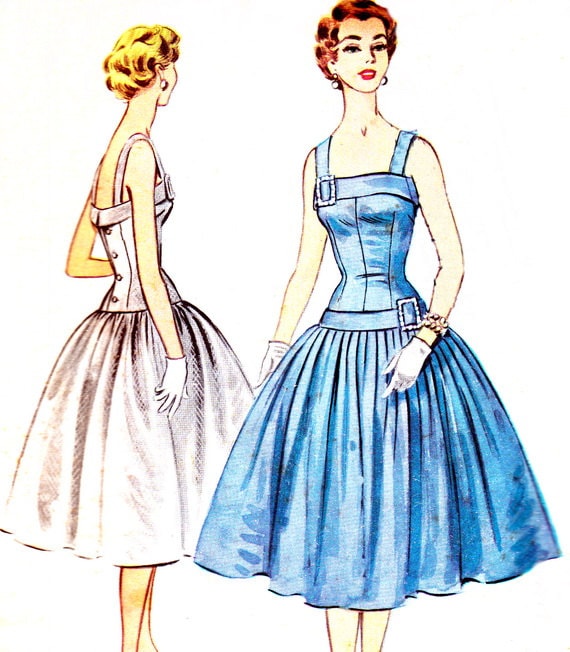
I wanted to add straps, and for a change of pace, I decided to go with the halter top look:
The strap was made out of fabric remaining from shortening the dress. For fun, I added a tulle ruffle along it as well. The dress had small spaghetti straps for actual support, and the halter strap just wrapped around the neck and closed with hook & loop tape on the opposite side of the bodice.

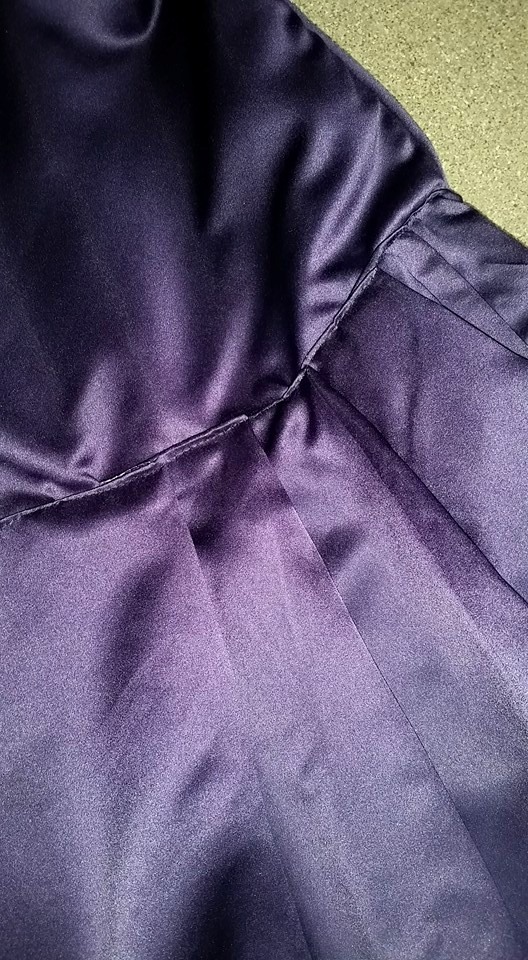
Overall, I was pleased with the technique of using the lining fabric to supplement the fashion fabric. In the pictures the difference is much more noticeable than in reality, mostly because the satin reflects the light differently than the lining fabric. However, on stage, with “mood lighting”, and in a group of cast members, the difference is unnoticeable. This was a very cost-effective method of upcycling, and a creative way to get matching fabric.
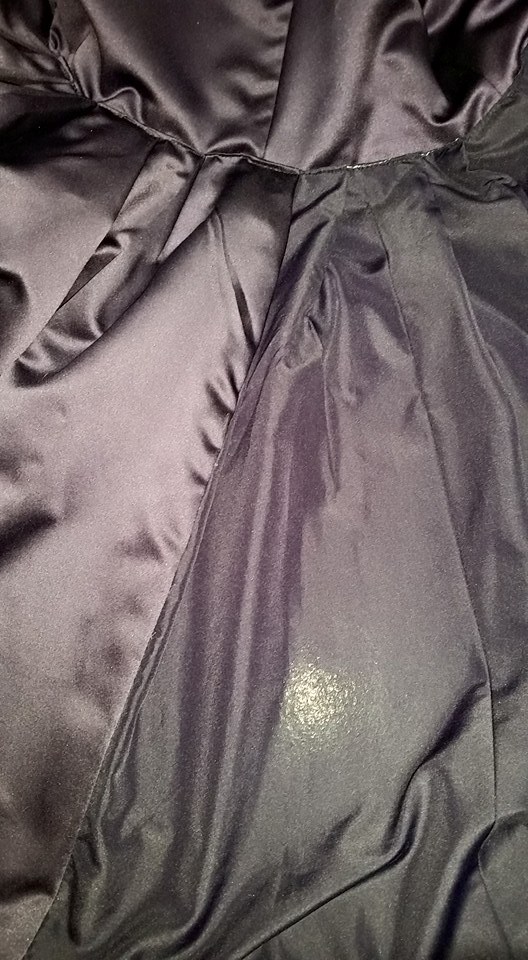
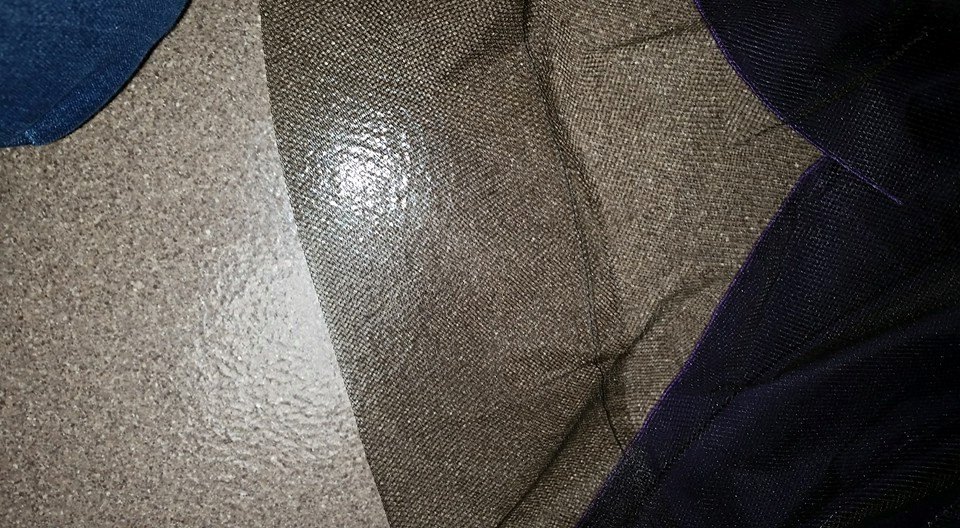
Satin fashion fabric and lining fabric
Cost: $6 dress, $1-2 for petticoat net, and $0.25-$0.50 for the tulle for the ruffles (leftover from another project).
Time: less than 2 hours.


I can see from the pattern envelope/sketch of original 50’s dresses, that a trim/sash at the top of the skirt would be another option.
LikeLiked by 1 person
Good observation! That would be easy enough to do with some tulle. The tulle itself can “wash” away as a single layer–especially lighter colors. It would be interesting to try laying out multiple layers (maybe even bonding them together with Heat & Bond?) on a lighter fabric (white? purple?) to make a “ribbon”, or finger gathering it along the top & bottom (long edge) to give it more dimension & color.
LikeLike