
Mrs. Potts is one of the more unique costumes in “Beauty & the Beast”. Her iconic teapot shape can be more than a bit challenging to create. Fortunately . . .there are a number of tutorials and blog posts sharing ideas . . .and here is one more to add to the “library”.
I did not make this costume–however, I did ask the creator to review this post prior to posting, so the process should be reasonably accurate. This costume was a collaboration between two of our very talented community volunteers. One created the base costume, and then turned it over to the second for embellishment and decoration.
For the dinner “theme” for the “Be Our Guest” scene I opted to go with a white & gold look. I purchased a roll of off-white bridal satin from Fashion Fabrics Club (https://www.fashionfabricsclub.com/c1313_fabric-by-the-bolt-wholesale-fabric-bridal-satin-by-the-bolt). This is really nice fabric. The price is reasonable (just over $4/yard and 60″ wide), it has a nice weight, and it washes well. Our 18 yard bolt had enough to make Mrs. Potts, the 5 Plate costumes, the 5 napkin dresses, and the tablecloth for the Chip cart. I also purchased a bolt of the “Gold Square Sequin” fabric to use for trim. This fabric was used for the Be Our Guest aprons, bow ties & cummberbunds, trim on the napkin dresses, trim on the plates, parts of the Chip costume, and trim on Mrs. Potts. This is not my favorite fabric. The gold squares come off VERY easily. We used fabric glue to re-glue them to the Mrs. Potts costume during the show. They have continued to shed. While I love the way the fabric looks onstage . . I would not use it again. While this post is not about the “Be Our Guest” scene, since Mrs. Potts and Chip are a part of the dining room set, I wanted them to coordinate with this scene, as well as with each other.

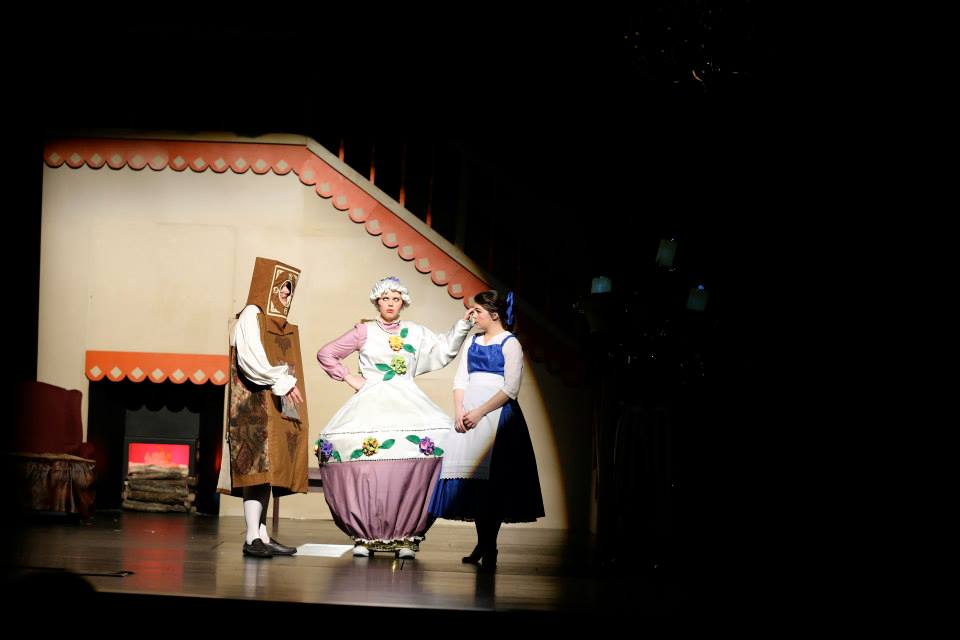
The Mrs. Potts costume consists of satin “jumper” and cap, with a plum colored blouse, and a hoop. For the “Human Again” finale, she exchanges the jumper and cap for a matching plum skirt, coordinating flower decorated apron & plain cap.
The Hoop
The hoop is the first item to be constructed. The reason being . it is easier to fit the dress to the hoop, than to try to create a hoop to match the dress. We opted to go with the hula hoop method of making a hoop. Yes, the hula hoops still rattle, but you don’t hear it under the dress 🙂
We used 3 hula hoops. One smaller (orange) at the top to give a rounded shape, and then a larger one below (yellow), with a second larger on suspended directly below the first (encased in the fabric).
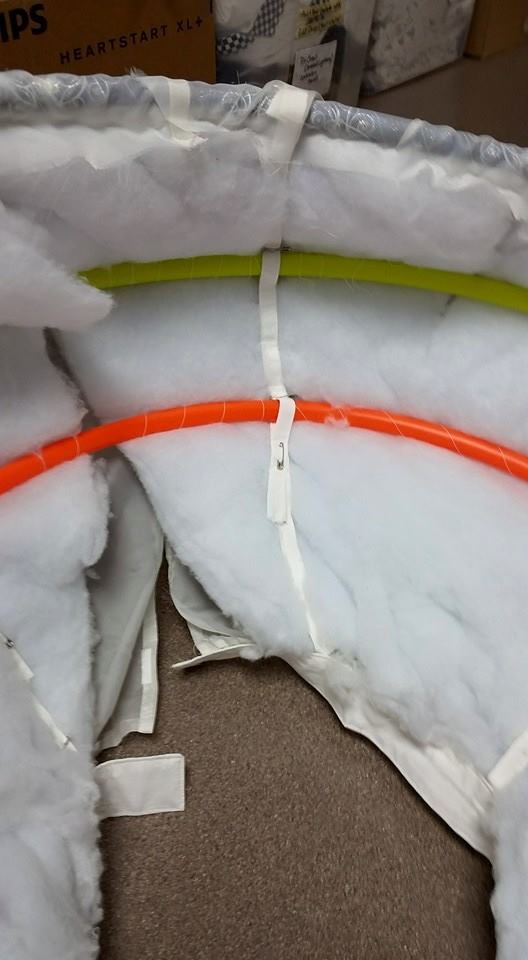
The supplies that were used were the 3 hula hoops (in two sizes), an old white sheet, quilt batting & a batting Christmas tree skirt, twill tape, pins, hook & loop tape, and a slippery shear curtain (thrift store).
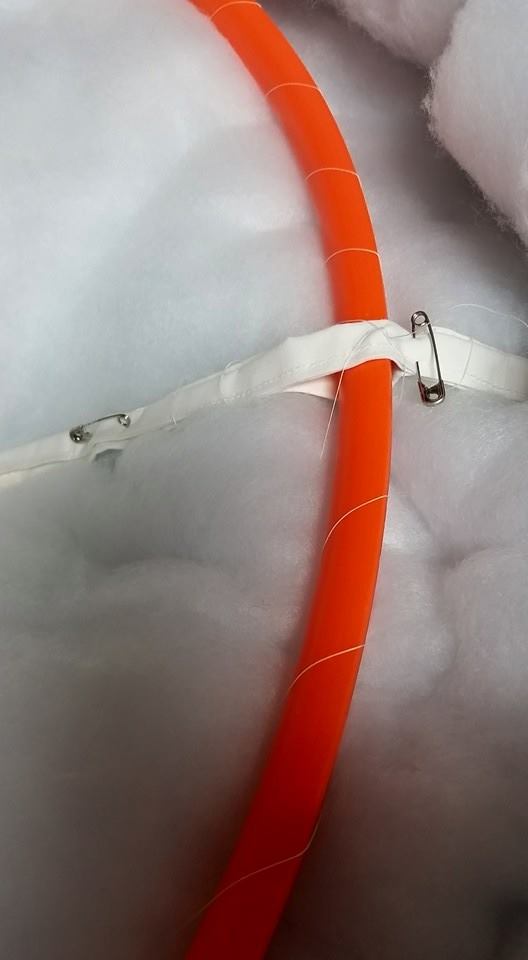
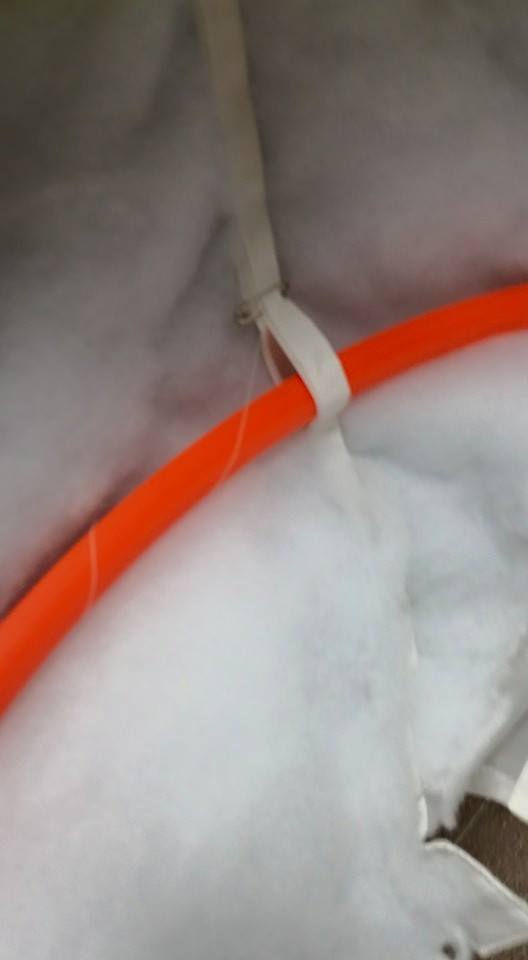
First, based on the measurements of the cast member, a waistband was made and long strips of twill tape were sewn in (6-8 strips). Velcro was added for closure. The hula hoops were hung from the waist band using loops and safety pins.
Once the basic form was made, the cast member tried on the hoop on to check for height and placement. Then, the batting was draped over the hoops and the hoop was basted to the batting to keep it in place. The batting was also basted to the waistband by hand. To keep the costume from “sticking” to the batting, a sheer curtain was used to make a “topper” for the hoop.
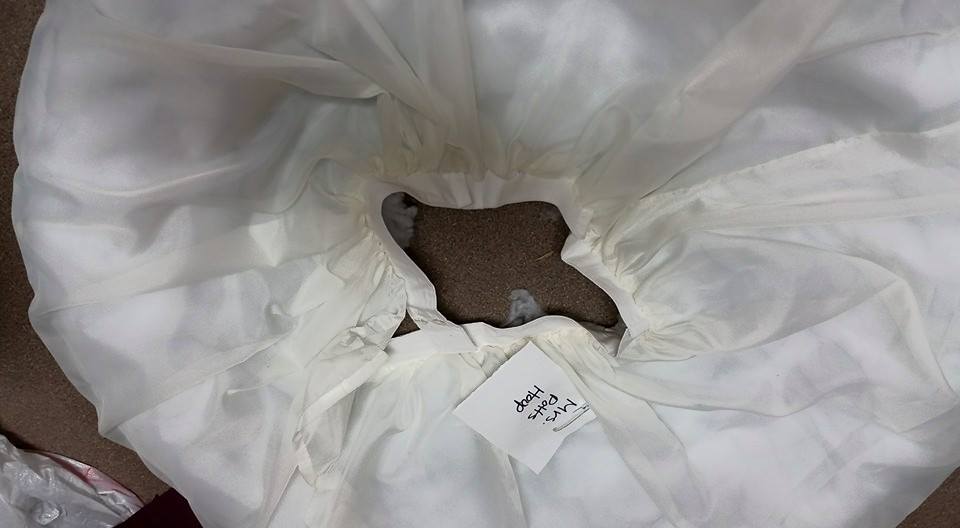
Mrs. Potts hoop, view of top and outer layer.
The bottom hoop was basted in place.
The Dress
The dress is made like a jumper. One arm shows the plum colored blouse, and the other arm is shaped from the waist and has a long sleeve to represent the spout.
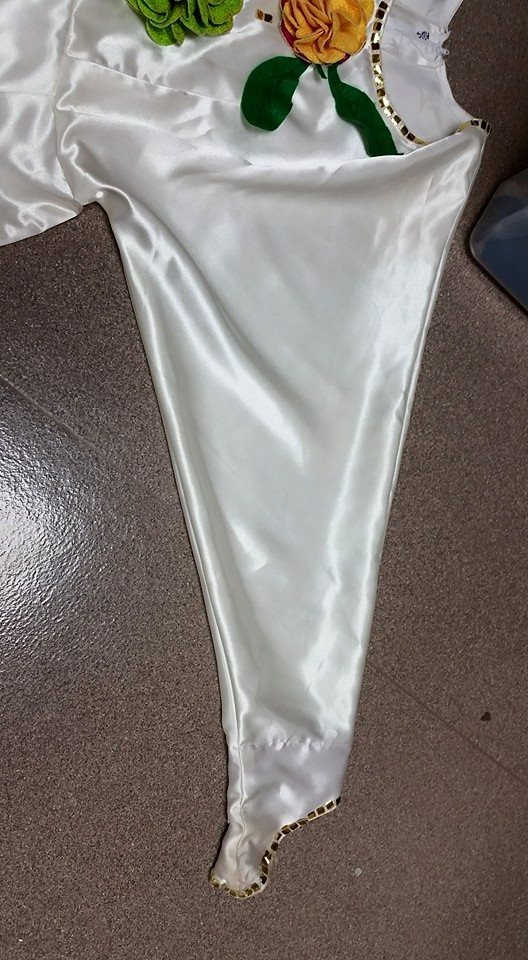
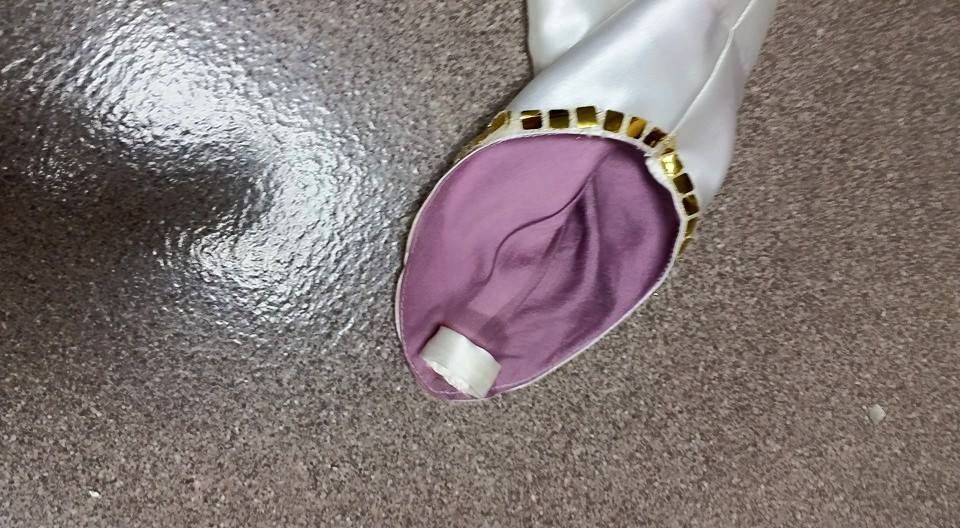
The end of the sleeve is lined with a bit of plum fabric, and has a loop for her finger to hold the sleeve in place.
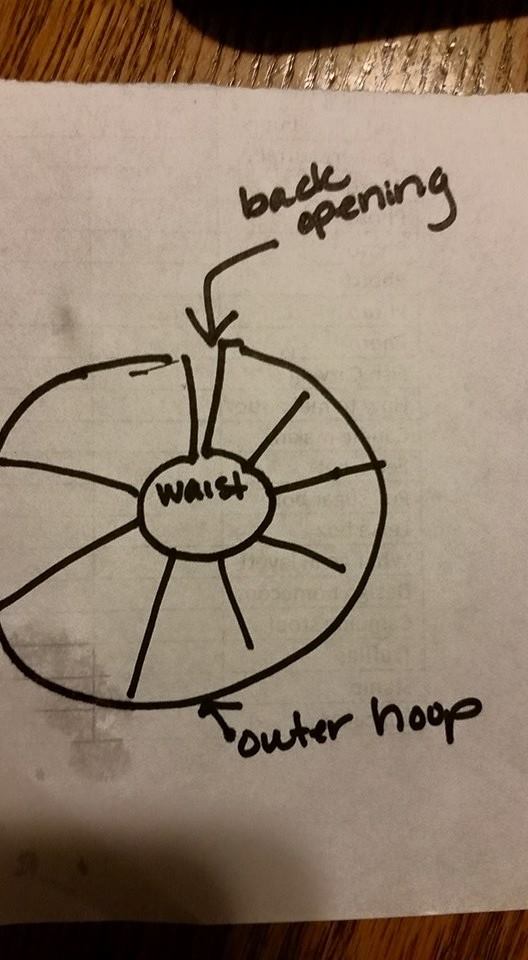
The skirt required a little bit of math and a few drafts to make a pattern for the wedge-shaped pieces that make the top. To do this, you need the desired waist measurement (circumference) and the circumference of the outside edge of the hoop, plus the distance between those two circles (adding a bit of extra distance to go over the curve of the smaller hoop and the poof of the padding. This is a really rough drawing of a top view of the top of the skirt (excuse the water drops on my paper!) Don’t forget you need an opening in the back to get the dress on and off. If you are at all uncertain about your drafted pattern piece . . make a sample top out of some junk fabric. It will be well worth the time and effort if it saves your fashion fabric.
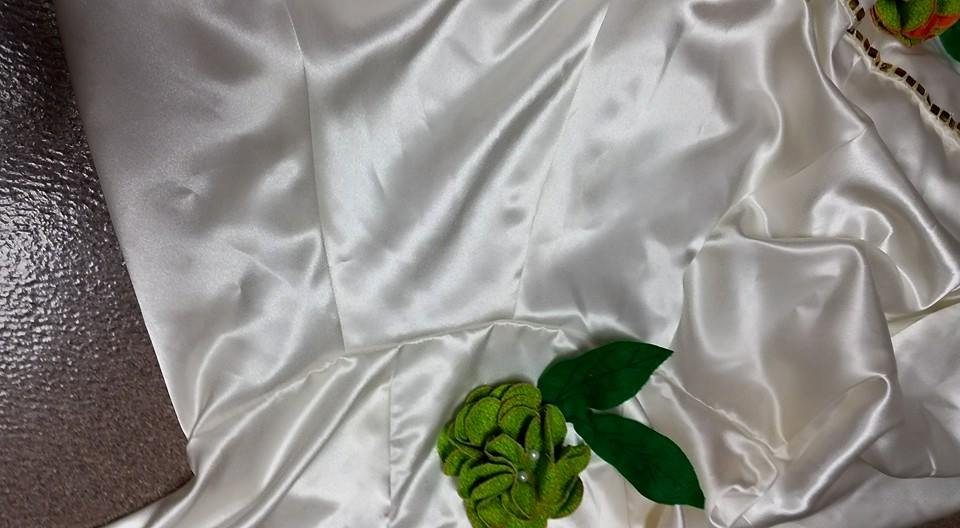
This is the waist seam, with the wedge-shaped skirt pieces attached.
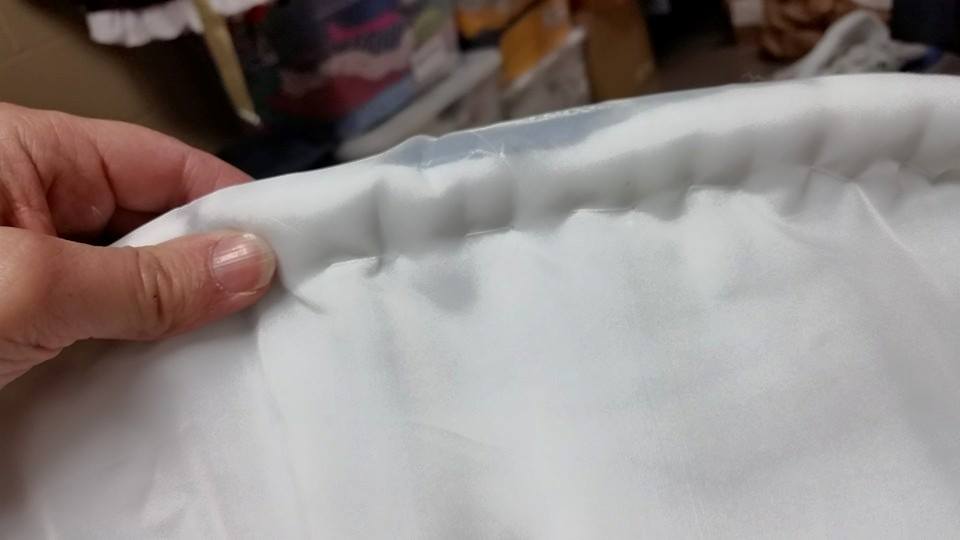
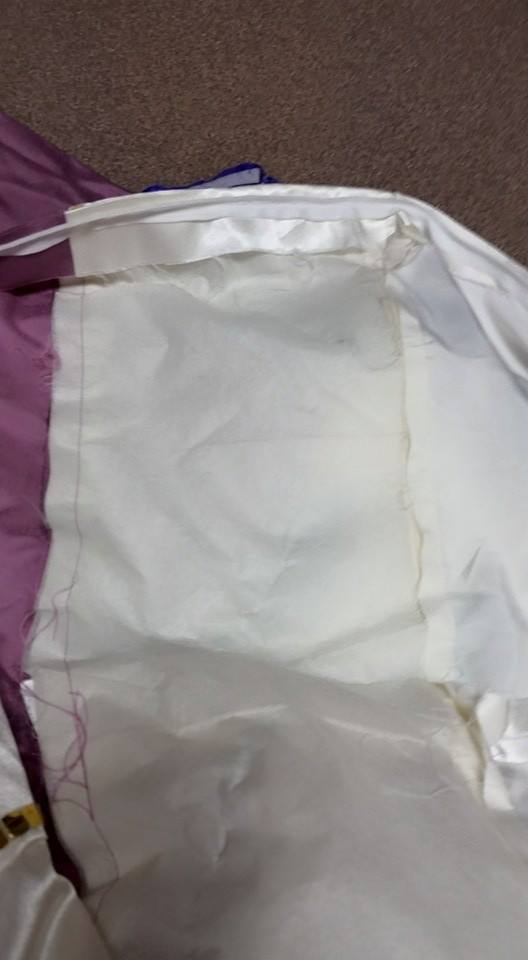
Once that was done, our costumer decided to have a straight band for placing the “china” decoration. This was a long rectangular strip of fabric that was sewn to the edge of the circle. This follows the shape of the hoop (with the two like sized hula hoops suspended one above the other). The width of the strip should match the distance the hula hoops are apart. This is a picture of the strip (white). The strip is backed with interfacing to give it stability and help keep it from stretching.
The bottom of our teapot costume is plum to match the blouse. A wider strip is sewn on to the straight decorative panel strip. It is then gathered again at the bottom to another straight strip . .that is just a wide enough circle so that she can walk.

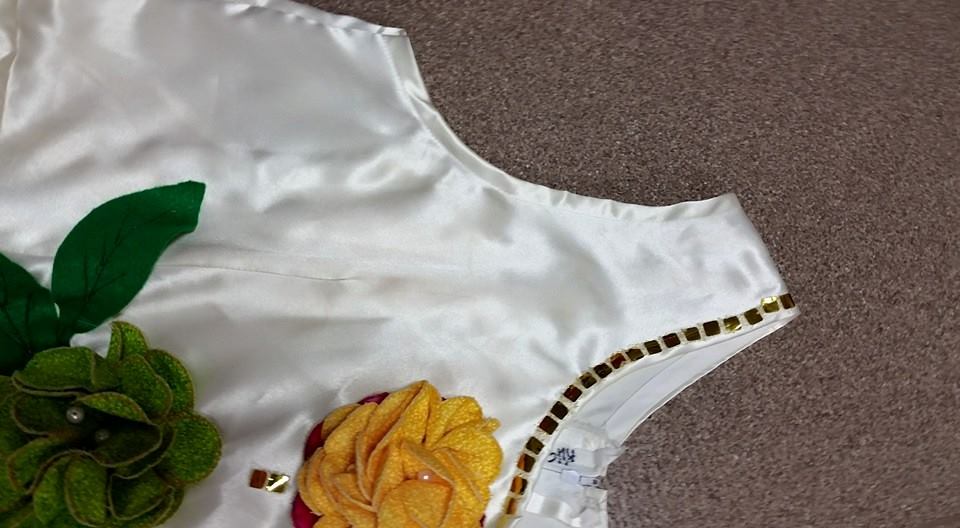
The flowers and leaves and single rows of gold were added later.
The dress closes with a very long zipper in the back. Zippers can be bought by the roll and then you cut them to the desired length. The zipper needed to extend from the neckline to down below the largest hoop (due to the narrowing at the bottom of the costume).
The flower embellishments are over-sized, bright in color and 3-dimensional. They may seem a bit “much” up close . . but from the back of the auditorium, they are visible, which was part of the goal. The bright colors are also in contrast to the muted tones that we chose to dress the villagers/chorus in. This adds to the “Enchanted” effect.
The Hat
The hat is a simple mob cap. It is basically a large circle with a casing running around the edge and elastic to make a hat. There are all kinds of patterns and tutorials. This hat is trimmed with eyelet, and then a “handle” (made of flowers) for the teapot theme.


One of the very important parts of the Mrs. Potts costume is the posture of the actress. Elevating the spout arm whenever possible in an integral component to creating the image of the teapot.
Addendum:
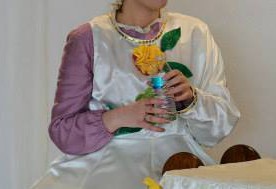
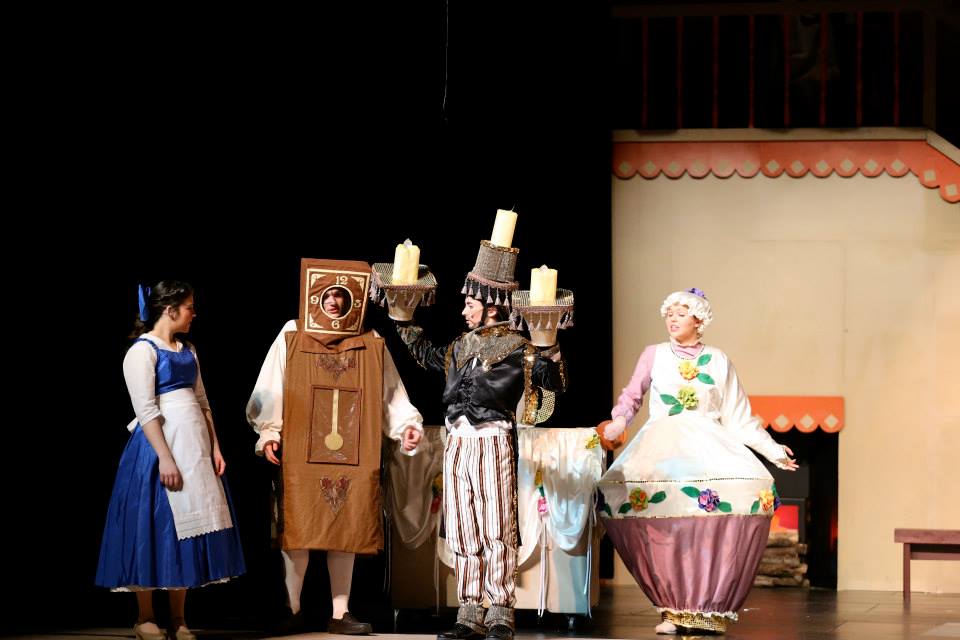
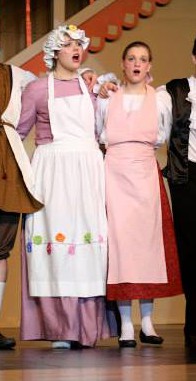
I found a picture! Mrs. Potts & Chip “Human Again”:
The Chip Cart
What is Mrs. Potts without Chip? Typically Chip is costumed one of two ways . . either in the “Chip Cart”, or, in a cup shaped costume. We opted to go with the Chip cart.
The cart is basically a wooden frame on wheels. Ours was constructed of some junk lumber. It has a bench for the cast member to sit on. There are fancy carts with illusions made with mirrors . .and you can find directions for those online. We went with a simpler version.
You will need to measure your cast member before designing the cart. One important measurement is to measure the cast member from the neck down in a sitting position. This will determine where the bench should be in relation to the top of the cart. If you are going to error, have it be a little low. Ours was, but the cast member appreciated being able to sit on a pillow during the show. The other measurement, again as the cast member is sitting, is from the base of the spine (back) to the front of the knees. Your cast member needs enough room to sit. We also had a strip of wood across the bottom for the cast members feet to rest to keep them away from the wheels. Overall, we were surprised how big the cart needed to be to front-to-back to accomplish these things.
Once the volunteer had made the frame, I covered it with fabric (using a staple gun). The back piece attached with hook & loop tape so that the cast member could get in & out. I used two pieces of foam board to cover the top. I cut out the hole for Chip’s head before I stapled them on. I used wooden paper towel holders from a thrift store as the handles on the sides to give it a more “tea cart” look.
I made a decorative tablecloth out of the leftover satin from the costumes and leftover decoration.
The actual Chip cup is made with a lamp shade from a Thrift store. I cut out various patterns for the face opening until I got a shape that I liked that fit the lamp shade. I then traced it on the shade with a pencil and carefully cut it out. Remember, you can always cut more off, but it is impossible to put it back on. The top of the shade is covered with some lightweight white fabric that is glued one, and the rough edges are covered with the gold trim. The handle is made from plastic mesh covered with gold fabric, and is hot glued to the lamp shade.
I was at a loss on how to make a “chip”. Since our Chip was a girl, we opted to put a flower in that spot and let the audience “see” what they knew was there. Another option would have been to use a piece of beige felt to make a chip shape, or draw one on. At the time I made it, it bothered me that it would end where the top covering joined the cup . .but . .in actuality, I don’t think that would have been a problem.

This is the top of a Chip costume made from lampshade.


As Chip is never seen outside of the cart except for the very end, this outfit does not need to coordinate with the
Enchanted outfit. She wore a white blouse, skirt and apron for the final scene (see picture above).


How did you make plate costumes?
LikeLike
Hi. If you look at the post about the silverware, I talk a bit about the plates. There is a search feature on the home page of my blog . . . search “silverware” and the post should show up. Hope that helps . . I’m always happy to answer questions or help troubleshoot. Liz
LikeLike