I am finally getting close to the end of the ball gowns . . . if I counted correctly, this is the 20th post. In addition to the dresses that were upcycled, there were a number that were useable “as is”, particularly some late 1980’s taffeta Prom dresses. There were a few that other people remodeled (what we shortened for “Grease” we re-lengthened for “Cinderella)., and then a couple that aren’t particularly interesting or that I didn’t care for. It is also getting harder to write the posts since I did some of these (like this one!) almost six months ago. But, I do want to finish up . . . and be able to delete all the pictures from my phone with no regrets.
This dress began with another dress from my stash:


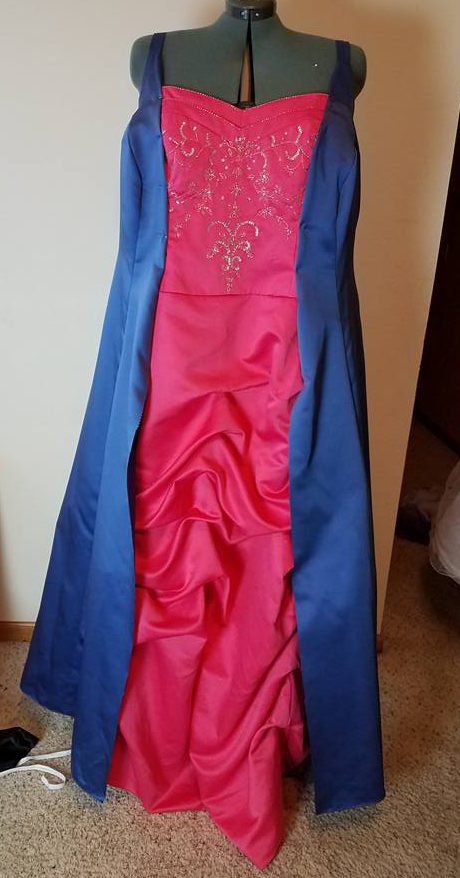
This was a purplish satin dress with a high scoop neck and shoulder straps (I love straps!). It was very plain, which made it a great base dress. This dress could have been changed in various different ways to suit multiple different eras. For this project, I was going for a Colonial/Marie Antoinette sort of look. This is where I love “Fairytale-land”, because, since this is the world that I am creating, there is no “wrong
I paired it with this dress:


This was a hot pink satin strapless dress. It had a side zipper. The front was embellished with silver embroidery, beads and sequins. The skirt was ruched. It did have a seam between the bodice and the skirt. This dress was too small to use as a base dress, but the bodice was close enough that I thought I could use it as in insert into the blue dress. This was challenged a bit by the side zipper and seams. Typically I would cut the dress up the center back seam, but, in this case, there was no center back seam.

I began by removing the bodice from the back of skirt, leaving it attached in the front.

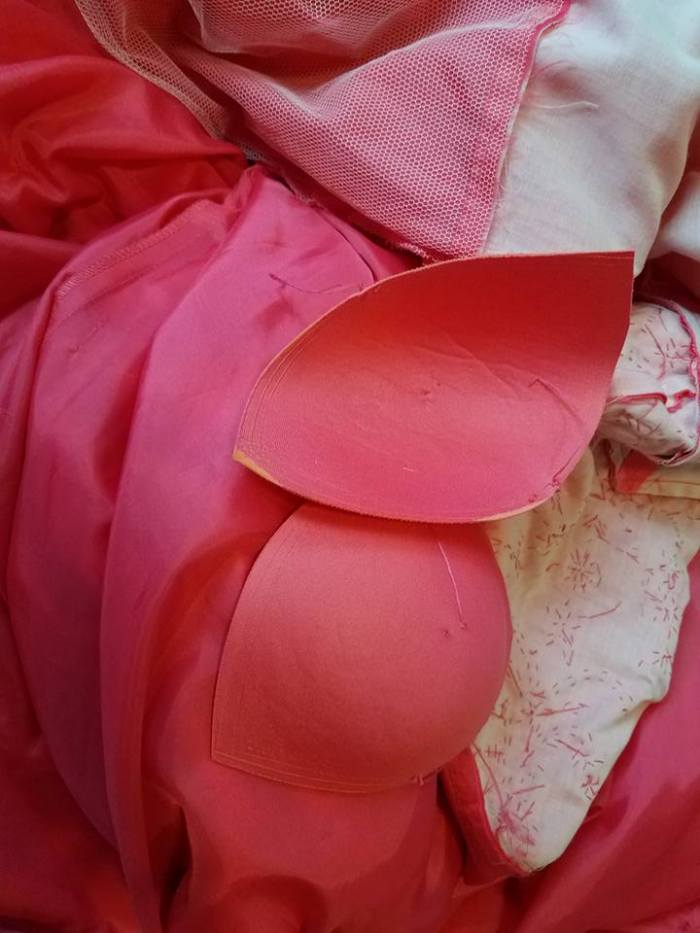
I opened up the bodice and took out the bra cups. I did this because it was easy to do now, and this dress would not be worn as a strapless dress. I thought the bra cups would probably cause me more fit issues than they would help. I usually cut the cups out when I am upcycling because the cast members typically will be wearing a bra already.
Then I cut the skirt apart in the center back. It meant that those edges were quite long as the ruching was gone. It just meant that when I stitched it to the other dress I would need to replace the pleats.

Dress #1 was slit up the center front. I carefully folded it in half, and the cut up the fold.

I began to pin the two dresses together I measured down from a seam in the shoulder straps to make sure that the pink dress was inserted at the same level on each side. I folded the blue dress to adjust the size of the front–otherwise the front of the dress would have been way too wide. I also utilized the seam lines in the pink dress to keep the dress symmetrical.

Here it is pinned together on the top.
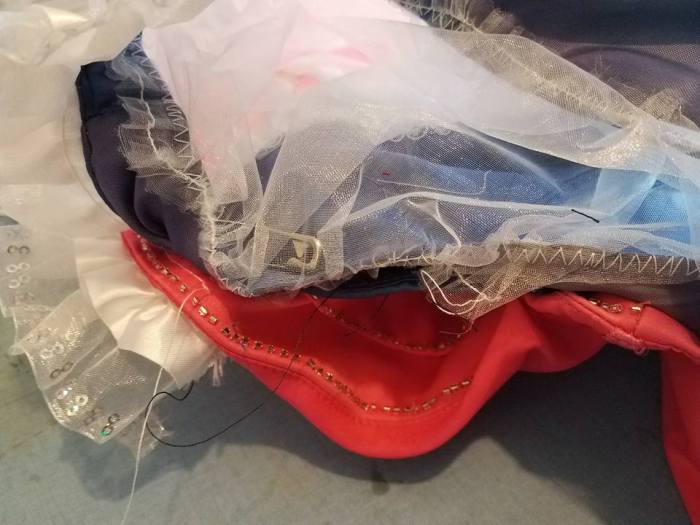
I thought this looked rather plain, so I added some white pre-ruffled organza and sequin trim to the edge of the blue dress.
I pleated the back of the pink dress to the bodice right at the edge where it met the blue dress. This would give added fullness to the front of the dress.

I began inserting the pink dress by pinning the bottom so it would be even. Then I pinned the pink dress to the blue dress where it seemed to make sense, making pleats as I went.


Here we are at this point. I am going to confess–I have absolutely no recollection of what is going on with those pleats in the front. I am guessing that I ended deciding I wanted more fullness in the front. But, exactly what I did, I am not sure. So, however I got there, I pleated the extra fabric into the center front.


I wanted to add sleeves, so I measured the existing armscye so that I would cut the sleeve large enough.

I used white organza (nothing like a little drama by showing my very large pile of it, lol). I think I just cut large rectangles and gathered them in to the sleeve.

Here is the inside view and the outside view.


I finished the bottom edge with a casing and some of the trim I used on the front of the dress.


And the dress was done:


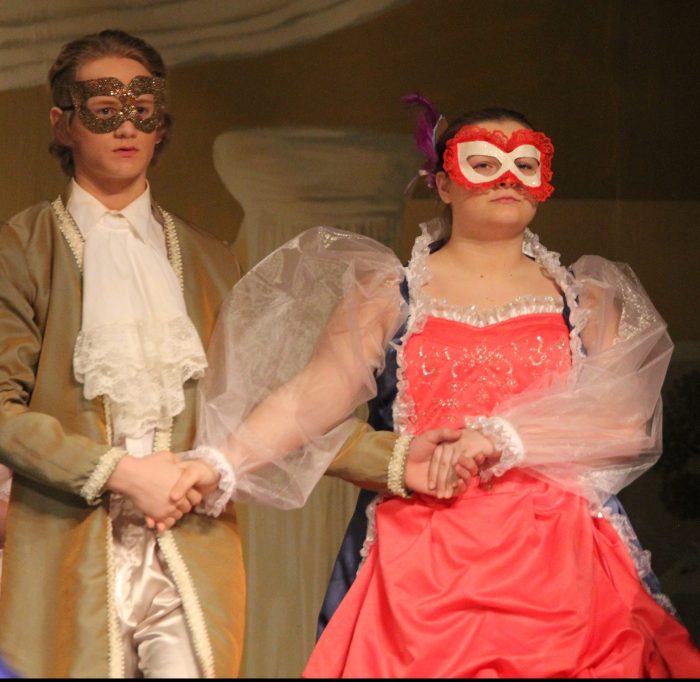
This dress was in the 22-24W size. I thought it turned out nicely. It would have been ideal to be able to make the sleeves out of the blue fabric, but I didn’t have another dress that matched the color.
So . . . this is not the end of the story. I did this dress early because I had limited plus size options to work with, and if I couldn’t make the dresses work, I wanted to have plenty of time to look for other costume possibilities, or have a volunteer make something from scratch. One day I got a “happy” little email from the Director that the girl this costume was made for decided to drop musical. Unfortunately, I already had her Villager costume done, and her Ball gown. Cast members who drop after I have their costumes made/purchased are not my favorite people. If you are lucky, you can shift the costume to another person. If you are not lucky, you just wasted a lot of your (volunteer) time and part of your (tight) budget.
While I didn’t have anyone else who could easily fit into this dress, I did have one cast member who still needed a dress that I thought it might work for. I assigned her to the dress and then forgot about it. When we did our “group fittings” I had a number of parent volunteers helping me. Overall I had been doing a pretty good job pre-fitting costumes, and then this cast member came through. She, and her adult helper came out and were “Ummmm, Liz . . . “, but, once I explained everyone thought it was a good joke, and she was actually happy the other girl quit so she could have the dress. She was a good sport, and came in for multiple fittings until we had everything adjusted.
To get it to fit I had to:
Take in both of the curved seams in the front and move the pink dress over, and also from the seams in the back.

I had to move the blue dress over to the center and raise the waist.


I also had to shorten the front skirt several time. The cast member was moving set while she wore it, and kept stepping on it. Luckily, a ruched dress is pretty easy to make shorter. I finally just tucked it up enough on the sides to make her happy, and ignored the uneven hem!
Eventually–we got it on stage, and she loved it.