Lumiere.
Lumiere is one of the “problem” costumes in Beauty & the Beast. Now . .if you are a professional, you can make really neat hand pieces with real flames and everything. If you have electrical skills, you can maybe wire something up . . . if your skills are more in the sewing area. . . well, let’s just say . . don’t leave this costume for last.
The first decision that needs to be made is whether or not the head-piece will light up. The director I was working with desired this . . . so that added to the challenge.
I have since learned that a person needs to learn their limits 🙂 Sometimes, if what the director wants is beyond what you can do within your time frame, budget and skill set. . . speak up and move on to plan B. I also learned another lesson while making this costume. Don’t be too set on any one idea/plan. If it isn’t working . . let it go and move on to something else.
My Lumiere Achilles heel: Early on in the costuming process I found some lamp shades that I thought would make cool accessories. I even found three–one for each hand, and one for the head! I loved them. Unfortunately, they ended up being something that I probably would have been better off abandoning along the way . . .live and learn. Sometimes when something isn’t working, flexibility needs to be key.
Suggestions on how (NOT) to make the Lumiere hands and headpiece:
Where to begin?
One of the first things to consider is weight. Something may not seem very heavy . .but when it is on your head, and when you have to hold your arms upright for extended periods of time . . .ounces matter.
The second thing to consider is how the cast member will hold on the hand pieces.
Third, is how you will switch on & off any light up feature you have in the hand/headpieces.
What to use as the light source?
My first thought was the battery operated tapers that you see in windows at Christmas. Great idea . . except that they turn on and off one of two ways: Either by twisting the candle to make battery contact (not real handy onstage and one-handed); or, by pushing on the flame (again, not too manageable unless Lumiere has a chronic itch). Next idea . . .

My second thought was that I would use battery operated candles with a remote. In concept . . what could be easier? Attach the candles to the costume pieces, tape the remote to the hand pieces . . and Ah Ha! Instant Lumiere! Well . . .the thought was good. First, the candles are heavy and difficult to figure out how to attach so that when he moves his hands around they don’t fly off. I thought I could overcome that . . so I temporarily attached them, attached the remote to the handle and . . .nothing. The signal from the remote is not strong enough to work the candles without a direct line to sight (certainly not through the inside layers of the costume). So . . give it to a crew member? It doesn’t work over distance and it is almost impossible get all three to go one and off at the same time since they aren’t close enough together. My kids and I tried. We really tried. We soooo wanted this to work. Nope. Flop idea #2.

Idea #3 was to use strings of battery operated “fairy” lights. These are relatively cheap, come in various lenghts, and could be controlled by the cast member. Great idea . . . I ordered one and made the prototype for the right hand, and it worked . . so I ordered two more. These strings come with a small plastic box that holds the batteries with a small on/off switch on one side. What I discovered (unfortunately) is that while you MAY be able to work one switch with your dominant hand, you certainly cannot work two switches, and it is even hard to do one with your non-dominant hand.

Along the way I was also discovering that it is harder than you would think to 1) attach a handle to a lampshade and 2) find something of an appropriate size to hold comfortably that is a size appropriate for attaching the battery boxes/switches.
In the meantime, I had been working on the costume pieces themselves.
At this point, I had my lamp shades (upside down). I had decided to use an empty clear plastic 2 qt juice bottle for the “candle”, so those were attached. I had covered these with parchment scrapbook paper.
I had made a “cover” for the lampshade that fit around the juice bottle out of plastic mesh covered with fabric and some velcro to hold it in place. I covered this in gold fabric that matched the Be Our Guest costumes & the Mrs. Potts trim.
Along the way, I found out that when you turned on the lights , in addition to lighting up the juice bottle, they also glowed through the lampshades . . .so I had lined the lampshades with duct tape (getting heavier by the minute).
Duct tape on the inside . . plastic mesh covering . . a plastic mesh sling to hold up the juice bottle . . .how much more complicated could it get? Arrgghh!
I hadn’t quite figured out how to hold them . .but I had faith in my plan . . . I had also added some really fun beaded fringe to add to the “candelabra” look.
Since the switch didn’t work, I decided I needed a push button on/off . . . . which after extensive internet searching, led me to the idea of using EL lighting. I found a place (in the U.S.) that would do custom lights so I could order one for the single hand, and one that would work the second hand and the hat at the same time. I was THRILLED. The wider the lighting wire the more light it puts off and the more expensive it is. I figured out what I thought I needed and ordered my WHITE EL lights.

When it arrived, it worked pretty much as planned. The push button controls worked great, the two were spiced together as ordered with little connectors so that you could put the costume jacket on, thread the headpiece lights & attach it to the hand controls . . all that was great, unfortunately the WHITE EL wire . . .glows BLUE. So now my Lumiere candles were BLUE. I thought I was going to cry. (The picture is just an illustration of generic EL lights, not the actual lights, nor is it linked to the actual company that did them).
On top of that, exactly HOW to attach the on/off boxes to the hand pieces just wasn’t working. I was BEYOND frustrated.
So the hat . . . I had the idea that a marching band hat, worn backwards, would provide a flat surface to attach the decorative pieces. I happened to have access to one, and that idea DID work. I painted the hat black, and removed the buckle from the chin strap (hard to do it up backwards) and had to shift the attachments to the other side of the hat for balance . . but, overall, that part worked. I added some foam for padding to protect the actors head, and used zip ties to attach the lamp shade/juice bottle. I drilled additional holes in the hat to thread the lights up into it. That all was working reasonably well . . until the cast member tried wearing it for a rehearsal. The weight was tolerable for a quick try on . . but very tiring for a whole two-hour show.

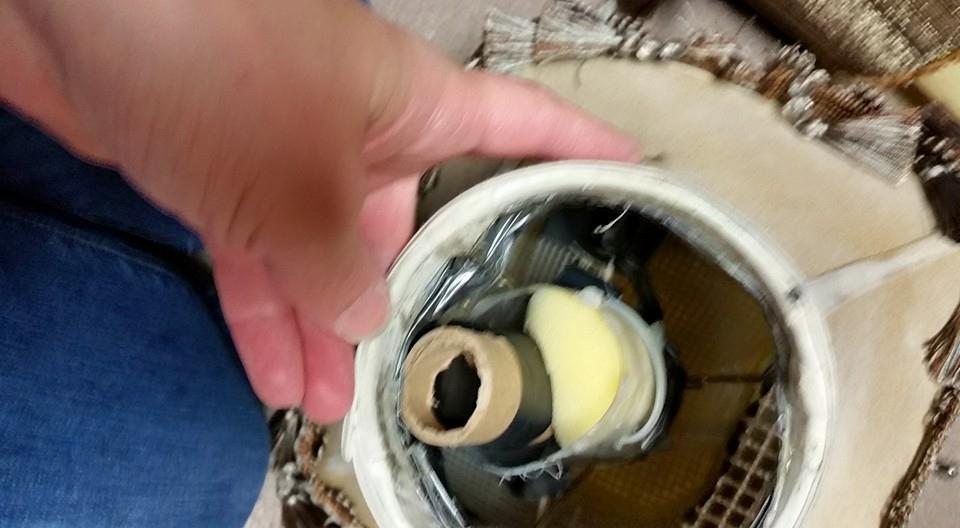
Inside of hat with foam padding, el light coming out the back of that hat.
I was ready to quit. Right then. I am not an engineer.
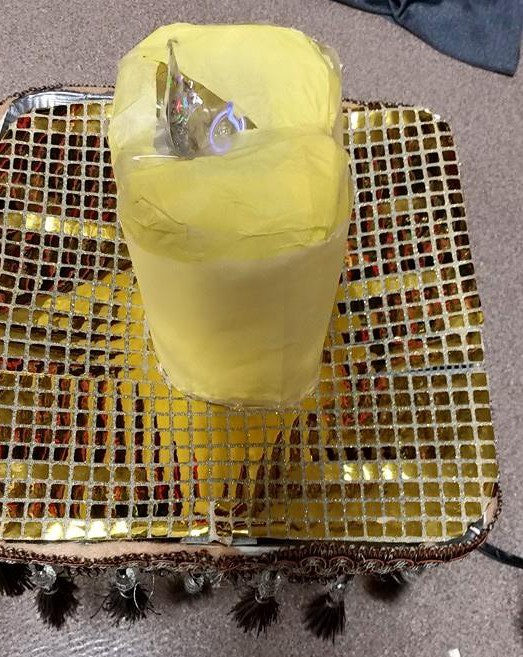
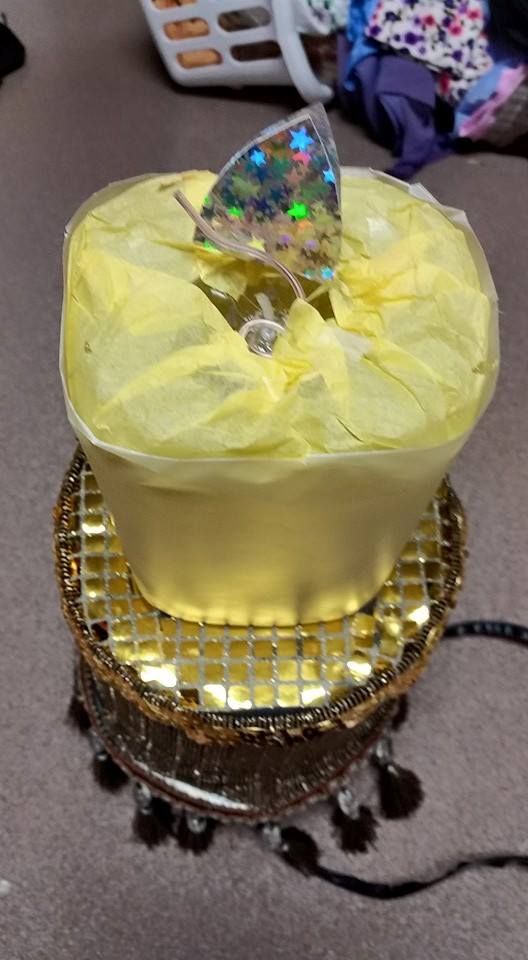
The lampshade was simply too top heavy to handle on the hat. I ended up removing the lamp shade and using a 5 qt plastic ice cream bucket (see picture above) as the form. I covered this with fabric that matched the collar of his costume.
To keep the candles from glowing excessively blue, I put yellow tissue paper under the parchment paper. I also added a piece of hologram scrapbook paper at the top to try to reflect some of the light. This dimmed my already less-than-fabulous lights, but at least they weren’t BLUE. I threaded a piece of the EL light out the top and wrapped it in a knot to hold it there.
The hand pieces . . eventually my daughter finished them. She found some thin plastic bottles and cut “windows” in them and filled them with stuffing and a cardboard tube to support the on/off boxes. The bottoms were cut off and then taped in place so that theoretically you could pull the boxes out to change the batteries. The bottles were zip-tied to the wire lampshade frames.
And . . . after all of that . . . unless the stage was completely dark, the lights barely showed up.

Barely visible Lumiere. Not the effect I was hoping for.
What would I do differently?
Where to begin? LOL. First . . I would say “no” to the head-piece turning on (or let someone else do it!). Or, no hat at all . . look at the Broadway costume. White wig all the way! (I have also seen some fun hats made with the squirty styrofoam insulation).
Then, for a simple costume, you could probably use small, inexpensive (powerful!) flashlights to do the lighting (keeping in mind the on/off switch is at the TOP of the flashlight). These could also double as the handles. Second . . . watch the weight. The juice bottles for candles worked well. My committment to using the lampshades, despite all of the obstacles that came up was ridiculous. Sometimes an idea works, and sometimes it doesn’t. Let it go. An acceptable base could have been made out of foam covered fabric, a different plastic container, an oatmeal box, a charger, styrofoam .. . something less cumbersome and much less weighty.
My preferred lighting would have been the strings of “fairy” lights. If someone had skills and could replace the battery box with a push button switch that would be perfect. The EL lights would have worked better in yellow. I also would have bought longer pieces and wrapped them around more for more brightness. In addition, I should have made sure to change the batteries out between each show to make sure they were glowing as brightly as possible.
I have also seen an idea where the character wears colored gloves and uses his/her fingers as the “fire”. I’ve seen pictures of it in red, but I’ve thought black gloves with gold sequins on the inside that would reflect the stage lights might be effective (although they would not light up independently).
Truly . . this part of the costume . . there is not much that worked out the way it was supposed to, and I was less that satisfied with the end result, but, time ran out. There is a reason there are professional costume designers, LOL. But, hopefully my experience will trigger some new creative ideas for a more successful concept for anyone reading this. There is something to be learned in failure.
One of my biggest problems was attaching handles to the upside-down lampshades, and making an acceptable grip to support the switch for the hand pieces. I feel like if I were to approach this today . .the end result would look totally different and I would be 1000% happier.
The Costume:
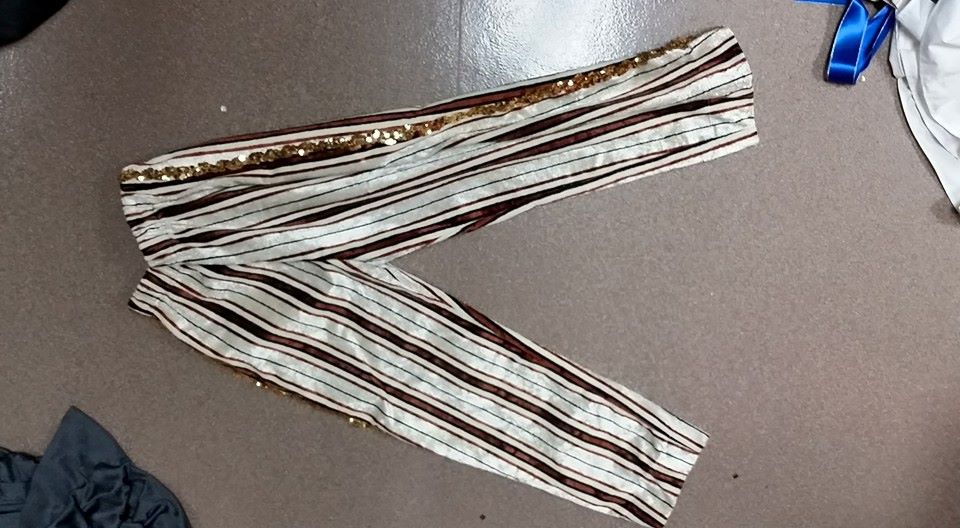
The inspiration for the costume itself came from the Broadway costume. I liked the vertical lines . . the stripes on the pants, and the lines down the sides of the jacket and sleeves that give the suggestion of a candelabra when the cast member holds his/her arms up. I did not actually construct this part of the costume . . . another of my fabulous volunteers did this creative work.
Inspiration:

Our Costume:

We had a piece of striped upholstery fabric donated, and so this easily became a pair of pull on pants. The costumer added gold trim down the sides of the legs.
The jacket is made of black satin. It has gold sequin trim on the sleeves. The cast member and costumer added “cords” with more hanging gold trim.

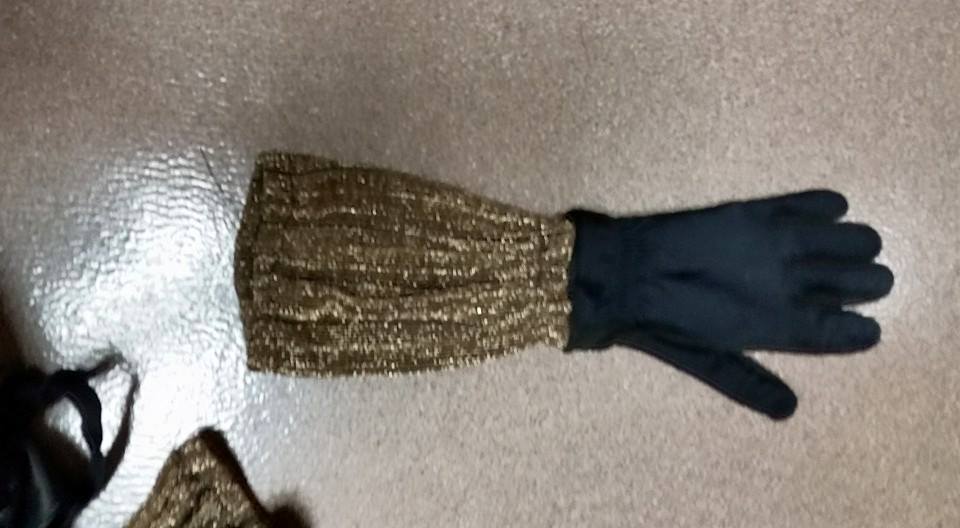
The collar secures to the shoulders with hook & loop tape. This same fabric was used to make wrist covers and ankle covers. The fabric was sewn to black gloves and extended down to cover the sleeve opening of the jacket. This fabric was also used to cover the hat. The fabric came from two matching glittery gold long-sleeved shirts from a thrift store. What is very interesting about these shirts is that up close, and from across a room (15-20′), they glitter very nicely. On stage . . not so much.
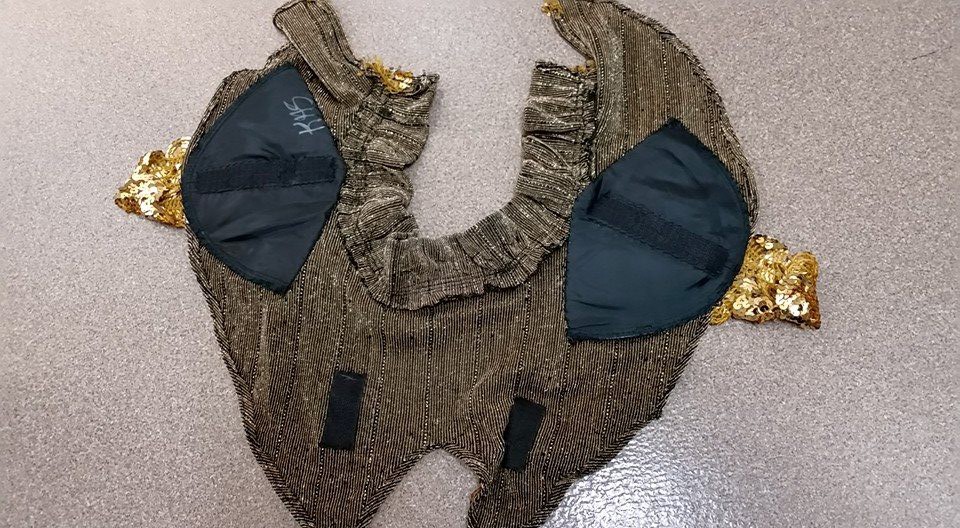
Inside view: Shoulder pads, and velcro to hold it in place. Closes with vecro in the back of the neck.
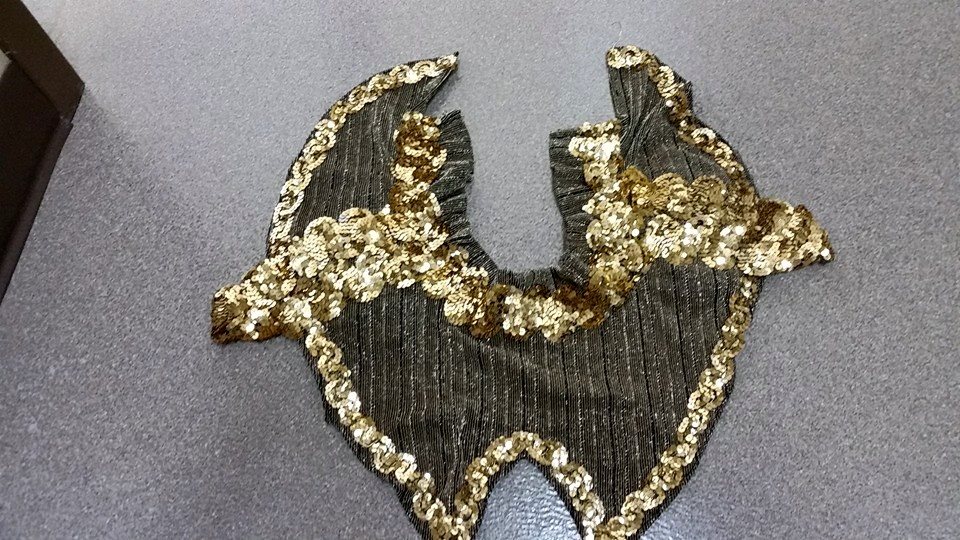
Top view.
I think that a person could do a whole study on different fabrics and how and when they glitter. Another case in point came recently at my daughters dance recital. Some of the little girls had these VERY glittery pink tutu’s and when you saw them in the hall you thought wonders how they would glitter on stage . . but on stage, the skirts didn’t glitter at all. I can only think that it has to do with the angle of the lighting and the angle of the tulle.. Unfortunately, often times the show lighting is not set until long after the costume is constructed. I have come to an appreciation that what I THINK will glitter . . .often does not. I have had this happen with beads and crystals as well. Part of it may be size . . . the stage is big, and if you are sitting a distance back, it may help if the reflective item is larger so it reflects better . .but . .this is by far not universal. Some of the most glittery fabrics have small sequins or small beads on them.
I would love it if anyone wants to weigh in with comments on this topic. I have done a lot of internet searching trying to determine the best shape of sequin. I put Swarovoski gems on a solo dance outfit for my daughter . . . and it didn’t glitter onstage at all (talk about a HUGE disappointment). I think maybe they were too small . .but I don’t know.
But, I digress . . back to Lumiere:
The outfit also included leg pieces to cover the ankles.
And black gloves with drapes attached to cover the gap between the ends of the sleeve jacket and the hand pieces.
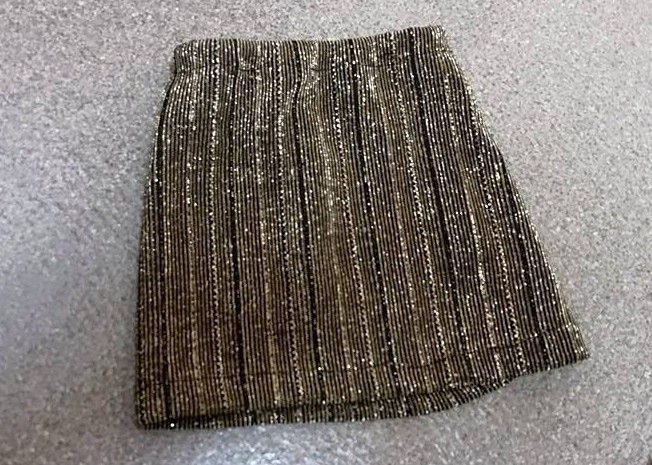
The Enchanted outfit also included a fitted black satin vest, and a white shirt. To become Human Again, the cast member switched to plain black pants, and a loose black vest.


In the end, the cast member neglected to thread the EL wires (covered with black electrical tape) through his coat sleeve and just let it hand outside his jacket. With the black jacket it was largely unnoticeable, and certainly was not a distraction. (see the above picture illustrating the jacket).
Overall, I think the costume looked good. I did like the movement of the fringe around the hand-pieces. I wish the lighted parts had turned out better . . . but . .oh well.
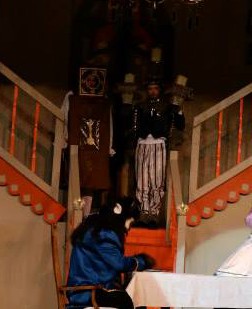
Lumiere on stage:


The fringe has crystals which I had thought would reflect the light . . nope.

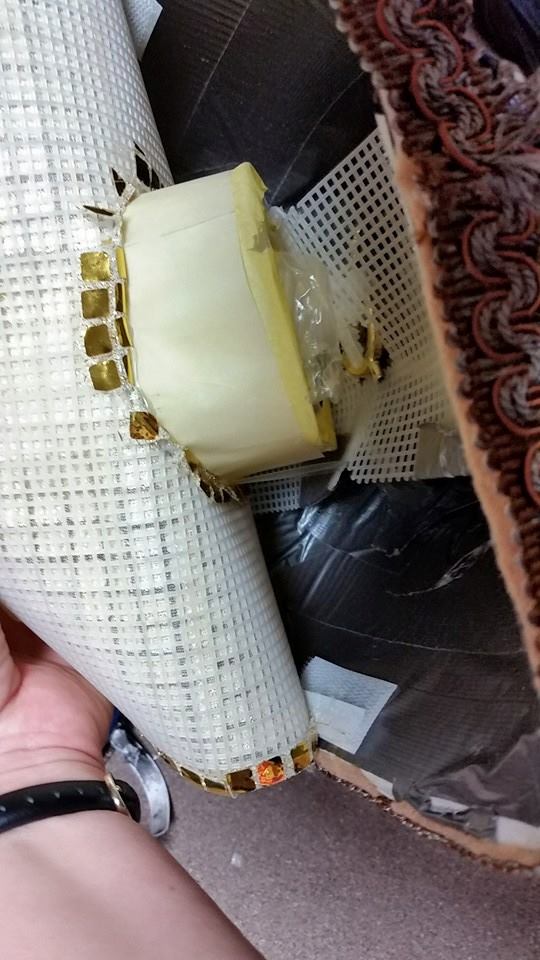
Note the importance of having a well secured candle
 Here’s a little clip from the show:


Since there is a strong possibility I will be doing this show sometime this year I will be studying these posts. Lots to think about.
Did you ever use those battery operated flame lantern things. They are cheap and have a little fan inside that makes the orange and yellow silk flame flicker. I used them on the walls at least ten years ago for Aida and they looked great on stage. I have to check though if the fan sound is loud enough to be picked up by the mic. I wonder if they have gotten quieter. I still have a few of the ones I used for Aida and they still work. They were very lightweight. I love the look of your Lumiere. I agree about the vertical stripes.
Nacf
LikeLike
I didn’t. This show was done on a really short time-line. I really wish I had the contacts at the time to try and involve someone with engineering type skills. The barrier for turning something on one-handed is real. There are a lot of different ways to do it, and I am not convinced that light-up hands really added that much.
LikeLike
I just started making a Lumiere costume this week, and I have gone through the same thought processes you have as I have been researching it. I really wanted to make it glow too. But I have decided to not go there. I am going to stand my ground. I am making it for Elementary age kids and they can’t hold up much weight at all. I don’t want to hamper their acting or limit their hand motions. Thanks so much for reinforcing my initial thoughts!
LikeLike
If i were going to do it again…. they make strands of battery operated fairy lights that have small battery packs… they are quite flat (i use them to make magic mirrors). But, the non-dominant hand would be hard. I’m with you that i’m not sure it’s worth it, esp for young kids. I suppose you could also build them around flashlights. I was pretty stuck on the lampshades, which limited my optiond
LikeLike
We did BATB last spring. You can see pics of the production on FB under my name. Lots of volunteers used their talents to create an amazing production.
LikeLike
Fun! I’ll have to take a look. One of my “to do” projects is to re-make some of these costumes just because I’ve learned so much since I did the show and have new ideas (and they are some of my most-looked at blog posts . . although Cinderella BV is picking up this year).
LikeLike