My last post was an Edwardian dress upcycled from a peacock blue Prom dress that I have loved for years. A beautiful dress is one thing . . . but when you add an over-the-top, oversized picture-style hat, well, there are no words.
So, I have never made a hat, but I have read about hat making on the internet and in some costuming books. Yes, I was lacking most of the basic supplies, but that has never stopped me yet. (Disclaimer: Hot Mess Ahead!)
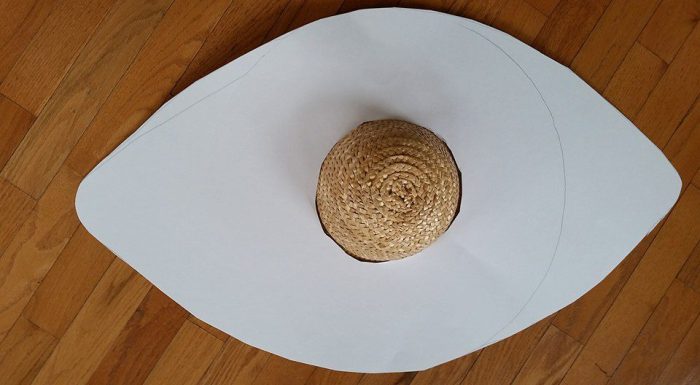
I stopped at Goodwill and picked up a hat:

It had a nice firm brim that was actually quite large. I originally had the thought of making the crown taller by making a circle of crib bumper padding and covering it with the fabric. That would get rid of the rounded “garden hat” shape I didn’t like. However, I had been working on some yard signs for an upcoming Dance Team Garage Sale and so had poster board laying on my floor. (I am a bad multi-tasker). This random piece of poster board just said “USE ME!”. So I did. There is no logic to the size or shape other than it was laying on my floor.
I drew around the edges of the hat so I knew where it sat on the poster board. Then I cut a hole out for the crown. I started small and made it larger as it needed to be. I was planning on covering the hat, so it didn’t matter if it wasn’t perfect.
I attached the poster board to the hat with duct tape. I think hot glue would be a better, more light-weight choice. I put a few strips to attach the crown to the top, and then placed strips around the circumference of the hat. The pink tape means nothing, just that I ran out of white. I am using up old duct tape . . the white was used to repair my daughter’s sousaphone for marching band a few years ago, and the pink was from a duct tape flower project. Time to purge!!

I wanted to give the hat some extra shaping, so I taped some 16g wire around the edge. I used 1/2 widths of duct tape to help reduce weight. I ran out of wire. Another time, I would start in an area that NEEDED support, ie, toward the ends. It would have been better to run out on the sides where there was straw hat, instead of on the poster board part. It was OK though, as there was only about a 6″ gap, so it held good enough.


My plan (ha-ha-ha) was to cover the TOP of the hat with a smooth piece of fabric. I would make a larger piece that would cover the bottom in soft pleats.
First I traced the hat on a left-over piece of blue satin (from making Dance Team skirts in “Legally Blonde”). I traced it on to the right side of the fabric so that it would fit the hat (which was just drawn free-form so may or may not be very symmetrical). I used a black sharpie, which, for my purpose, I figured wouldn’t show. I cut around the edge, leaving about a 1/2″ seam allowance.


I then measured from the widest part of the hat.

It was 12″, so I added an extra 2″ for the seam allowance and gluing into the inside of the hat and cut 14″ strips. I measured around the circumference of the hat, which was actually 70+”. I was amazed. So, it took one 58″ width of fabric plus another piece. I thought I had added a good 3″ extra in length, but I barely had enough–so overshoot. You can always cut it off.
Since I had drawn my sewing line on the right side of the fabric, I ran a row of stay stitching around on that black line. This helped me see where to sew when I added the back strip, and helped keep the bias edges from stretching. Once I had the long strip sewn around the oval piece I clipped all of the seams.


At this point, I tried to put it on the hat, but it was difficult to tell how things were going since I didn’t have the hole cut for the crown. I could tell I needed to do something to “sharpen” the seam. I tried pressing it, but that was less than successful. In the end I pushed the seam allowance over to the strip side and sewed it down . . . kind of like understitching a facing (in theory . . . it sounded good in my head at that time).
Then I made some slits in the top for the crown, again, starting small (I thought).
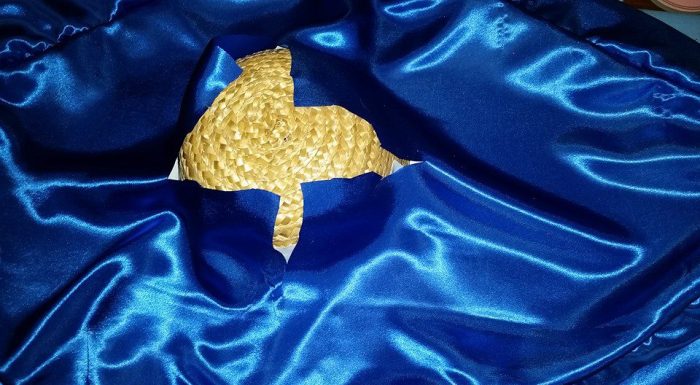
I was moving merrily along and I went to slip the hat cover on . . and . . it didn’t fit. The oval top piece was WAY too small. I pulled and twisted and eased and manipulated and did all manner of things and NO WAY would it go on. I am not exactly sure where I went wrong, but something didn’t work. I was having some tension issues, and so perhaps it was just enough to make the oval just that much too small. But whatever, I flipped it around and put the smooth part on the BOTTOM of the hat.

This was still less than perfect, and it didn’t lay smooth. And, it was much harder than I would have thought to make that slippery mass of satin STAY.IN.PLACE. I ended up pinning it in a few places (easier said than done between the fake straw, the duct tape, the wire AND the weird shape). Then I tacked the center part down with some hot glue, and then peeled those tacks up a bit at a time and reached up under the hat with my glue gun to start gluing the fabric down. I also ended up gluing in a few pleats and tucks to try and smooth it out. Luckily, my fingers are not permanently attached to the hat.
So, now the soft pleats were on the top.
And me with no plan on how to make them happen. Luckily, I had some trusty safety pins so I pulled up chunks of the fabric and pinned them together (about 6 altogether). Actually, it didn’t look too bad, just needed to be tighter to the crown. So, I made a circle of 1/4″ elastic and put it around the crown, and since it didn’t want to stay in place, I secured it with the pins.

This was becoming a crazy mess at this point–I warned you.
I flipped it back over and tried it on, and had some droopy sections of fabric on the underside, so did some nip & tucking with the old scissors and glue gun and made it look more respectable.
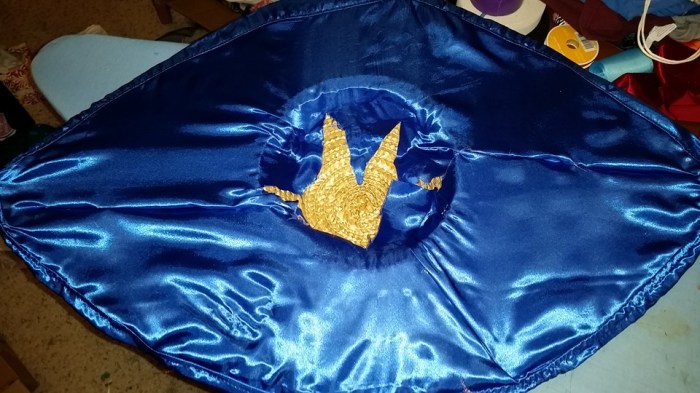
So . . that crown idea I had? Not feeling it at this point, so I just folded the ends of the fabric up and over the crown and glued them down. They didn’t quite come together neatly, so I cut a little circle of fabric and glued it over the top. Probably not the best fix for an up-close-and-personal examination, but from a distance, it is fine.


Next came the decorating. I used a gray lace crochet scarf I had from the Create/Exchange, the discarded shoulder pads from making the original dark blue jacket, a random feather, and some leftover blue flowers.

Lastly, I added some elastic to help keep the hat on (it is kind of heavy), and a piece of batting inside the crown to help it perch higher on the head.


This whole process was pretty much one step from major disaster the whole way through . . . but I think it turned out OK in the end.
Cost: hat $1.99, poster board $0.25, the rest was leftover scraps of stuff
Time: About 2 hours


It’s all great . . until you try to go through a door . . .just sayin’.


