Rapunzel is a relatively “new” Princess on the scene. While I imagined Rapunzel as being defined by her long hair . . . I was quickly corrected by my (much) younger and more “in touch” daughter, lol. Rapunzel, as presented in the popular animated movie “Tangled”, wears a purple and pink dress. She DOES have long hair MOST of the time . . . but she also has short hair.
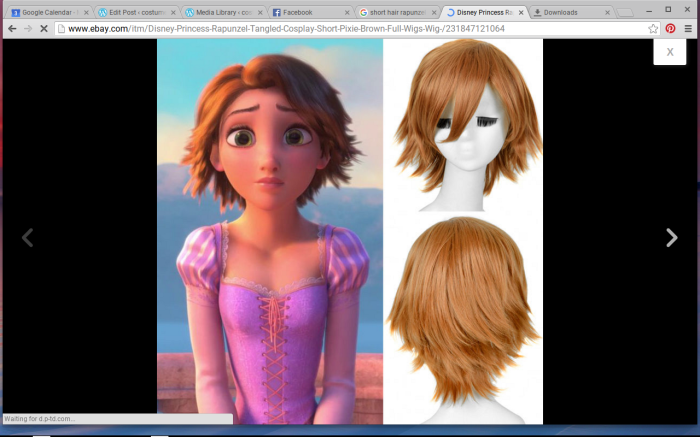
Her hair color also varies . . . the above picture is quite brown, but her hair is much more of a mid-blonde when her hair is long. If you are wanting an “Into the Woods” Rapunzel then her hair will need to be quite golden as it is repeatedly described as “hair as yellow as corn”. However, it seems much more important to the little girls in this world that Rapunzel has the appropriately styled pink & purple dress rather than what her HAIR is actually like.
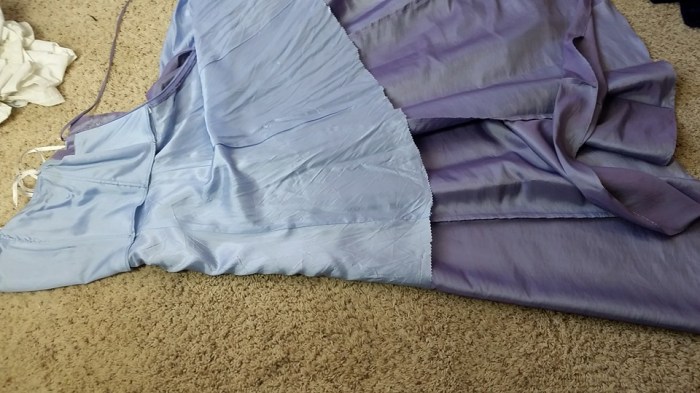
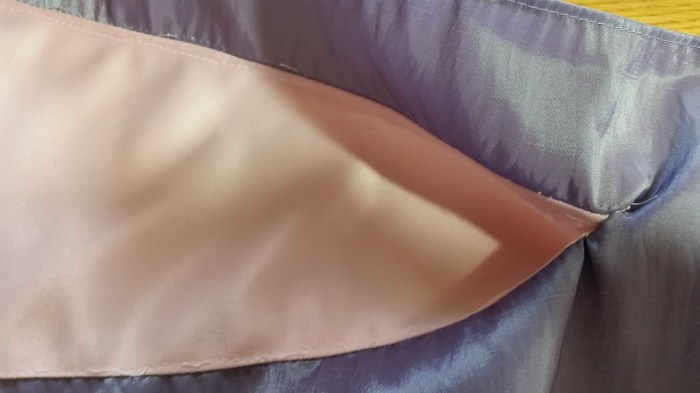
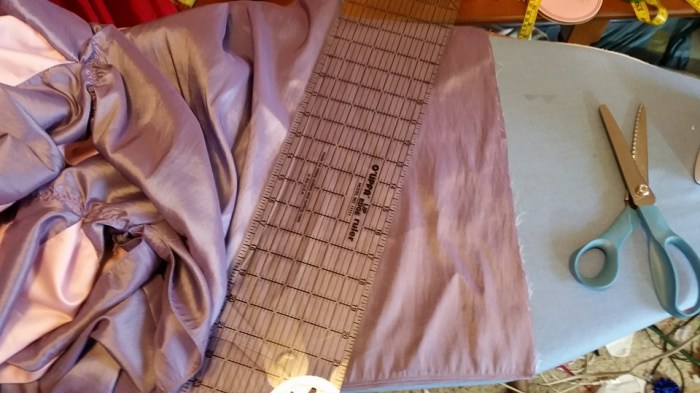
I started with a purple “formal” style dress. The dress has a empire waist, spaghetti straps, a zipper back and a small train emerging from a deep inverted pleat.


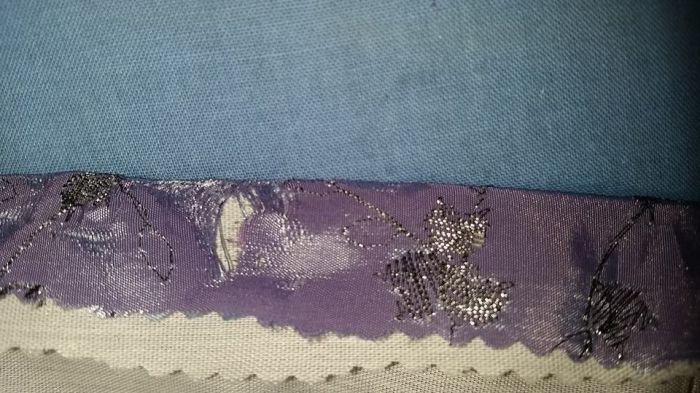
The dress has a full lining, with petticoat net attached to the bottom. The bodice has a bit of silver embroidery. Fortunately, the dress also came with a matching single layer wrap, as the lining was quite a different color from the dress there therefore not really useable to supplement the fashion fabric of the dress.

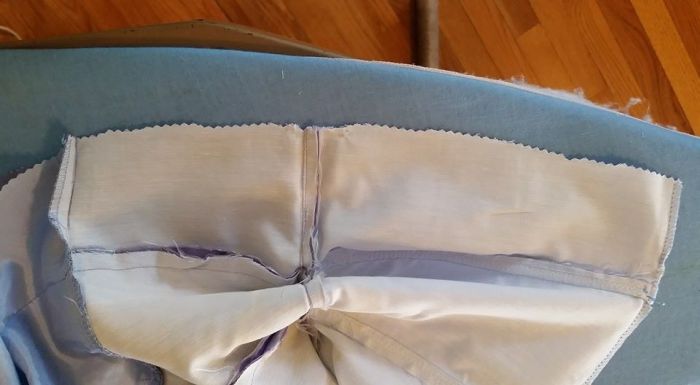
My plan was to slit the dress up the front and make a laced bodice. At this point I did not have a firm idea of what I would do for the under-dress. I had a vague idea that I might attach something to the lining fabric that would just show in the front. So, for now, I just cut the net part off leaving the top part of the skirt lining intact.

In order to slit it up the front, I lay the dress out carefully on the floor, lining up the seams on either side of the center panel. I then cut the dress up that fold.
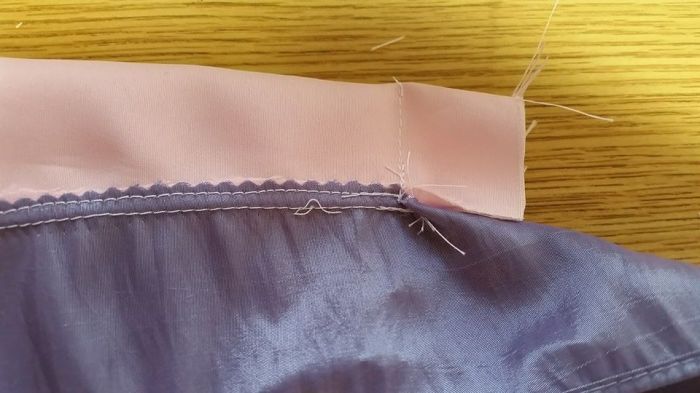
The inside of the bodice had some nice lining. I decided that this would be adequate support for the lacing supports. I didn’t think that the gap in the front needed to be huge, so I just planned to turn the raw edges in 1-1 1/2 inches or so.
I pressed that fold in and learned that metallic threads melt :(. Luckily, this was on the inside, so I used a press cloth and was a bit more careful for the rest of the pressing.
I was super happy that the dress came with detachable spaghetti straps, which repurposed nicely into loop material.
Here they are pinned in place and ready to be sewn:

I made sure to take some extra tiny stitches when I sewed over the loops as this could be a stress point and I wanted to make sure they were sewn in securely.
I did make one mistake here. When I slit the front of the dress I cut straight up the center, and then, when I finished the front, I simply made a tiny double-rolled hem along the cut line. What happened is that the dress has that extra fullness at the bottom from the gore in the front panel. This pulls forward and tends to overlap in the front. The other upcycles I have done this way I have made into capes, and in that case, that excess fabric is a good thing. Here, I am just not happy with how it hangs. Another time, I will follow the seam line down and remove the center of the gore. Depending up on how wide the front gore is, this might be a source of fabric to either create, or embellish, some sort of sleeve/strap.
For this project, I was fortunate to have the matching wrap to use to make sleeves. I wanted to make the sleeves have the pink detailing/inserts. My original plan was to use pieces of pink ribbon and sew them at the shoulder edge and then part way down the sleeve.
I pinned one end of the wrap to the dress about where I thought I would want it to attach.

I spent some time messing around with the length, trying to visualize what I wanted to do, and how it would work. The wrap was barely wide enough to reach from the front of the bodice to where it would attach in the back. I wanted the sleeve to have a little bit of a poof, and I didn’t think I would be happy with the width so I had to figure out how to add fabric. One option was to cut the wrap so that I could splice in extra fabric. Another option might have been to use the lining, but in this case the color was quite different. My original thought of using ribbon, while a reasonable and easy plan, was going to have to change. Inserting pink fabric seemed like it would give me the look I was after, AND would give some extra width at the shoulder.
I started by process by trying to figure out how long the pink inserts should be. I bunched up the fabric a bit, and marked that distance from the end with a pin.


I looked at those proportions and determined I thought my sleeve plan would work, so I cut the wrap in half. Sleeves need to be identical, and so it is important to always do things the same, and make sure you are starting with double of whatever amount of fabric or trim you think you need.
I then measured the distance from the edge of the wrap to the place I had put the pin. This was about how long I would want the inserts to be.
I looked at some different options, including pink velour and some pink sequin embellished fabric. In the end, plain pink satin won out as it didn’t detract from the simplicity of the dress. This is actually the bottom of the dress that was used to make the pink dress Elle first tried on in “Legally Blonde”. It had a nice tiny rolled hem. I planned that if I used the hemmed side of the wrap, and the hemmed side of the pink on the shoulder edge, I wouldn’t have to finish that edge 🙂

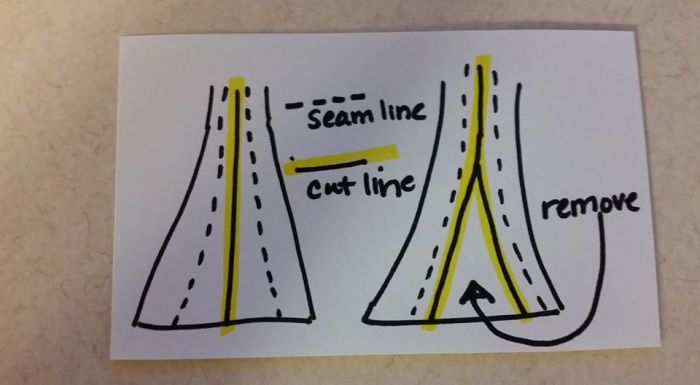
The inserts were put in using the same basic technique that I used to make cheer skirt for Serena in “Legally Blonde”. The basic idea is to cut a slit, and then sew in a wedge shaped piece. How did I decide how big to make the wedge-shaped piece? Ummm . . this dress happened to have a modesty panel which looked to be about the right size, so I just cut out 8 of them. How did I decide 8? Well, three inserts on each sleeve didn’t seem like it was enough, and while I prefer odd numbers for their aesthetic appearance, I only had enough fabric to cut 8 wedges. (see hand-drawn picture below for basic shape).
I measured the top of the sleeve pieces to determine where the slits would go (they are marked with pins).

I then slit the wrap piece in four places to insert the wedges. If there were concerns about the fabric fraying, or that this would be a stress spot, I would take this opportunity to add some stay-stitching around the slit, or reinforce it with fusible interfacing. I wasn’t concerned about stress, so I didn’t reinforce it.
I figured out (I am brilliant sometimes) that the wrap was MUCH easier to press BEFORE the slits were cut . . so for the second sleeve I pressed first and cut second.
The pink wedges were sewn into the slits. I sewed down each side, stopping just before the bottom of the slit (arrows on picture).
Once both sides were sewn in, I folded the wedge in half, and sewed across the bottom stopping just at where it met the purple fabric.
Here is a (hopefully) clearer idea of how this worked:

The pink fabric was a little heavier than the purple, so to encourage the purple to puff out and not fold in, I topstitched along the pink, while pushing the seam allowances toward the pink. This is the back/inside view.
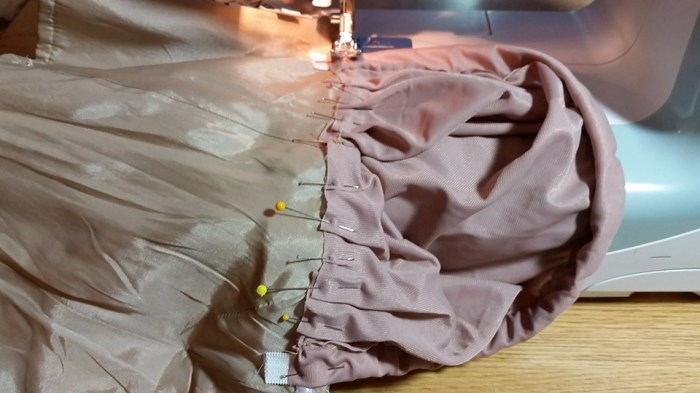
I used bias tape to make a casing along the top edge, and threaded elastic through.

For the bottom of the poof, I simply zig-zagged stretched elastic right under where the bottoms of the wedges were inserted.
Eventually I trimmed off the excess pink fabric at an angle with the pinking shears.
At this point, when my daughter tried the dress on, she commented that she didn’t like how the bottom of the sleeves just ended in a straight line. To fix this, I cut the base of the sleeve at an angle, and then made a narrow hem.
After elastic was threaded through the casing at the top of the sleeve, it was sewn to the dress on the front and back with a narrow bar tack.
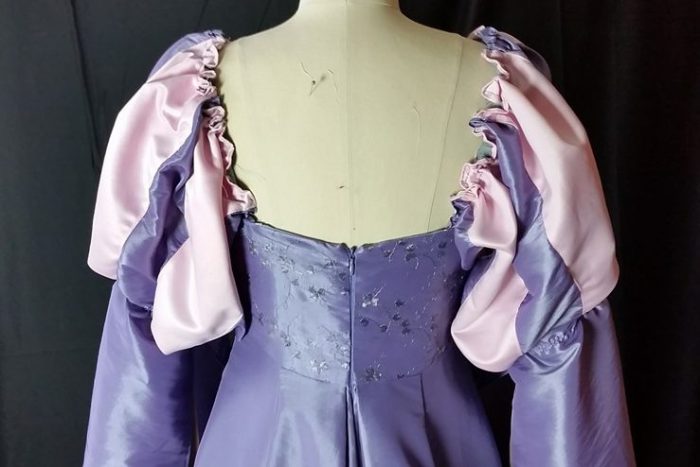
This is how it looked at this point. The only other change I made was to cut the lining out right under the bodice. We considered embellishing it with pink ribbons on the sleeves, and/or some fake flowers on the skirt or sleeves, but opted to leave it simple.

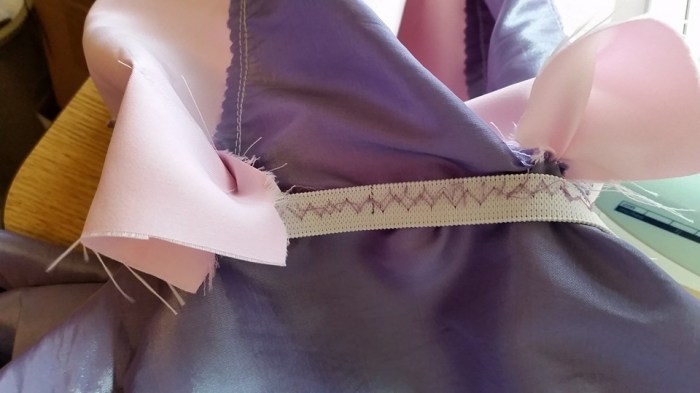
Now I really had to decide whether I would make an attached underdress or use a separate one. The advantage of an attached one is that it could be a mock dress, and thus lighter weight. The advantage to a separate dress is that the size would be more adjustable, especially since the front could be expanded through the lacing.
We experimented with various colors for the underdress, including dark purple, and ended up liking this light beige color.

This was an interesting dress. The fabric content is 80% silk and 20% wool. It is strapless and has quite heavy metal boning. It also is supported by an adjustable waist tape. I like this dress because it has just enough of a sheen to make it look Princess-y, and yet, it still gives the suggestion of a linen-type fabric.

When I washed this dress, you can see that the dress shrunk somewhat and the lining is sticking out the bottom.
I wanted the underdress to have long sleeves, since the purple dress sleeves are really of a mock-version for the lower half. I thought cutting out the lining and using it would work perfectly and kill two birds with one stone. In theory, that would have worked, EXCEPT that this is a older dress and whatever the fabric content of the lining was, it was horribly wrinkled from washing and would.not.iron.flat. I don’t mind a little touching up with an iron, but no way did I want to create a costume that needed steaming and or MAJOR pressing every time it was washed. So, since my daughter said the beige dress was pretty itchy on the inside, I sewed the lining back in, adding a row of eyelet on the bottom.
I looked through my scraps, and ended up finding a piece of tricot in a compatible color. I was happy with this fabric choice as it is lightweight and stretchy, and I would be able to make a tight-fitting sleeve for the underdress.
I used the same basic sleeve pattern that I had cut for the Flapper dress. I added additional fabric at the top to make an elastic topped sleeve. I totally just guessed at the shape other than to measure how wide it needed to be to go over the shoulder.
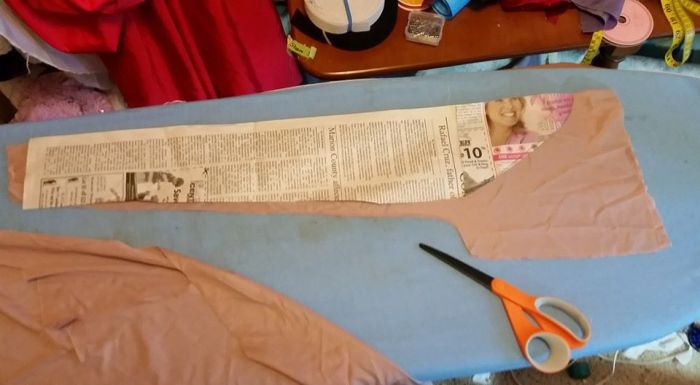
I sewed the sleeve together using a small zig-zag for stretchiness and made a self-fabric casing on the shoulder edge.
This is not a glamorous sleeve by any stretch of the imagination, but I really didn’t care because it was all covered with the purple dress.
There was plenty of excess fabric in the underarm area, and I just pleated that in.
A little trim was added to the top of the bodice. I love this trim. It is substantial enough to be seen, and yet, plain enough not to detract.
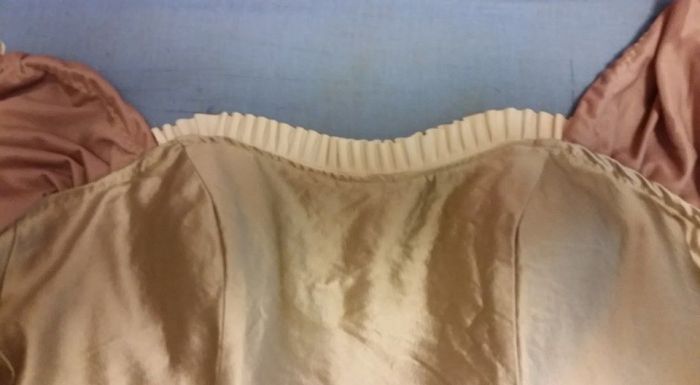
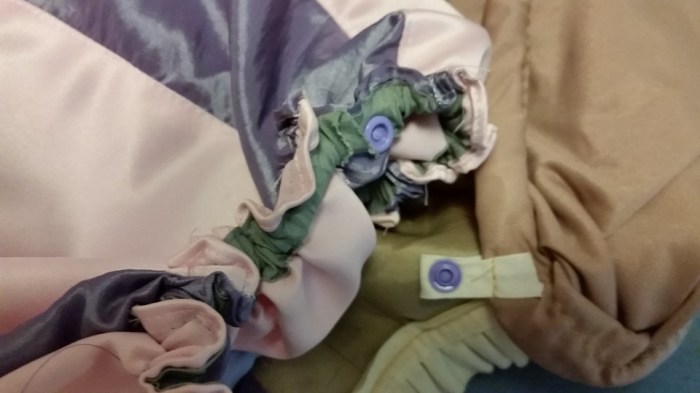
The sleeves are placed rather near the edge of the shoulders (so that they stayed under the purple dress). In order to keep them up, snaps were added. Purple snaps! How fun! I added a little tab of bias tape on the underdress, and put the snap right to the side of the elastic on the overdress.
And … the outfit is done!


Cost: purple dress $8, beige dress $3, elastic from a large roll, bias tape from my Grandma, 2 snaps, eyelet trim from the bottom of the sheet used to make the poet shirt, neck trim from a 50 cent thrift store bag, pink fabric scraps from a previous project.
Time: This is a bit hard to estimate. I did this project over several weeks, with a few others thrown in between. I am estimating 6-7 hours.
Evaluation: I have mentioned how I would change making the slit up the front of the skirt. I think I could have made the pink in the sleeves a bit narrower.
Overall, I am happy with how this project came together. I am happy with the sleeves. I think they give a nice impression of a full sleeve, with actually using a fairly small amount of fabric.
The next step in this project will be to create a wig. Once we get that done we will take some live model pictures.
I think I am going to have to watch “Tangled” this week . . . .


I think this one turned out great! Definitely gives the Rapunel look. The commercially available Rapunzel dresses vary a lot, so I think you are right that it is the lavendar and pink combination that says “Rapunzel” these days, and not specific details of the dress or even the hair. Kids identify with the colors of the dress. Also, interesting note on removing the excess fabric in the gore on the bodice. It’s hard to foresee those kinds of things, but that little detail can make a difference. I find it can be hard to make lacing bodices with even spacing from top to bottom, front or back.
LikeLike
Pingback: Leather Split-Sleeve Peasant Jacket: Upcycle | costumecrazed