While watching a Youtube video of “Cinderella” one night, I paid particular attention to the Villager outfits. Fitting, I suppose, since that has been my focus for the last little bit. One of the men had on a short, fitted jacket with slit sleeves. I rather liked that look and thought it would be a fun upcycle.
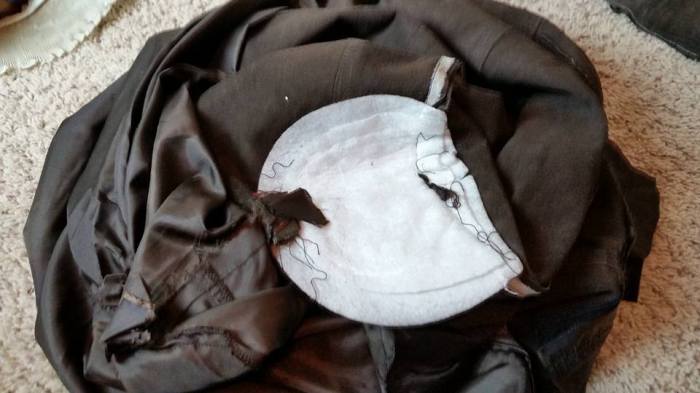
I began with a brown leather suede jacket:


The jacket is a woman’s 18/20. It has shoulder pads, a button front, and patch pockets on the front.
The first thing I did was remove the buttons. Then, I cut the jacket off at the level of the top of the pockets. Looking different already!

The second thing was to explore the inside of the jacket. The jacket was fully lined, and had some hefty shoulder pads. Snip, snip . . and they are gone. It was really interesting to see how the lining was attached to the jacket with short pieces of fabric, so it almost “floated” on the inside, anchored by short tethers.
The shape of the shoulders is now softer.


I wanted the slit part the the sleeve to be a little bit “more” than just slits in the sleeve. I began the process by taking the sleeve out. The stitching was easily removed. and the lining cut away using a pinking sheers to help preven raveling.
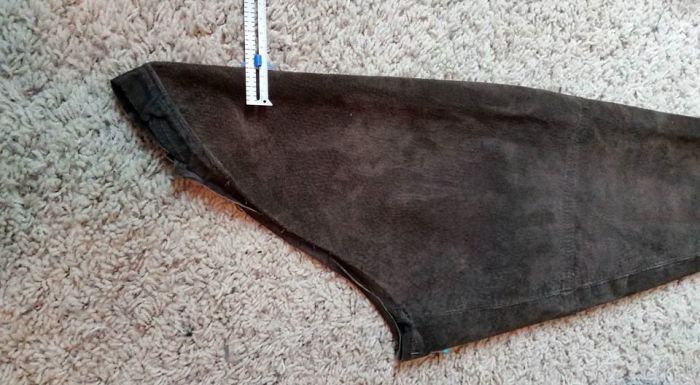
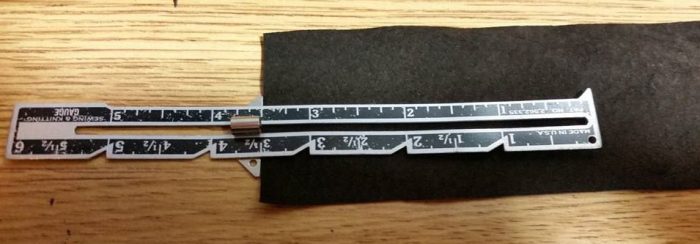
Once the sleeve was removed, I needed to decide how wide the leather between the slits would be. I intended to lengthen all of the strips except for the one under the arm. This one would stay the original length to help hold the sleeve up. I decided that 2″ was a good width for this particular jacket. The first strip was cut on the center of the sleeve. Since it was cut on the fold, the ruler is set to the 1″ mark.
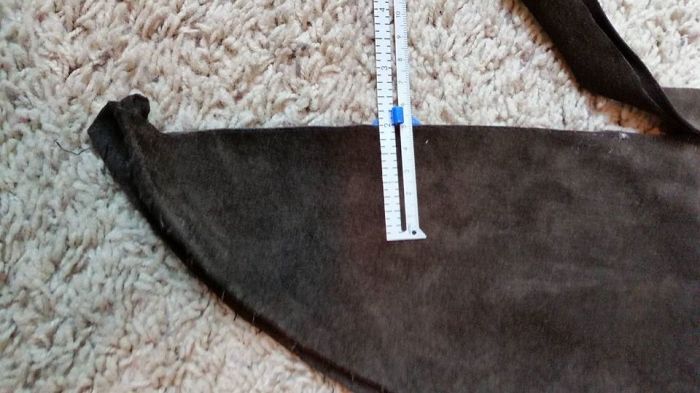
The next strip was cut 2″. This was repeated two more times.
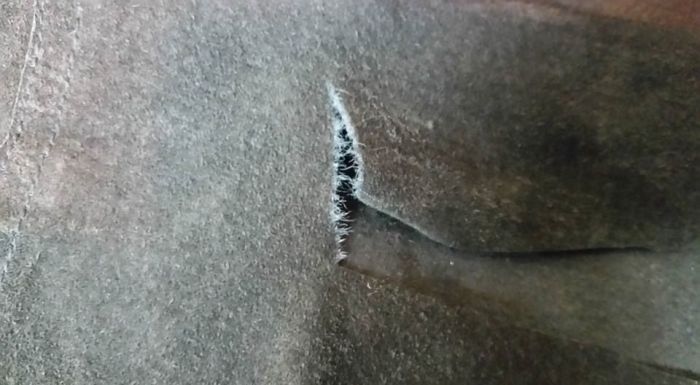
The first thing I did was try and stick my arm in the sleeve, and oops! The leather was much softer than I would have thought. Actually, this was a good time to find that out.
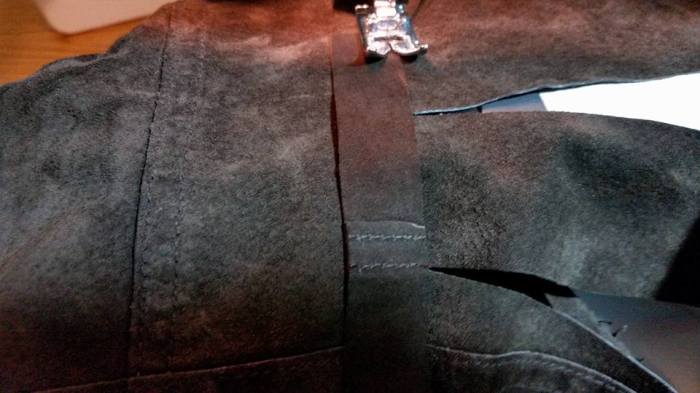
I cut narrow strips of leather from the discarded bottom of the coat and sewed them along the base of the strips. I got this idea from the construcion of the coat itself. The seams are pieces of overlapping leather sewn in parallel lines (you can see them in the upper left corner of this picture). It seemed sturdy and strong, so why not? I stitched along the top and bottom of the strip.
Next I cut 2″ strips from the bottom of the jacket.

I had no clue how much “slack” I wanted in the upper sleeve, and I was a little leery of adding too much after my length error in the mock slit sleeve in my previous project, so, I guessed at 3.5″, which would include the overlap for stitching it into the sleeve strips.
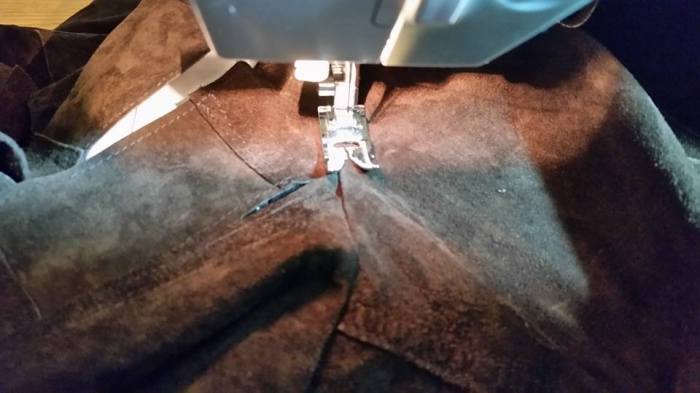
The top of the sleeve had a curved shape that fit the armscye. It seemed to make sense to preserve that shaping. After all, my next step was going to be re-sewing the strips to the jacket. So, I opted to cut the strips a few inches below the shoulder and insert the extra piece. I was a little worried about how this would look because the leather from the back of the jacket was actually quite different from the sleeves. Perhaps from sitting and wear? However, from a distance, at least for this jacket, it doesn’t show. The strips are sewn in with two rows of parallel stitching. If the strip and the insert weren’t quite the same width, they were easily trimmed to match.

Once the inserts were completed. I added a row of supporting stitching along all of the edges. I particularly made a point to stitch down into the reinforcing strip below the slits. The thought being that the strength of the thread would help support the leather. Time will tell if this worked.
After that, I sewed the strips back on to the jacket, following the previous stitching lines. I didn’t even pin them, just added them one after another, taking great care not to skip any strips! The last step was to topstitch the shoulder seam catching the seam allowance so that it was hidden under the jacket, and didn’t poke out the slits.
I had my Dad try the jacket on. We decided the collar needed a little work, and that I could fold the front under and pull some of the fabric out of the front. One thought was to cut the collar off and make a collarless jacket, but I decided to try and make a bigger collar instead.
First I folded both sides of the jacket front under and stitched them in place. The jacket naturally wanted to fold this way. Then I basically just squished the front curve down, and sewed it flat, removing the extra fabric which accommodated the bust. This is by far not perfect or flawless, but, from a bit of distance, it looks fine.

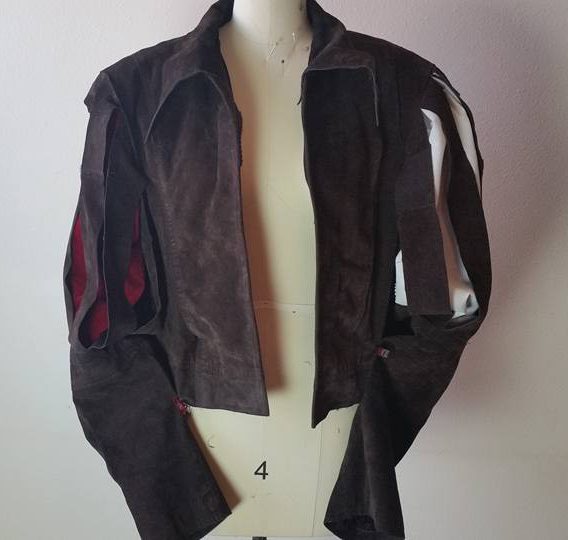
This is where we are now:
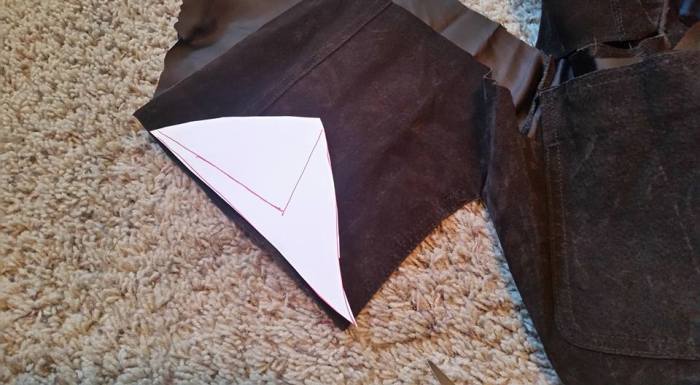
Then, I lay the collar on a piece of paper and drew a pattern.

I cut the collar points out of the jacket bottom, making use of the reinforced edges for body and strength. I made sure to cut one, and then flip the pattern to cut the other.
Originally my thought was to sew the extra collar pieces on under the original collar, but I found that it “disappeared” much better when sewn on the top. The left shows the extra piece under the original collar,the right shows the extra piece over the original collar. I am using litte clips to hold the leather in place since not only do pins make little permanent holes, but they are just about impossible to stick through the leather.

Ready to sew:

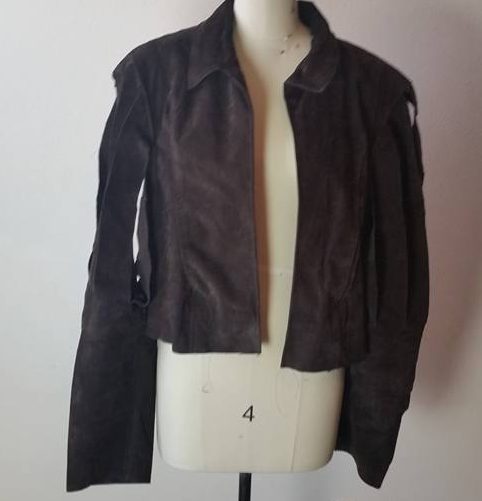
Done! I am showing the jacket with a couple sleeve options. On the left a contrasting color sleeve (cut off of the mock corset from the link below) is shown. On the right, a puff of white fabric was inserted, simlulating a peasant shirt. The sleeves are supported by a couple clips, so that the top hangs a bit loosely. The bottom part of the sleeves may be a bit wide. My intention is that this jacket will be worn over a white shirt, so I think the fullness of the shirt sleeve will help support the jacket sleeve. If you wanted the jacket to be more “stand alone”, you could easily insert a contrasting fabric as was done to make the Rapunzel sleeve.
My thought was that I would just leave the jacket as is. You could add some lacing to the front, or some strips of leather to make a couple velcro closures. I think the open look will be fine for my purpose.
Cost: Jacket: $3.50
Time: About 3 hours.


