Simple Skirt-to-Cape Upcycle
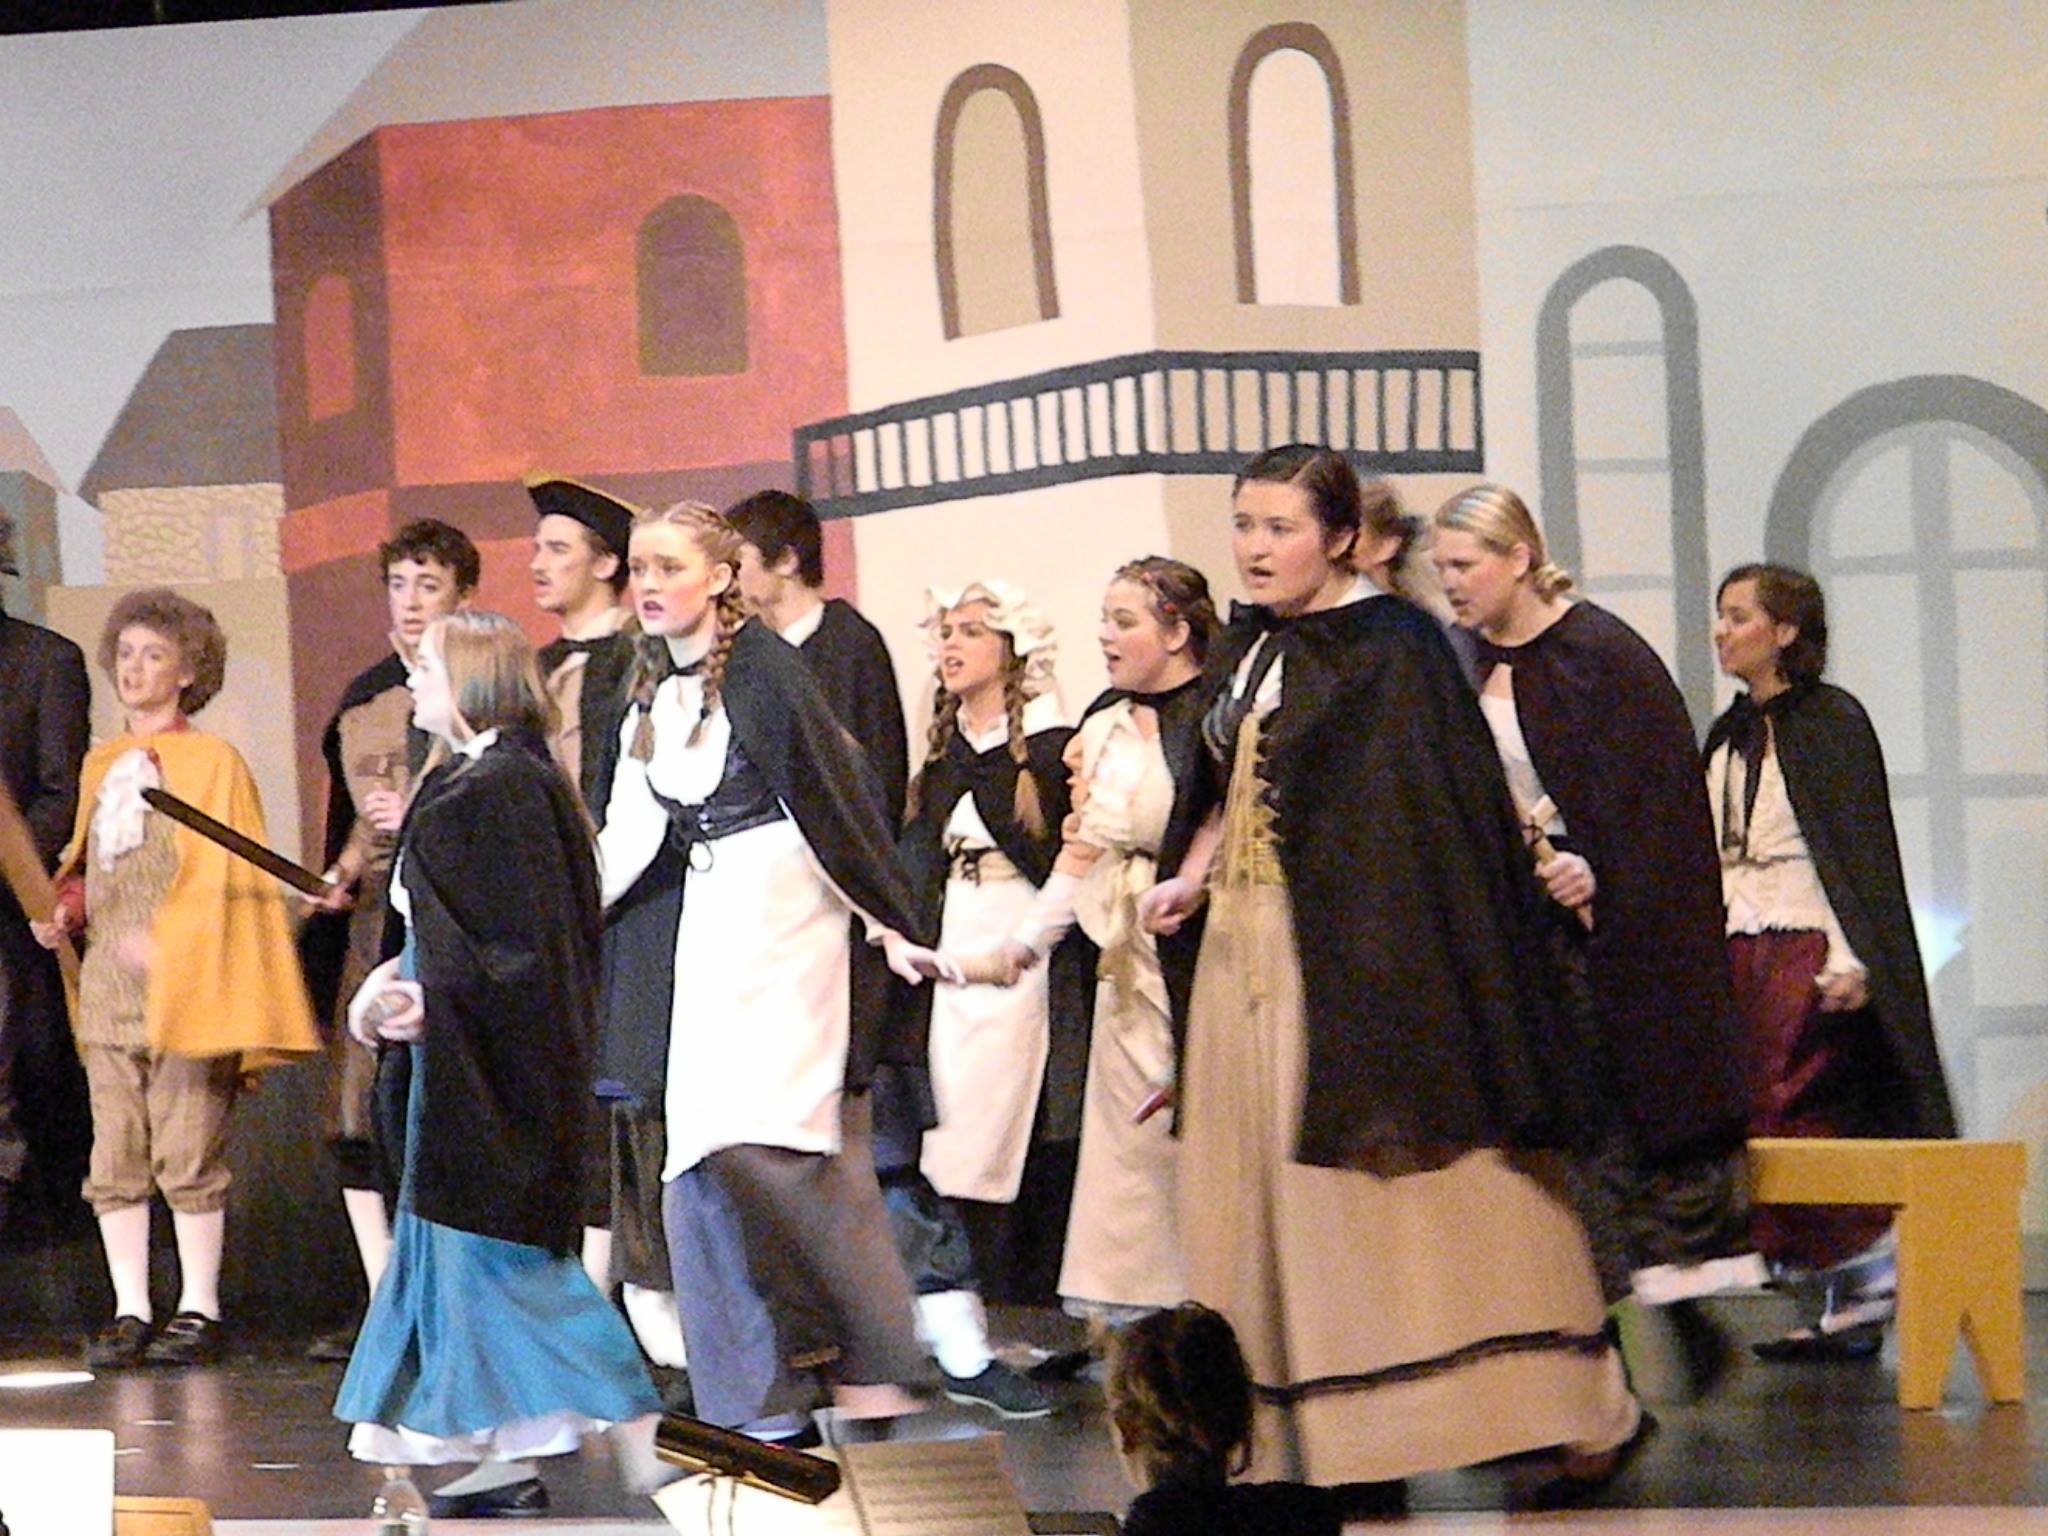
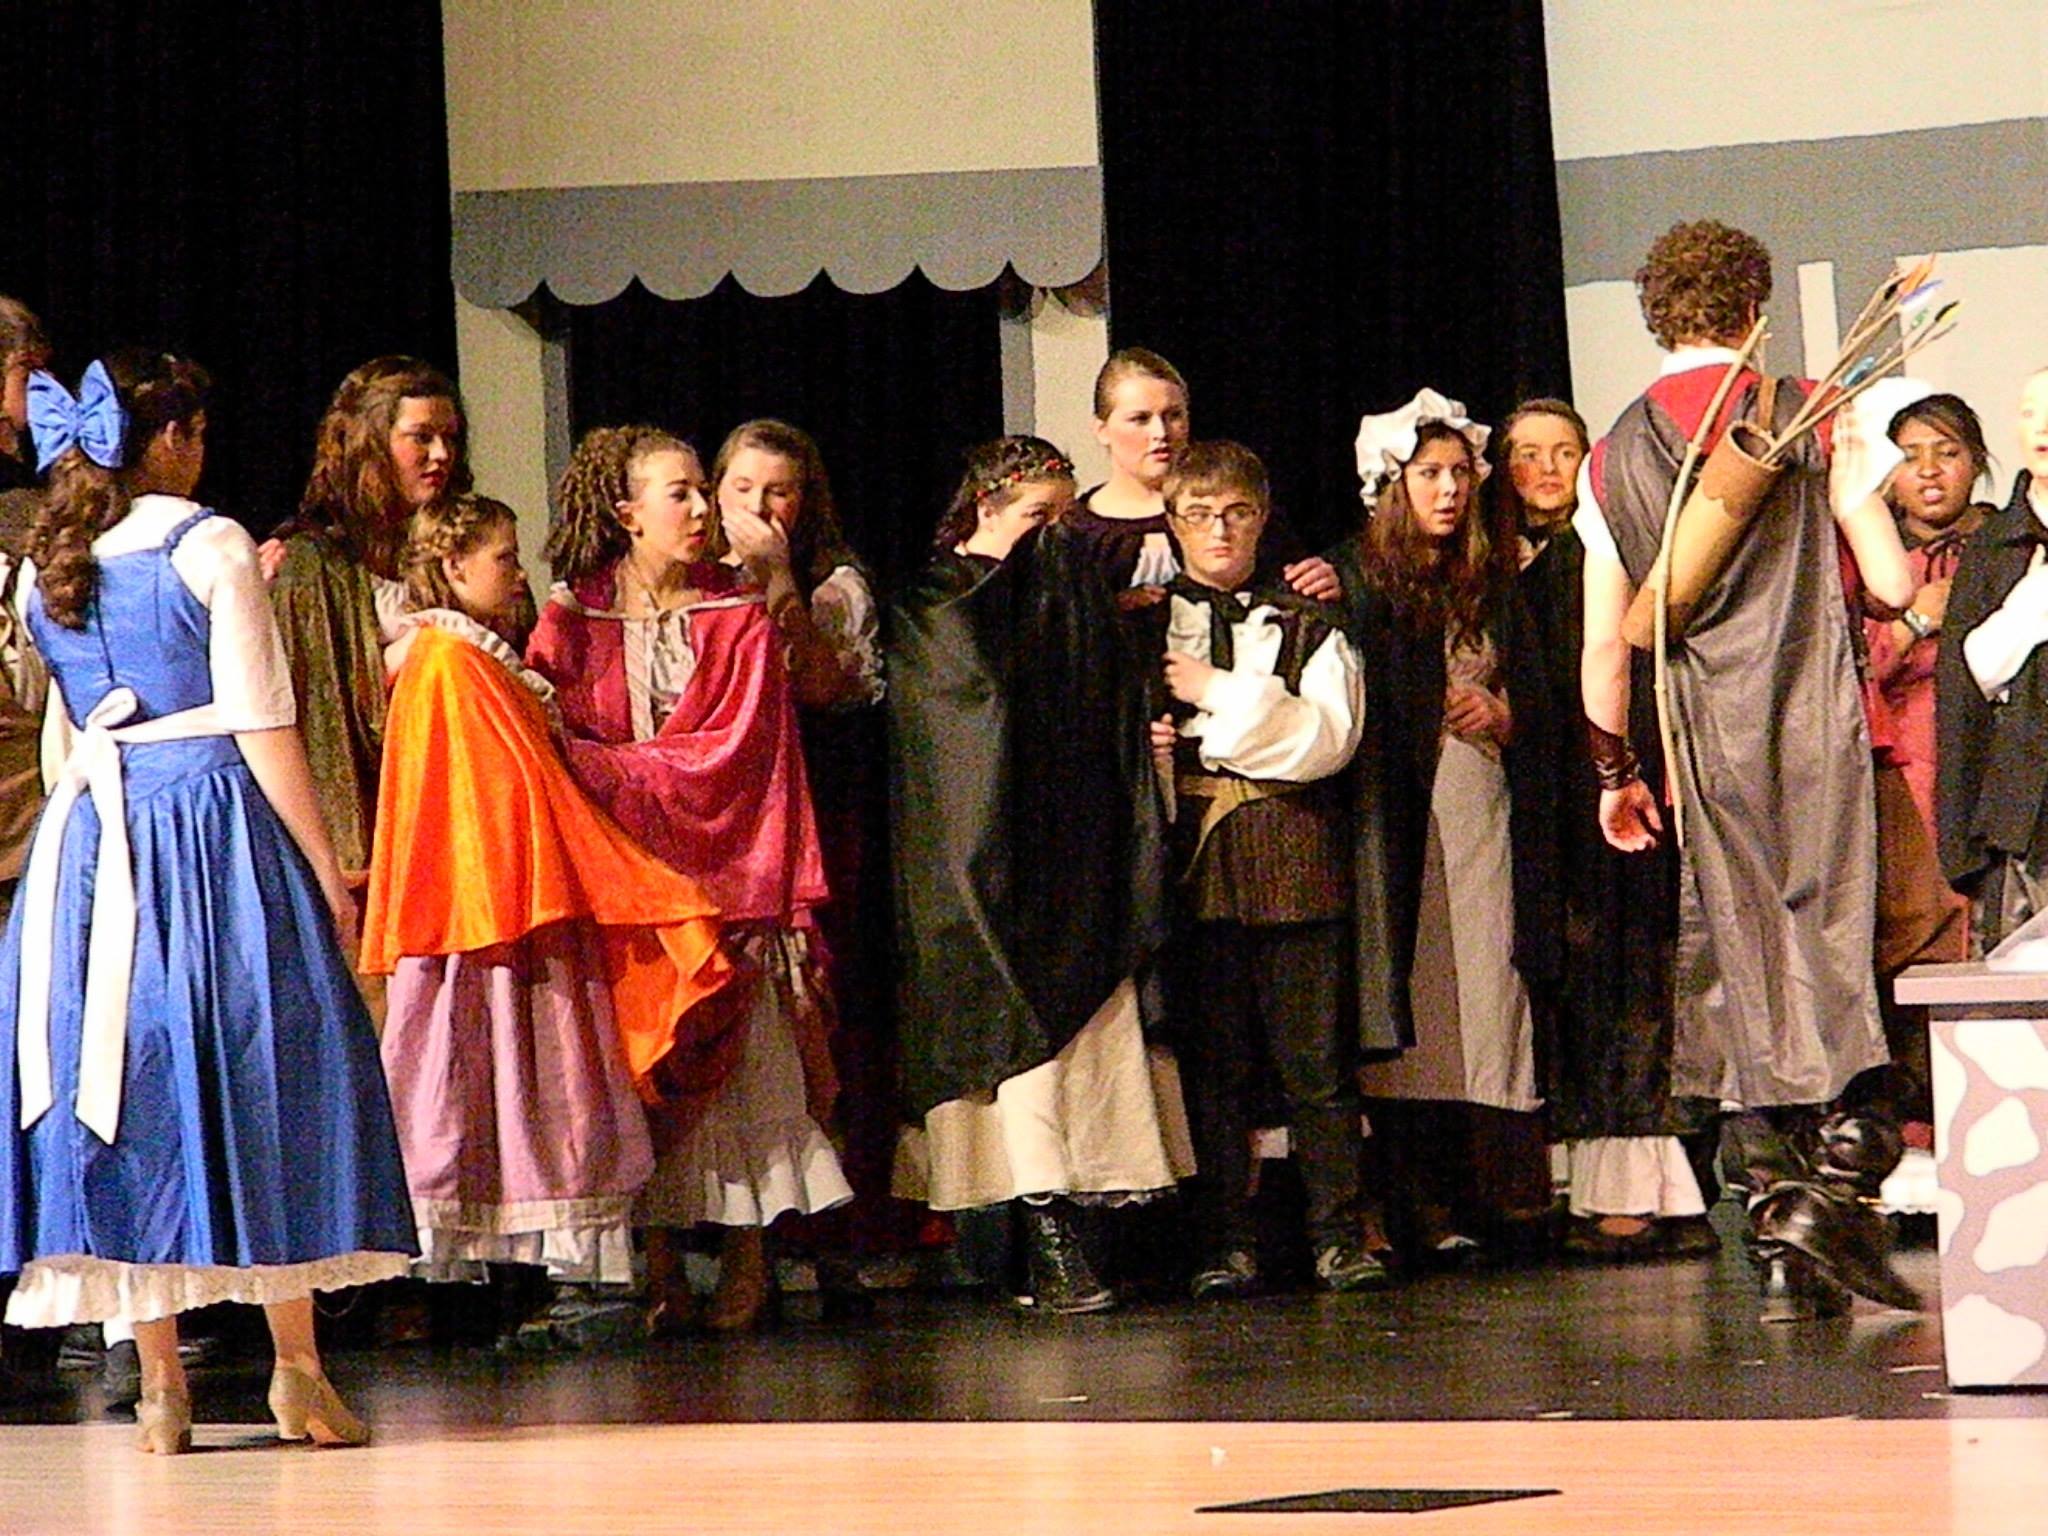
Last year when our High School was doing “Beauty & the Beast” I wanted all of the Villagers to have capes in the Mob Scene . . .it just looks “better”. After going to our local rental shop . . .and coming away with some really nice capes . . and some really cheap-old-Halloween-Vampire capes . . .all renting from $8-12 each . . . I knew I needed to do something different.
I first turned to the Internet and did a lot of looking at cape tutorials . . and found some good ideas for various shapes, sizes, hoods, etc on capes. But, with all of them bottom line is . . .even using a fairly cheap easy-to-sew material like felt . . . . my budget couldn’t handle that.
At some point I got the “AHA” moment, and realized I could easily make capes from skirts . . .even very full, very rich capes if I went with the skirts of formal dresses, for a fraction of the cost, and a fraction of the work of starting from new fabric.
Hence . . the skirt-to-cape upcycle.
This technique is EXTREMELY flexible. I even had the luck of finding matchy-matchy full skirted (with gores!) satin dresses, one in black and one in red, so I was able to make a two color lined cape for a Prince– with a hood since they both came with stoles . .all for about $5.
Obviously, the cost of your cape depends on the cost of the skirt or dress you start with. My cost typically ranges from $0.20 to $10, depending on what Thrift store I go to. Typical skirt prices at a nation-wide chain thrift store in my area tend to be about $3.50 . . . and I try to buy them on 1/2 price days. The skirt I am using cost me $1.69. A local church-run thrift store sells most clothing items for $0.50. You can’t go wrong with that!
What to look for in a skirt? That depends on what you want your finished cape to look like. Want a swingy cape? Look for a very full skirt made with gores (triangle-shaped pieces). Another hint: look for plus size clothes–you get more skirt for your money. Want it really full and shiny? Start with a bridesmaid/formal dress. Don’t want to sew? Look for one made of knit so the fabric edges won’t ravel.
Important upcycling hints: don’t make work for yourself. Cut garments along the seams (or just cut the seams out in many cases), Use existing features in the fabric–don’t cut the waistband off, use it. Don’t cut the zipper out–just close it and ignore it. Use as much of the existing finish work as you can–shorten things from the cut edge side, not the hem.
Enough of that–Let’s make a cape!
The method described below works best with a skirt (not a dress).
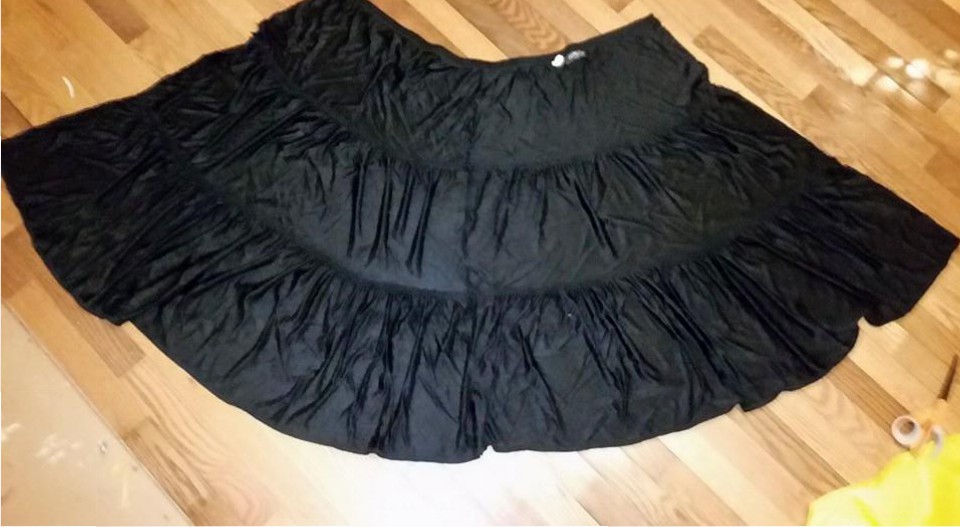
Start with a skirt:

This particular skirt is a size 4, 3 tiered skirt with a sewn in elastic waist. It is a stretch knit with a little sheen. It feels like one of those “packable mix-and-match” ensembles that were popular a few years ago.
The first step is to open the skirt up. I chose to do this along a seam. This does put a seam in the center back. If you don’t like that, cut it up the middle between the seams, and let the seams be on the sides. If you don’t want to cut it along a seam, fold your garment in 1/2 on a flat surface, lining up seams (or other distinguishing landmarks), and then slide your scissors along the fold and cut (first picture). You can see how full the opened flat skirt is.

At this point–if you just want something simple–drape it around your shoulders, pin it shut, and you are done.

This is not a particularly good image–but you can see that the cape sits loosely around the neck, and the front edges are raw. There is a pin holding it shut. This would be a perfectly fine cape for dress-up, or a one time quick costume. At this point you could also glue on emblems or other decorations if desired.
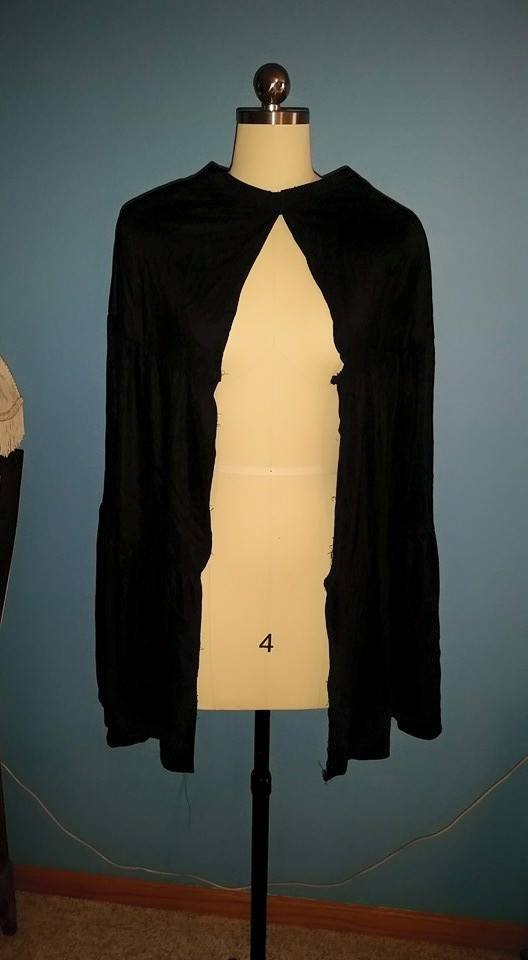
I want this cape to be a bit more fitted around the neck. There are multiple ways to do this–for this particular cape I will use pleats and darts.
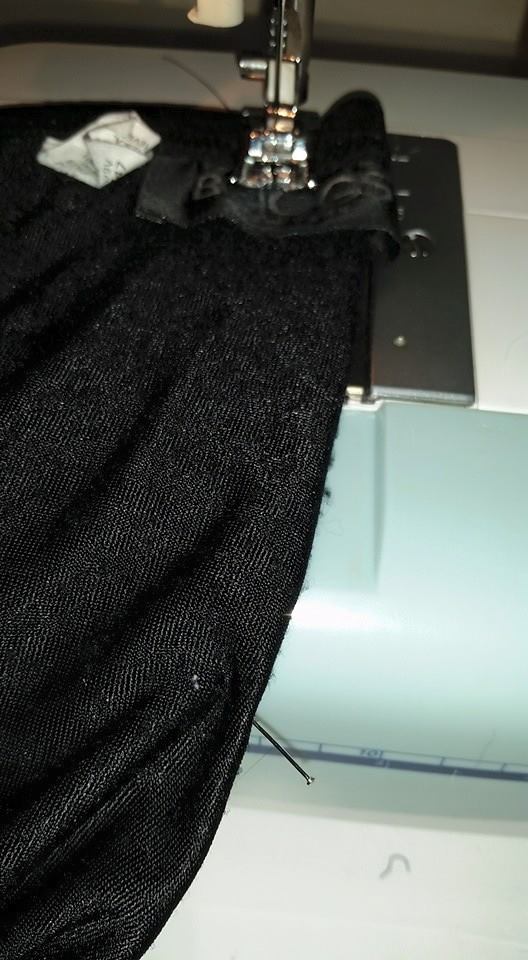
I start in the back and pin in a center back pleat.

Next, I want the shoulders to have more shape. I could do more pleats. but today I will do darts. Darts are basically wedge shapes sewn into the garment to make the opening smaller, and leave fullness in the garment.

You could do this from the outside, and then flip the dart to the inside while you are sewing. I pinned it from the inside to begin with. You can see the short seam from the neckline to the shoulder. Basically the pin at the edge of the shoulder is just showing where I want the dart to end. The second picture shows the dart from the inside.
Now to the sewing machine.
Could you glue this? Probably. I prefer to sew whenever I can. I also won’t glue anything critical. If you use hot glue–I recommend buying a fabric version that will stay flexible. You can also try a fabric glue like Fabri-Tac. Either way, I would suggest using clamps or metal binding clips to hold the fabrics together and squish the glue into the fibers until it dries. Safety Pins? Probably. If you just want to pin things, I suggest buying quality name brand pins. I also would suggest gluing them shut and possibly gluing felt (or something) over them. If you use hot glue, remember you can wash the garment on cold and hang dry . but not put in the dryer. Other glues–follow manufacturers directions.
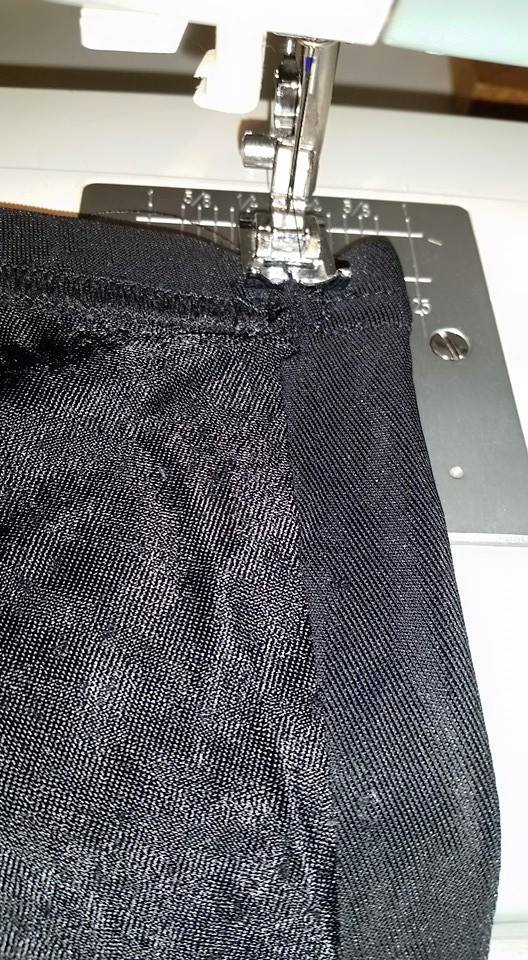
This picture shows sewing across the back pleats. I am using a large zig zag stitch since this neckline will be fairly stretchy, both because of the elastic and the stretch fabric. Remember to back-stitch whenever you start and stop.

Next: Sew in the darts. These don’t have to be perfect, or perfectly even. Start at the edge, and aim for the pin marking the shoulder width, and sew off the fabric.
 ]
]
Next, I decided that for this cape I wanted to turn the front opening edges in and make a “hem” along the front edges. This gives a little extra added weight to the front of the cape, and I think helps it hang better. This is strictly optional for a non-raveling fabric. For a woven, like a cotton blend, denim, or satin you need to do this (or some other edge finish) to prevent raveling.
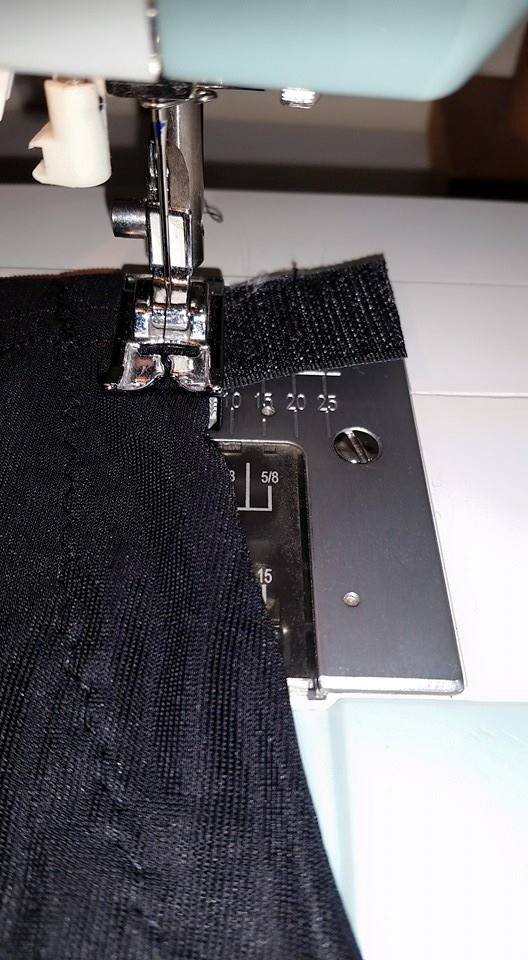
I decided to close this cape with velcro. You could also use a button & buttonhole, a button and loop, ties, or any other creative thing you can think of. I am going to make this so the front edges come together evenly in the front.
I start by sewing the “soft” side of the velcro to the underside of one side of the cape at the neckline (so it faces the body)
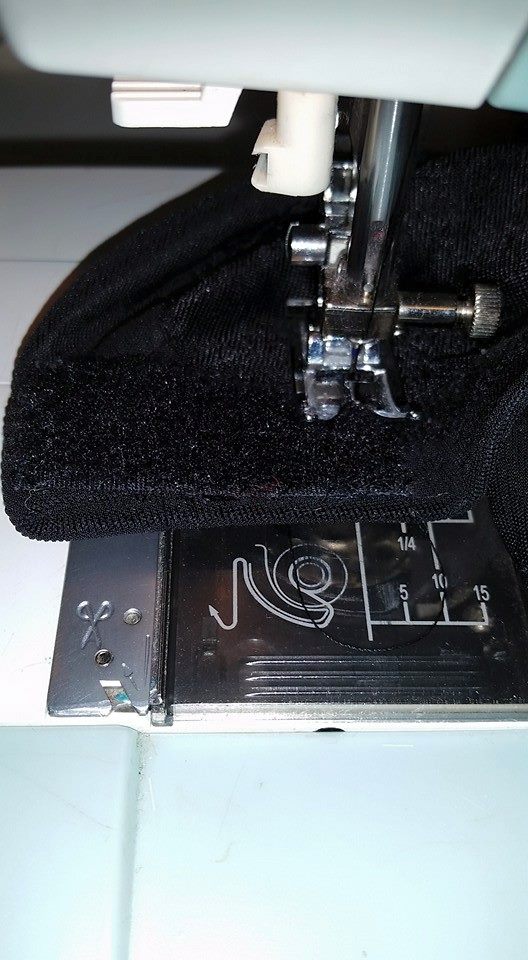
The “hard” side I sewed facing away from the body, making a “tab” that will attach to the soft velcro.
Now . . . trim any threads, try it on . .and if you like it, you are done! If you don’t like the way it fits, take out the back pleats or the darts and try again.
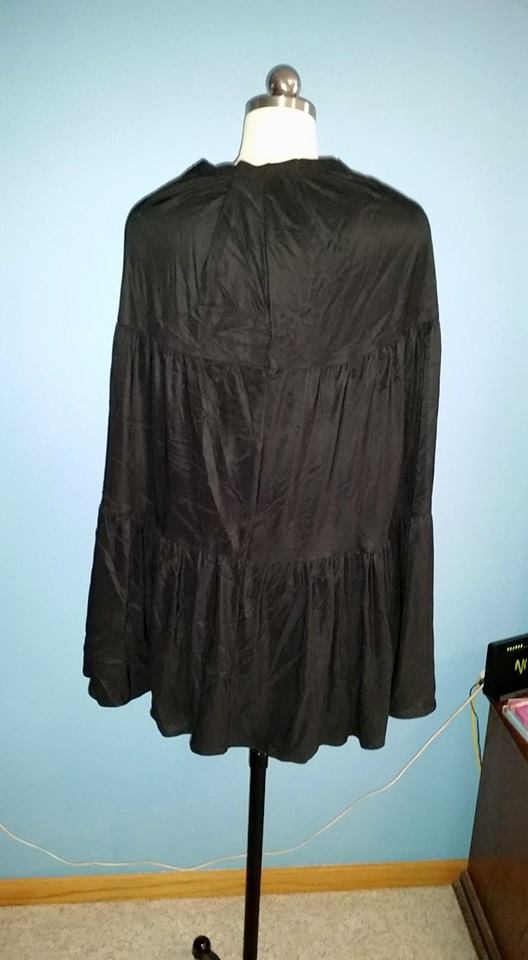
I really like the way the gathered tiers on this cape look. It has a Victorian Capelet look . . perfect for Steampunk, Dickens, Civil War era type costumes.
It took me about 15″ time to make this cape from start to finish (including the pictures), and cost less than $2.
Capes in the Mob Scene of “Beauty & the Beast”:


Pingback: “Cinderella” (Broadway Version): Dressing Marie & the Fairy Godmother | costumecrazed