If you’ve been reading my blog, you know that I helped a friend out with some costumes on late notice for a high school production of “Young Frankenstein”. One of the “quick and dirty” costumes I made for her (think less than 2 hours total) was the costume for the Monster. I don’t have a ton of pictures because I was in accelerated-costume-making mode, but, I can give you an idea of what I did.
I began with the largest suit jacket that I could find. I think I had a 54, or a 54L. The cast member was a tall, muscular guy to begin with, and I wanted the shoulders to be larger than his to give him a bulky silhouette. The jacket I found was black, and I think a brown or a tweed would be a better look, but, I had one morning to go thrifting and two small stores to look at, so he got what he got–I was just thrilled to find one that big on short notice.
I considered adding the extra bulk to the jacket, however, the Monster changes into a tux for the “Puttin’ on the Ritz” scene, and so I thought it would be better to have it built into a shirt so it could stay on him through the costume change. I found a t-shirt that I thought could work for his “everyday” shirt (if he didn’t already have something to wear). I wanted a knit because that would be easier to fit the padding into.
I began by cutting a slit down the back of the shirt and adding a hook and loop tape closure at the top. I did this so that he could easily take it on and off without disturbing his hair/makeup/wig. Next, I constructed the shoulder pads. At first I just sewed in some old pads I had removed from something else.
That worked just fine, but it didn’t give the lift to the jacket like I wanted it to. I found some old stiff padding (that had been removed from a crib bumper pad) and stacked two pieces together. I used an old slip, and encased the padding in an envelope of tricot. (Thats some great sewing, isn’t it?)
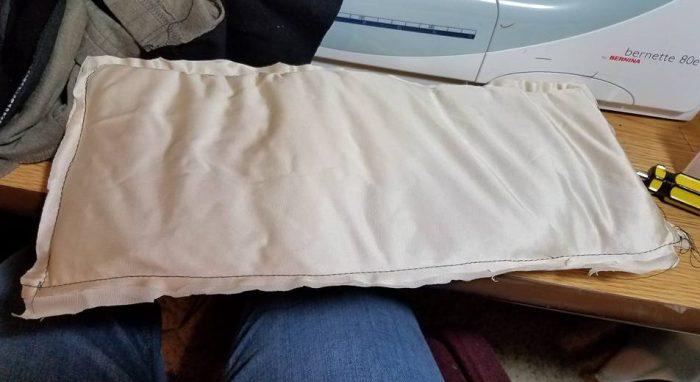
The slippery fabric would make it easier for him to get the shirt on and off. The shoulders were quite bulky now, and I thought it might be too tight under the arms. I slit the underarm seam, and added a wedge of scrap knit. I didn’t care about the color as it would never show.


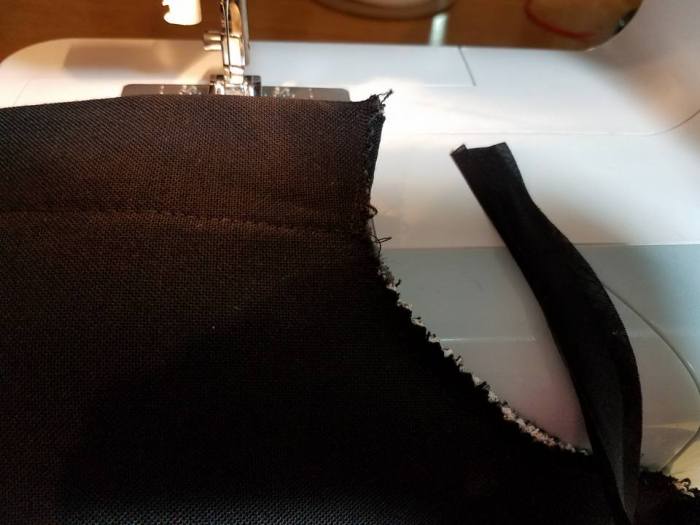
Adding a wedge like this is easier than it looks. I cut a rectangle of the scrap black fabric, making sure it was longer than the slit I had cut in the underarm seam. I lined up the edges on the armhole part of the sleeve. Then I stitched the two together, roughly angling the line of stitching toward the middle of my rectangle. Then I took it out from the machine, flipped the piece over, and stitched the other side down, again, angling toward the center. Once done, I trimmed away the excess black fabric. All that was needed was to hand stitch the extra padding in place, and the undershirt was done.
On to the jacket:
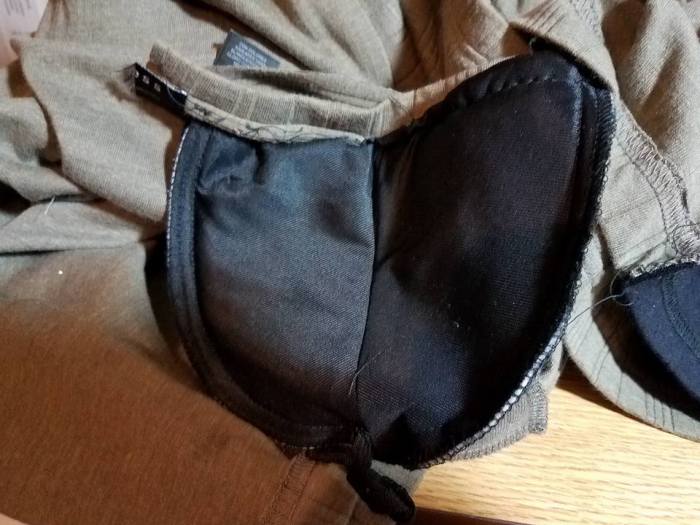
I began by cutting the collar off the jacket. I clipped/pinned the jacket and the lining together, and stay-stitched around the neck opening.
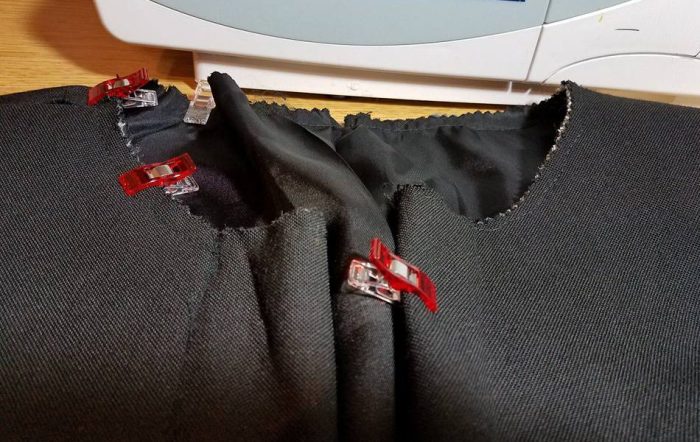
I folded the two front lapels to the inside, and stitched them down. This made a simple open front jacket.


I finished by binding the neck with some black bias tape, and stitched the pockets closed (with the flaps to the inside).
I then distressed the jacket (similar to how I did the zombie jackets ). I used the saw to distress the ends of the sleeves, and various parts of the jackets, and then I “dirtied” it with some acrylic paints. I didn’t do too much because this wasn’t “my” show so I didn’t really know their vision for the Monster . . . and I figured it was easier to add more distressing/dirt than to wish it wasn’t there. I also didn’t know what their stage lighting would be like, or if what I had done would show at all. I think the jacket probably could have used a little more light paint to make it look dirtier. I also think some patches might have helped–but this was “good enough”.

Notice how the shoulder pads make his neck look short. They also pull the jacket up so that the sleeves are a bit short. I think both of these add to his “presence” on stage.
I made a quick pair of pants using a pattern for scrub pants with a drawstring waist. I cut the pants longer than the pattern. I thought we would hem them, but they liked the look of the longer pants, so they were left as is. I felt a little bad for the Monster–I made these pants out of wool–it was the only piece of fabric I had in the right colors that was large enough. They were a little itchy (and probably a bit warm).

I really don’t care for the look of the knit t-shirt. The color is OK, but the hem edge is too smooth. If it had been longer, distressing the bottom might have helped. I would have preferred a linen-looking tunic top and maybe a rope belt. I’ve seen some pictures with a ratty looking stock, and I think that is a nice look.
Puttin’ on the Ritz:
If you are doing this show–this is a VERY fast costume change. You will need to plan ahead, especially if you are using the large boots, as they don’t slip on and off. You will probably need to have a pair of side-opening pants. Either the tux pants will be quickly snapped on over the peasant pants, or the peasant pants can have snaps/magnets/hook and loop tape to be quickly removed.
The tux shirt will likely need to be all-inclusive with the bow tie and (if used) vest/cummerbund. It can either be back split, or close down the front with something other than buttons. I read a description once where the costumer used a metal headband in the collar to support a back-split shirt. I haven’t tried it, but the idea would seem to work. Cuffs can also slow you down, I would suggest that the sleeves could be eliminated and mock cuffs attached to the bottom of the jacket sleeves. Alternatively, I have replaced cuff buttons with hook & loop tape, or used elastic through the buttonhole so that the cuff can be slipped on.
I would suggest a minimum of three dressers, four would be ideal–one to hold the new shirt ready, the second to pull the shirt closed and fasten it, and then, depending on whether your shirt is back or front closing, one of them would then help put the tux jacket on, while the other would hand the actor the tophat and cane. The other two dressers can be on either side to fasten the legs (if putting tux pants on), or to remove the peasant pants (revealing the tux pants). If stacking double pants, that could be staged during Intermission so they don’t have to be worn for the whole show.


