And here we are . . . on the last of seven variations on a theme. This post is a little sketchy–so if this is the first one you are reading, and it seems like I am skipping a few steps, I suggest you could look at the previous posts in this series. Not only is this the seventh variation on a theme, it also my least favorite outfit. However, I think it is worth talking about what didn’t work, because I sometimes learn more from the mistakes I make than the successes. There really isn’t anything wrong with the outfit, I just think it looks like I tried too hard.
As with several of the other costumes, I began with a circle tablecloth.
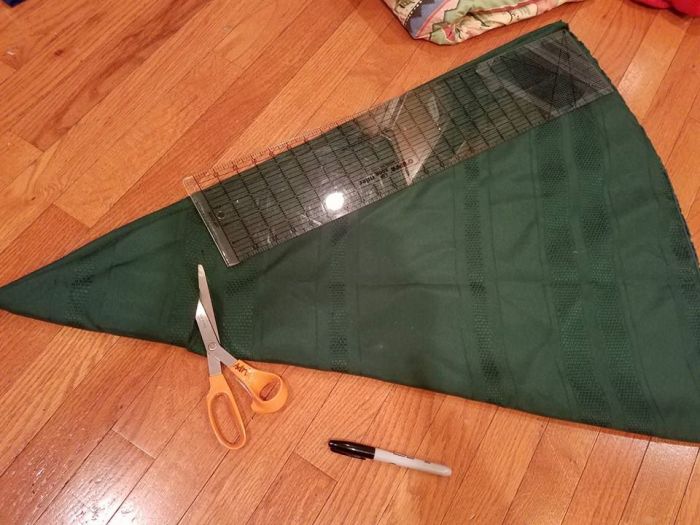
I decided how long I wanted the green section, and then marked the cutting line at the top, and trimmed off the inner point area. (At this point the tablecloth is folded (carefully) in 1/8’s). The tablecloth is very plain, and I wanted to reflect the border print on the Young Frankenstein: Peasant Girl #1 dress, so I found a piece of lightweight patterned upholstery fabric. I didn’t want to deal with a hem, so I opted to put a strip of the red knit I had used for Young Frankenstein: Peasant Girl #2 and Young Frankenstein: Peasant Girl #4, with circle skirt musings, and then used the same black braid I had used on the #2 skirt. (See the #4 post for a description of how I cut the strips).

Using the same fabric and trims in different outfits helps to give a cohesive look to a group of cast members. I am not a fan of extremely matchy-matchy outfits, instead opting for variations on a theme, and using some common design features like color, trim, style, etc. I chose to make the waistband out of the red fabric because I thought I was going to make the waist corset red. However, I didn’t, so that decision rather backfired. Instead, at the time, it seemed like a good idea to make it out of the same fabric as the border. I used premade button-loops for the lacing. The red is a rattail cord. The waist corset was spliced together in multiple places (about every 4″) as I had to cut it out of the left-over scraps from cutting the border. That turned out fairly well, and you can’t tell how spliced it is.


The blouse began with a plain white top:


The top is a soft knit. It has elastic around the neckline and sleeves. I think it would work as a “good enough” top without upgrading.

However where is the fun in not upgrading? So, I added some wide lace and green ric-rac.

I made an apron out of a piece of bedskirt.

And the outfit was done:


The stretchy neckline allows it to be worn on or off the shoulders.


So what don’t I like:
- I don’t like the bright red along the bottom. I think this is WAY too distracting and pulls your eye to the bottom of the dress. I think a darker color would have been better.
- I also don’t like the waist corset. The pattern is fine, but the lacing gets lost.
- I think there is too much white between the blouse and the apron.
- I like the idea of the patterned fabric as a “border”, but, this fabric sort of muddies when seen from a distance.
- The red casing a the top of the skirt was a big mistake. While the costume is not being worn, I am able to tuck it up under the waist corset and keep it in place. This doesn’t work as well when it is being worn, and the red likes to peek out.
Would I have liked it better with a red waist corset? Perhaps. It might have helped to make the bottom of the skirt less distracting.
At any rate . . . there you have it. Seven variations on a theme . . finished over the span of 24 hours (with some time out for sleeping).
I’m hoping to get some pictures of the Monster so I can show you want I did for that. In my rush, I took pictures of the process . . . but forgot the finished costume.


Clever additions to jazz up the outfit!
LikeLike