I had a friend contact me looking for 1800-ish historical looking nightwear for a production she was costuming in two weeks. I didn’t happen to have any in my “stash”, or at school, and it was two days before Thanksgiving, so I my response was “Sorry, I can’t help”. Of course . . . making costumes is more fun than cleaning (and I was ALMOST ready for my kids to come home), and the project tickled my brain . . . I couldn’t resist the temptation to do a little sewing.
In her original email, my friend indicated that the characters would be wearing nightgowns and robes. Since I really wasn’t planning on doing any sewing, my first brainstorming considered what would be “good enough”–in other words–what did she have on hand that might work in lieu of actual nightgowns? Since the nightgowns would be covered by the robes, I thought that pretty much anything light-colored and fairly plain could work for a faux-nightgown–petticoat, high-necked blouse, 1970’s dress, etc. For the robe, I imagined a simple robe could be made out of a long-sleeved flannel nightgown by simply slitting it up in the center front and adding a sash. A simple shawl might also be an option. I really think that the key to taking a so-so costume from “good enough to “great” might be adding a nightcap of some sort. As with many historical costumes–layers and head wear can make a huge difference.
But, let’s say you wanted to go ahead and make a few nightgowns–especially if you were going with the shawl-as-a-robe option. How could you do that quickly and inexpensively? The most time-consuming part of the making the project from scratch would be the bodice, so that is the place to start with the upcycle.
Nightgown #1: Sleeveless blouse
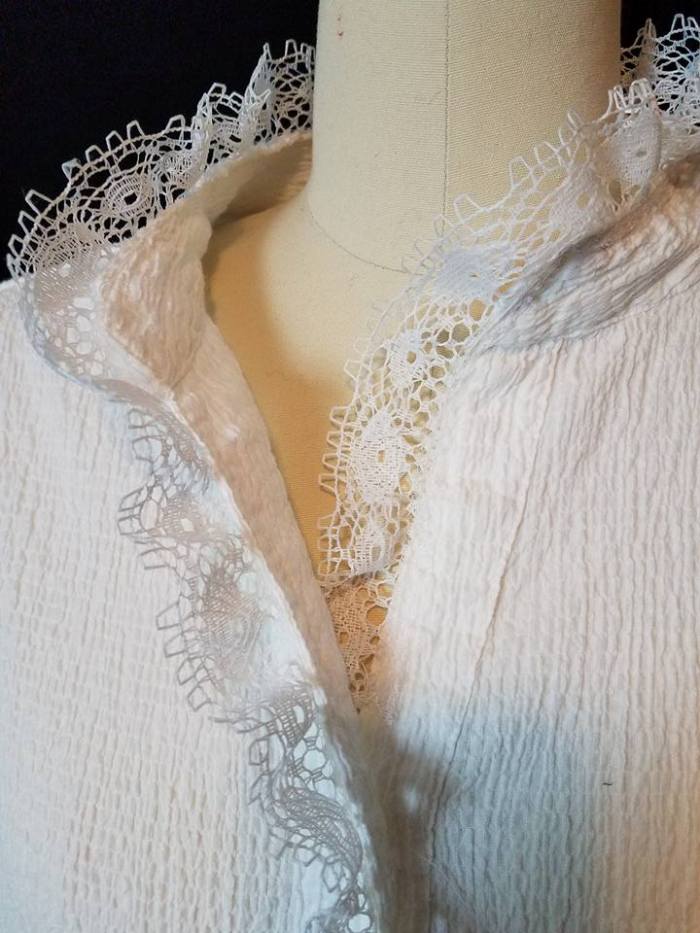
I began the first nightgown with a sleeveless blouse.

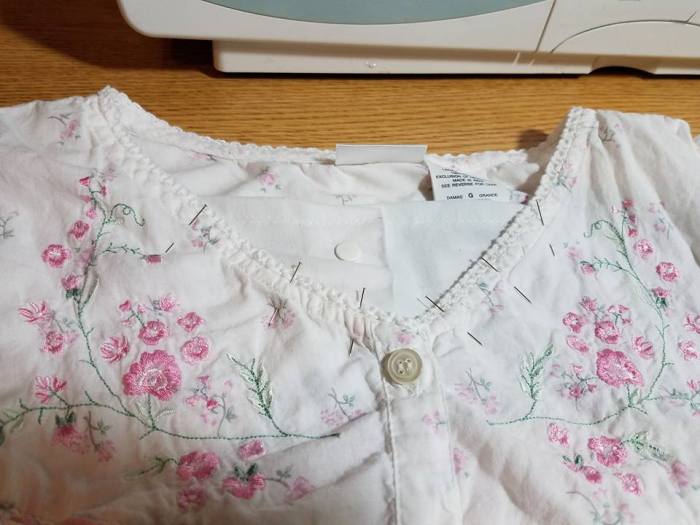
The prep for this included cutting the collar off and cutting the bottom of the top off.


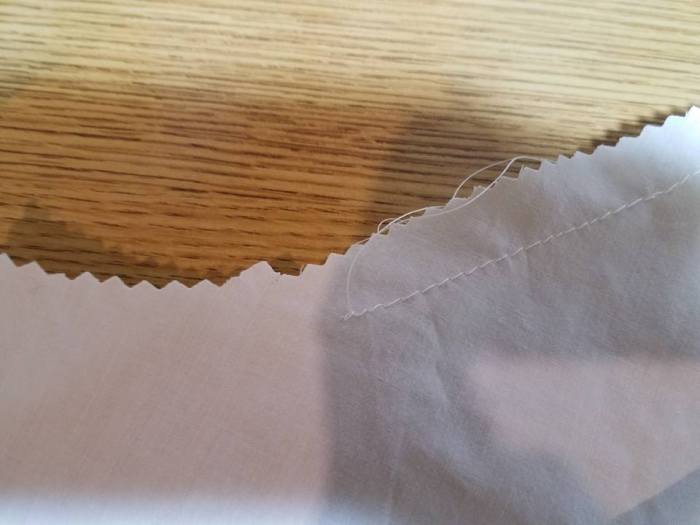
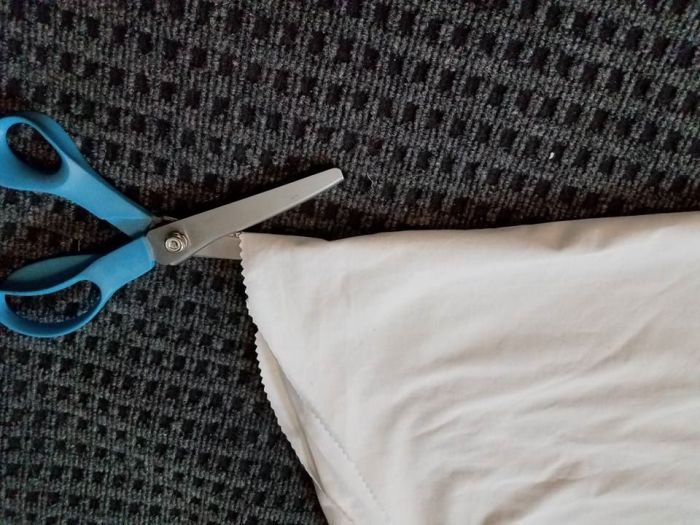
I used a pinking shears to cut the collar off the band since I was planning on adding lace to the collar. If I wasn’t, I would use a regular scissors. The most important part is to keep the stitching on the band intact. I originally intended to cut the blouse off along the seam under the bust. However, this line was actually curved, so I elected to cut the shirt straight across.
I embellished the front placket and the collar with some pre-ruffled lace.


I stitched the center front together at the plackets to make it easier to (eventually) attach the skirt.

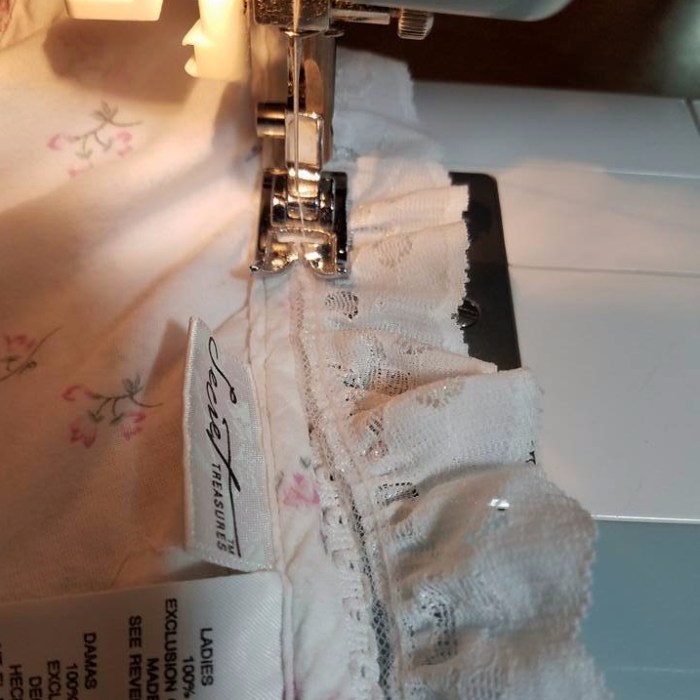
I cut some sleeves out of a piece of old sheet. I used a basic sleeve pattern, and cut it for a long sleeve.

I decided to put elastic at the end of the sleeve. I first added some eyelet on the bottom edge because it is easier to put it on when it is flat.

I used bias tape for a casing. I end the tape at the seam allowance so that I can sew the underarm seam and then pull the elastic through. For this project I measured up 5″. If you can line the fabric up on some marking on your machine, that will make it easier to keep the casing straight and you can skip pinning.


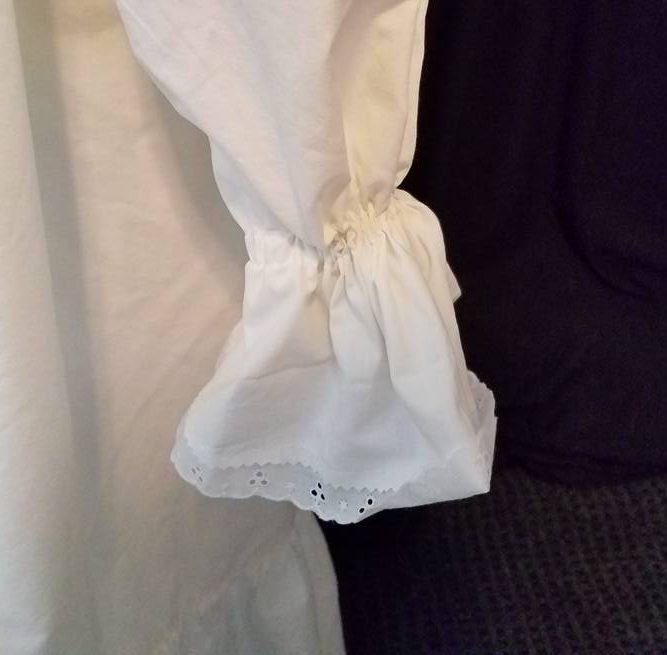
For this nightgown I decided to make a gathered sleeve. I ran a row of large stitches to make the gathering thread. I only used one row because this was not a very full sleeve, and it was just a nightgown. (Running one gathering thread runs the risk that if you break it . . . you are screwed. A second gathering thread makes a nicer gather and is also “insurance”).
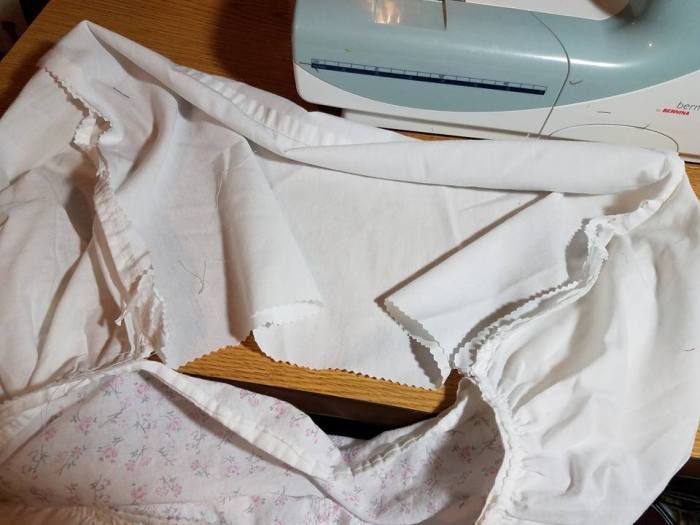
The sleeves insert into the armscye and are topstitched in place.


The skirt will be made out of a white bedskirt. I intended to use the bedskirt for all three nightgowns. To begin, I cut the “foot” end of the ruffle off the bedskirt. This piece would be the ruffle for one gown. The bedskirt would be divided in half lengthwise for the other two. It would seem logical that you could just measure and then tear down the length of the bedskirt. However, experience has taught me (the hard way), that linens, especially cheap ones like the middle of a bedskirt, are more likely than not to be off-grain. Therefore, to divide the bedskirt in half, I carefully fold it (lining up the edge of the ruffle and the ruffle seam), and then cut the bedskirt in half along the fold. It may not be perfectly on grain, but at least it will all be the same length.
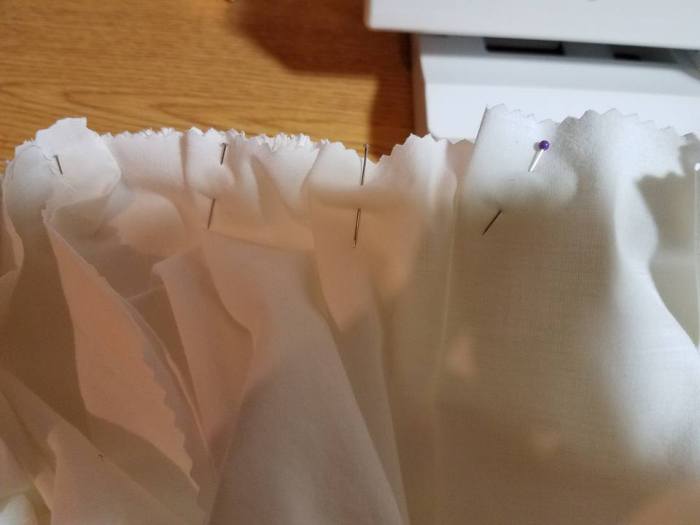
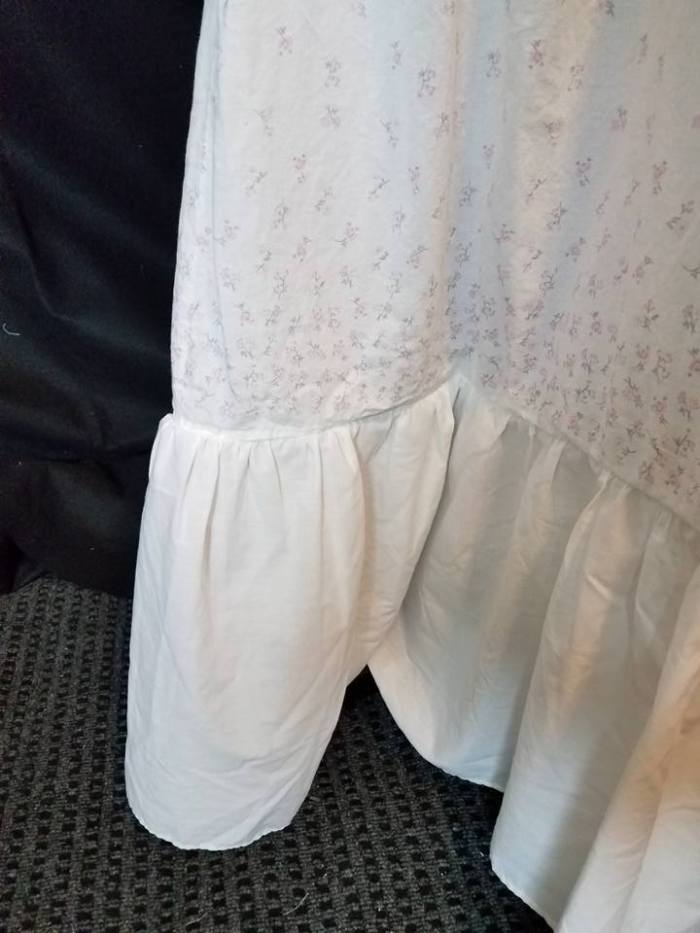
Next step was to sew one half of the bedskirt into a tube. I start at the hem edge, because if it isn’t quite even, I would rather deal with it in the seam than at the hem. Once that was done, I pleated the tube on to the bodice.
And, Nightgown #1 was done.


Depending on the use, it might need a bit of hook & loop tape or a snap at the neckline.
Nightgown #2
Nightgown #2 began with an old snap front long-sleeved scrub jacket.
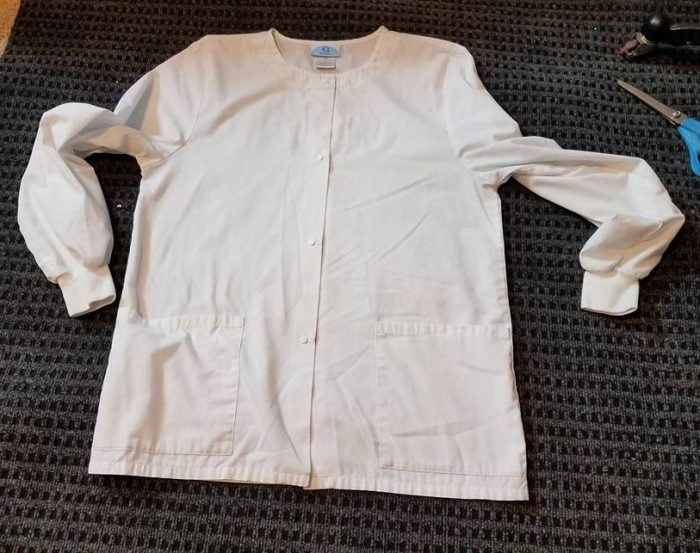
I began by cutting from one side to the center of the jacket. Then I folded that flap over to make the pattern for the 2nd side.


I added some pre-ruffled lace to the neckline and front.
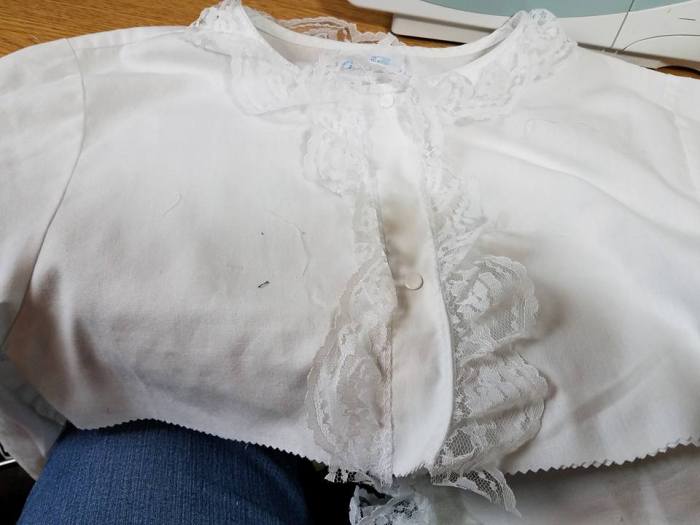
Lace also went around the edge of the knit cuffs. The cuffs were stretched while the lace was zig-zagged in place.


A little lace to the edge of the bedskirt (do you recognize this? It is the lace from that roll of 400 yards I bought a while back).

Then repeat the skirt making process from Nightgown #1 and it is done.


Nightgown #3:
Nightgown #3 began with, don’t fall over in shock, a nightgown. It was sleeveless and did not have a ruffle at the bottom.
I wanted to fill in the neckline, so I used the discarded bottom of the lab coat since it already had snaps. I cut out a rectangle, pinned it in place, stitched it in, and trimmed off the excess.


A little lace for trim:
Next I made some sleeves as I did for nightgown #1. The only difference was the cuff edge. I cut these utilizing the hem of the sheet, thinking I would run a row of stitching and make a self-fabric casing. That was a good plan, except, when I got to that point, the hem edge was worn and fraying in places. I made a row of stitching about 1/8″ from the edge, and then ran a second row parallel to make the casing.


Sleeves inserted with pleats this time:


My plan was to trim the bottom of the nightgown with the “foot” ruffle from the bedskirt. My original thought had been that I would sew the foot-ruffle on as far as it would go, and then finish with part of one of the “halves”. After I did the first nightgown, I didn’t think it was any too full, so I was reluctant to cut a chunk off, as that would make nightgown #2 have a narrower skirt (especially as the amount I needed was larger than I had eyeballed it to be). Instead, I picked up the remaining piece of scrub jacket back and as luck would have it, the back piece was about the perfect length to match my ruffle–and it was pre-hemmed already.
I squish gathered it in place–after all, this is the bottom of a costume nightgown, perfectly even gathers don’t matter. You can’t even tell the difference in the fabric.
And, Nightgown #3 was done.


This really was a fun project. The nightgowns went together very quickly–I think I only spent 2-3 hours on all three, and that included taking pictures AND video. They were very inexpensive. In lieu of a bedskirt, you could use a sheet or any other cheap piece of fabric. Mine had bottom ruffles, but they certainly don’t need that.
I have two of the videos done: Nightgown #1 and Nightgown #2 .
I think this same technique could be used to make historical looking dresses. They would be very adaptable for different sizes and body types, and could be “shaped” using a pinafore, apron, belt, long vest, etc. But, that’s a project for another day!


