This post is about an “Anna” inspired costume I created last fall. I made this costume in about 8 hours over the course of two days. I was lucky enough to have the base dresses & trims in my “stash”. Most of the time came from cutting out and ironing on the dress “embroidery” designs.
Unfortunately, I didn’t take “before” pictures . . but this will give you an idea . . . and hopefully inspire you to create your own upcycled costume.
Start: Blue “bubble skirt” satin dress with puffy sleeves (very 80’s), a long empire waist burgundy bridesmaid dress, a blue & white pinstripe mans shirt; additional trim: blue gimp (from a friend), burgundy fringe (from a Thrift shop), heat press glitter (scraps from a local screenprinter); additional fabric: black “stuff” left from a local manufacturer (awesome stuff, it lines something they make and a friend who works there buys the end bolts for me–has a velveteen type texture, washes, does not fray, does not stretch–LOVE IT!)
THE SHIRT:
Cut off the collar close to the neck-band. Sew trim around the neck, and around the sleeves. DONE.

THE DRESS:
The original dress had a bubble skirt–so the front was sewn to the lining, with a layer of petticoat net in between to make it “poof”. I cut the dress apart at the hem seam between the front & the back. I pressed both layers, trimmed the front skirt to the desired length + hem, and hemmed them both.
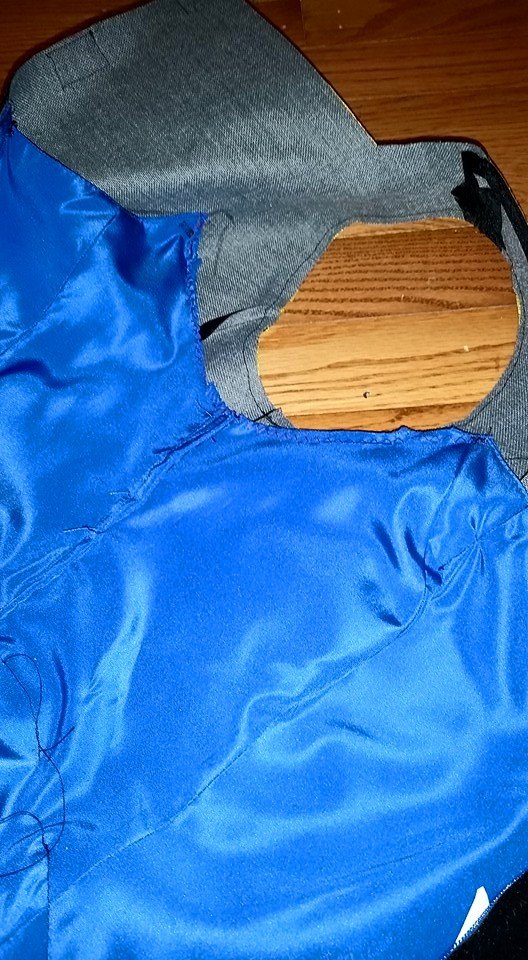
Next, I cut off the sleeves and zig-zagged the raw edges of the bodice front & lining together. This particular dress was one of those where the sleeve edge was elastic and made the shoulder strap . . so when I cut them off, there were no straps left on the dress.
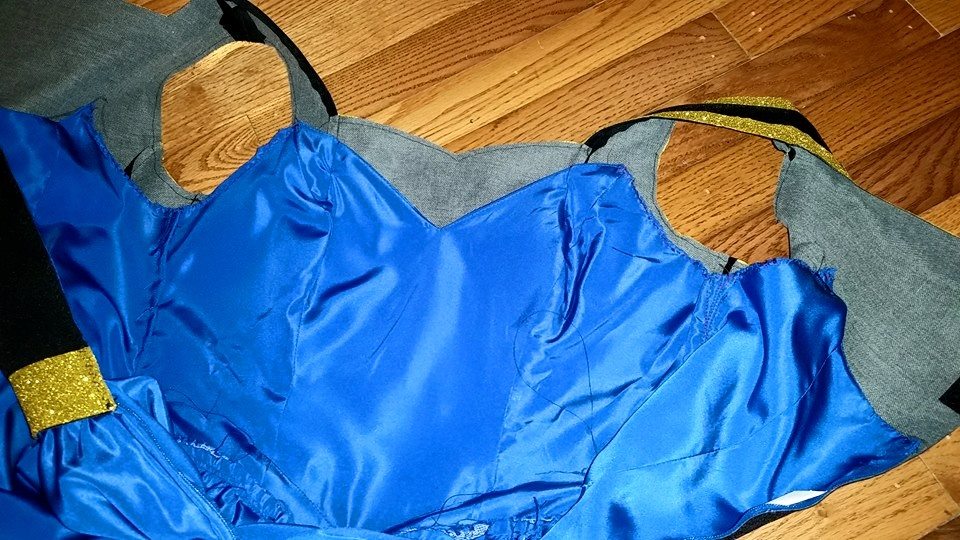
View of dress with sleeves cut off.
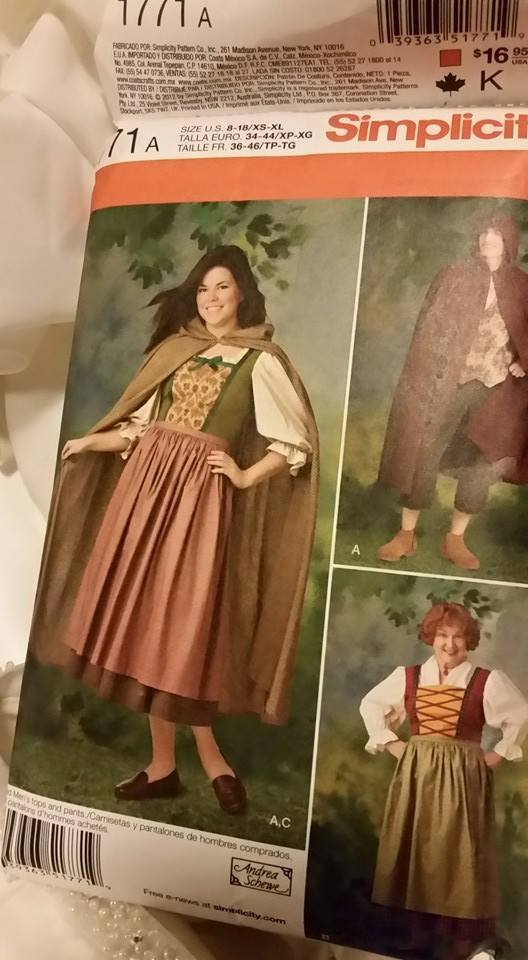
The next step was to make the replacement bodice. For this I first traced the bodice itself onto newspaper to make a pattern off of the original dress–this gave me an idea of what size the pattern pieces should be. At that point, I pulled out a commercial pattern I had with a similar top and used that pattern to actually cut the pieces (was much quicker than drafting the pieces myself, making a “prototype”–especially since I needed the shoulder straps ). I still did some resizing and altering of the waistline to make it “fit” my original dress. I don’t know if this is the actual pattern I used, but it gives you an idea of what I was looking for: higher neckline, shoulder straps, pieced fitted bodice.
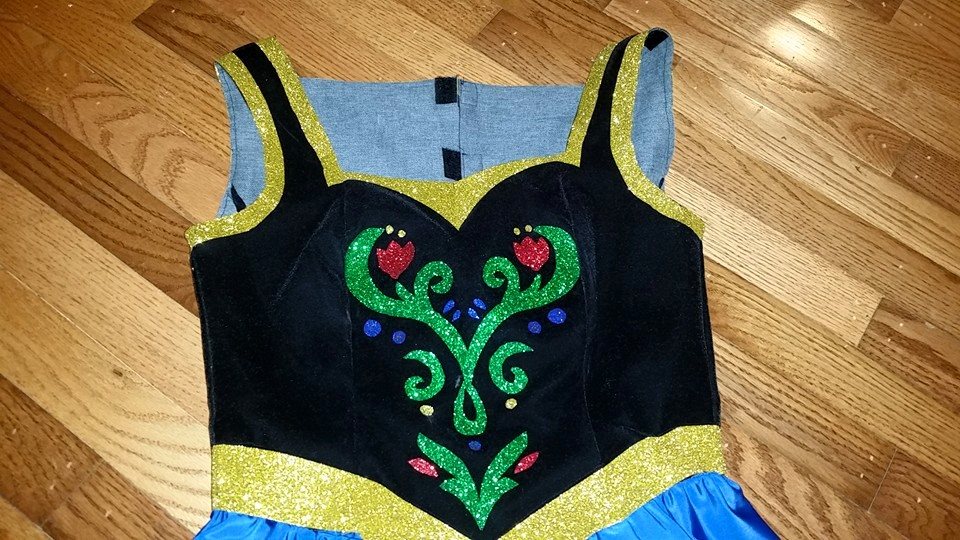
Next came the embellishing of the bodice. I am lucky enough to have a friend in the screenprinting business and she lets me have some of the scraps left over from making heat press shirts. I decided those scraps would make a perfectly wonderful glittery costume. You could also use felt, sequined fabric, fabric paint, or other scraps of colored fabric. I would use Heat & Bond and iron the pieces on, and either finish the edges with fabric paint or a tight zig-zag (applique).

Scraps of heat press glitter left from “weeding” the designs for shirts. It no longer has a heavy backing. It is very flexible when hot. You can trace onto it and cut it easily.
I found this awesome embroidery reference source online and used that to trace out a pattern for cutting the pieces.
http://momokurumi.deviantart.com/art/Frozen-s-Princess-Anna-Embroidery-References-452274660
I then ironed them on. I’ve learned, without a commercial heat press, you need to iron HOT–and for this I ironed from the back as well, and used a press cloth on the front, so as not to scorch the velveteen stuff. I did have to go back and re-iron both the top and skirt, but they are sticking well now. Lesson learned.
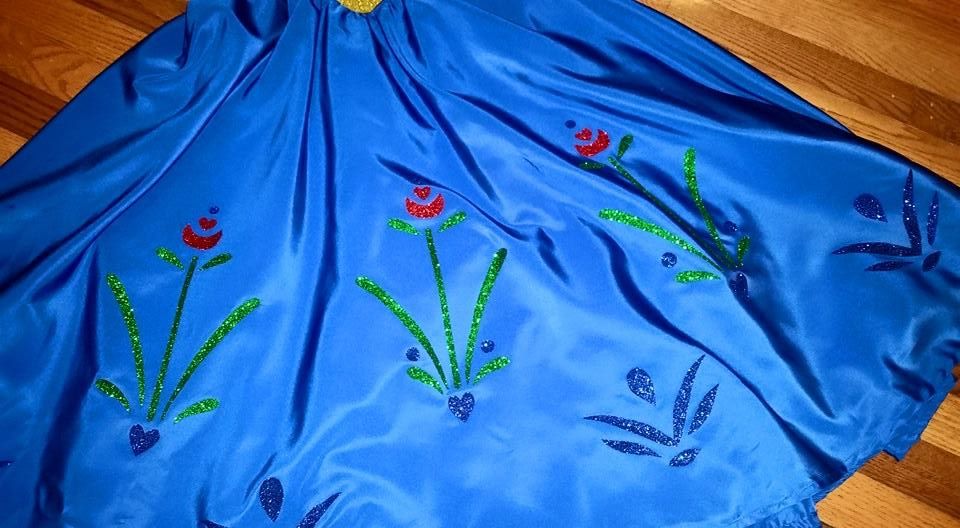
I decided not to worry about the scalloping that is at the bottom of the skirt. That was way more work than I was interested in doing!
Next I needed to sew the bodice on to the dress. I didn’t have a dress form at that time, so I made my daughter put the blue dress on, and then the bodice, lined them up at the waist, and pinned them together. I then marked the inside where they needed to line up. I attached the bodice only in a few places–this sort of lets it “float” on top of the dress and I didn’t have to worry so much about pulling & bubbling.

Then, I added velcro to the back above the zipper, and topstitched the bodice to the zipper in the back.
And . . . the dress is done!
THE CAPE:
OK, I know this one is going to drive people crazy . . I will do my best to describe how this is done. My best advice is to not expect to duplicated it . . you can’t if you don’t have almost the exact same style dress. Just . . go with the flow, and use it as inspiration, and I will try to do a better step-by-step tutorial at some point. Basically, any burgundy dress or skirt can make an acceptable cape. (There are tons of ways to make dress & skirt capes . . those are for future posts 🙂 )
This particular dress was a bridesmaid dress that was sleeveless and had an empire waist. It also had a gored skirt, and a slight train in the back.
Because I wanted to make this into a cape, I did not want the back opening. Therefore, I knew I would want to open the dress in the front. Since the “Anna” cape has a capelet over a longer back cape, I removed the front gore piece from the skirt along the two front seams (don’t worry about taking the stitching part–just cut the seam off as close as possible to the stitching line). I then cut the bodice apart at the center front. I did this by folding it in half, lining up the seams etc, and just sliding my scissors along that fold line and cutting.
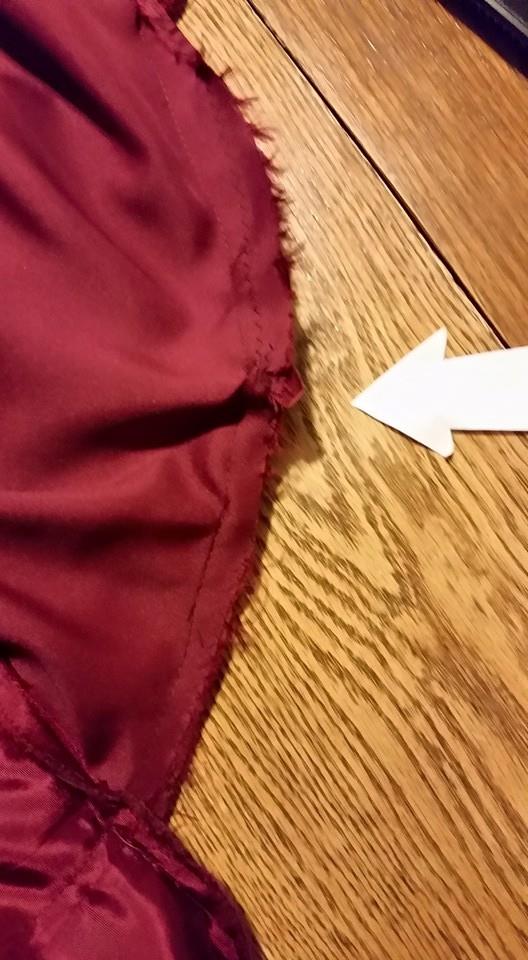
The next thing I did was to cut off the straps (back view below–front view farther down).


The first picture is from the inside–you can see they were cut off with just enough left to fold over and stitch down. In the second picture the arrow points to the back showing the stitching were they are sewn down. You can also see that the center back zipper is still in the cape–just being ignored and holding the thing together in the back. The bow was already a part of the dress.
The next part of making a cape is the creative part . . somehow you want to make a “space” for the shoulders., If you have a dressmaker form, this can help. Looking at cape patterns or tutorials can also help. Basically you want to “listen” to the garment (I call this “fabric whispering”) and figure out how the original seams and lines of the garment want to go. If you try and “force” an upcycle . . it often won’t work. That is why I counsel that this may or may not work for you with a different base dress. You can also use gathers, pleats, elastic, a drawstring or a ribbon tie, or even make a totally separate “capelet” from other fabric.
Once you have the dress cut apart, you need to drape it over something. If you don’t have a dressmaker dummy, you can sometimes use yourself and a mirror, or a hanger padded with some wadded up grocery sacks, or your child . . anything to give you some “shape”.
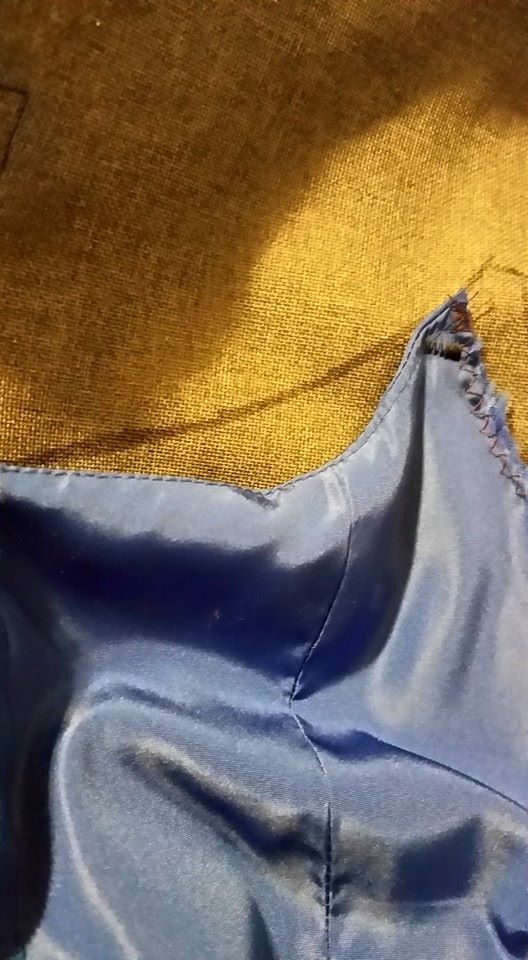
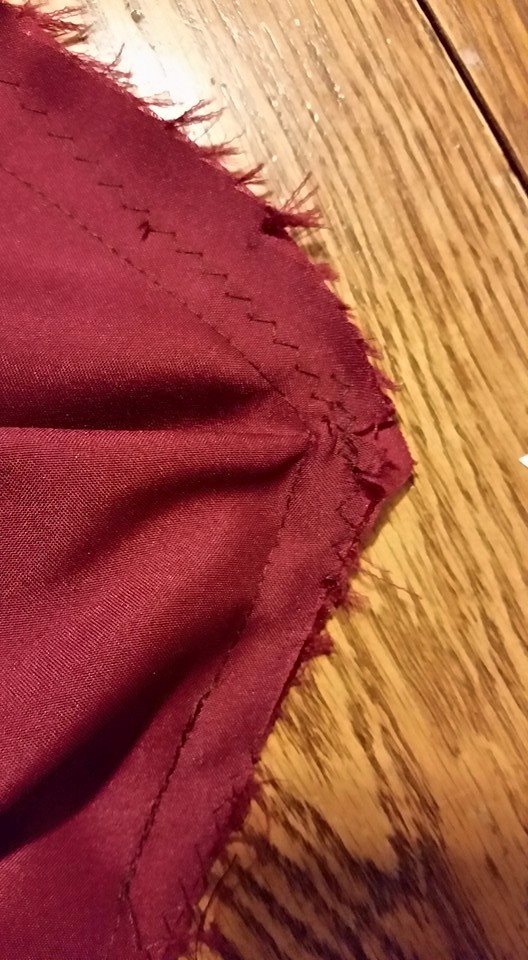
When I draped this dress . . . those back shoulder straps that I had cut off just WANTED to be a little stand-up collar. This put the side seams of the original dress going down the shoulder. That seam in the second picture that is going up and over the shoulder is actually the original seam from the empire waist of the dress.
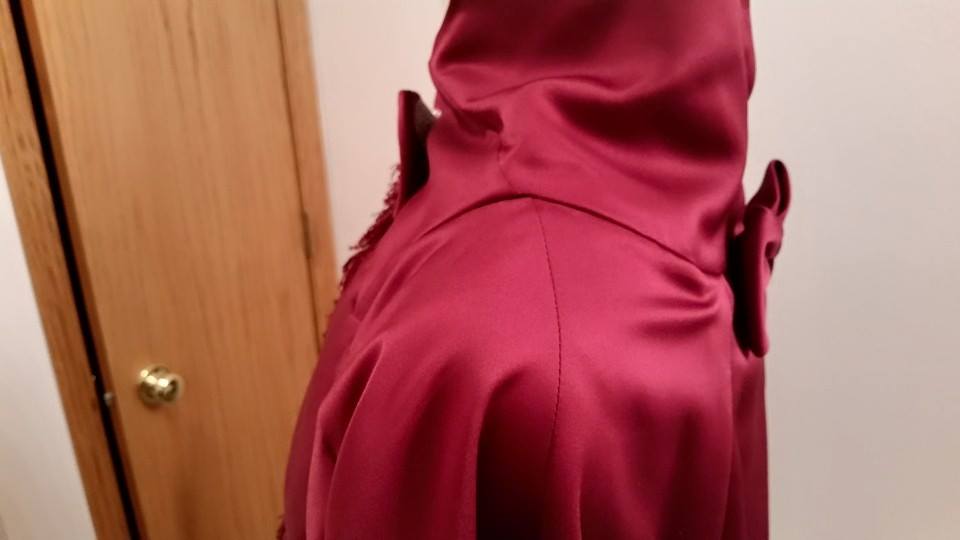
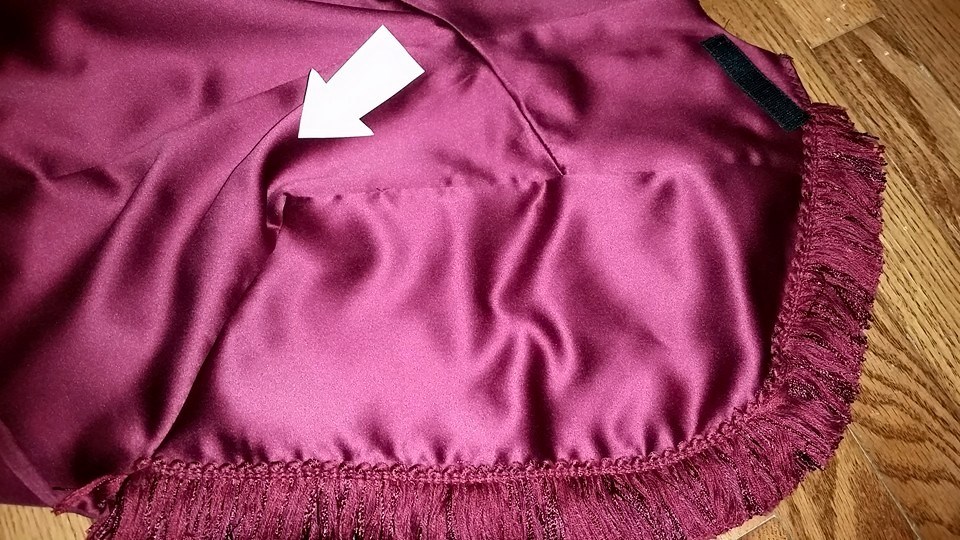
The armscye makes the front neckline, and what remains of the front strap is folded down and became the top of the front opening.

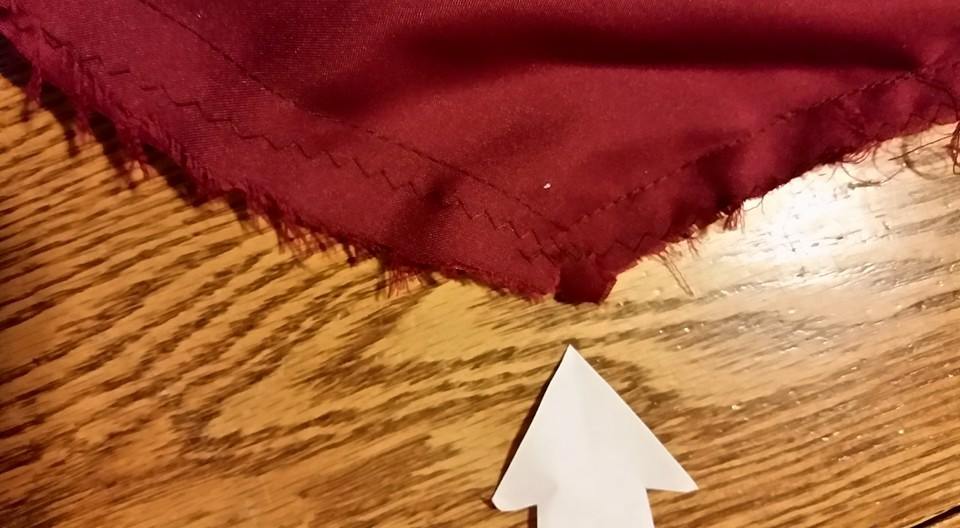
Folded down cut off front strap . . at base of neck.
Zig zagged raw edge from cutting the front bodice apart.
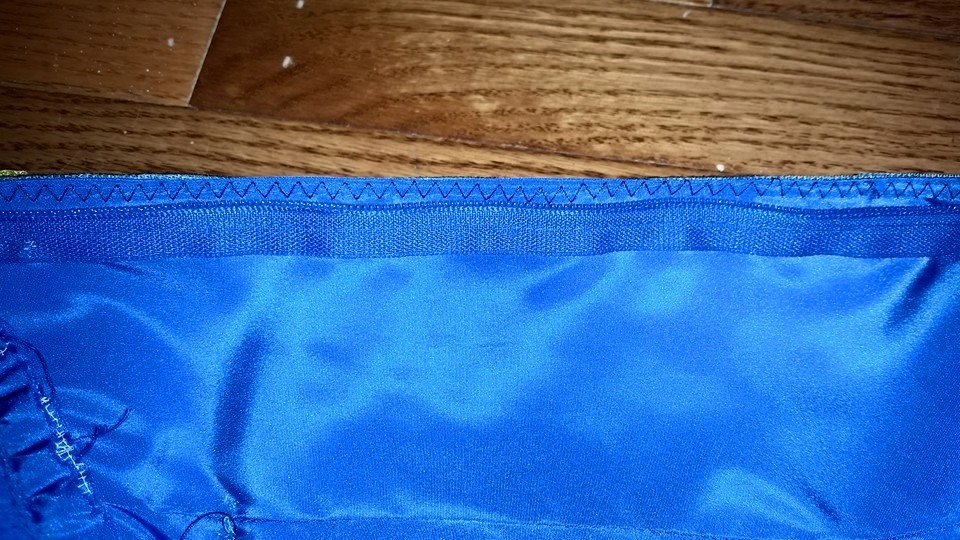
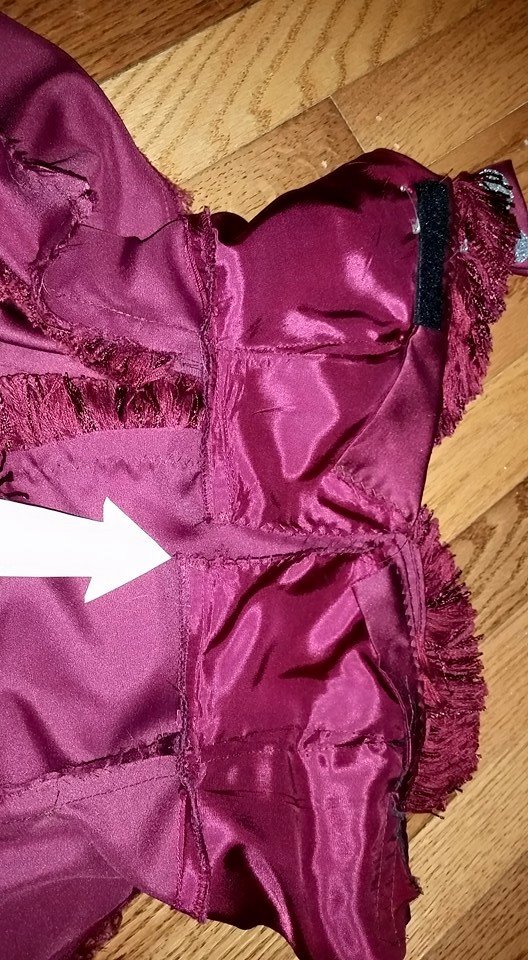
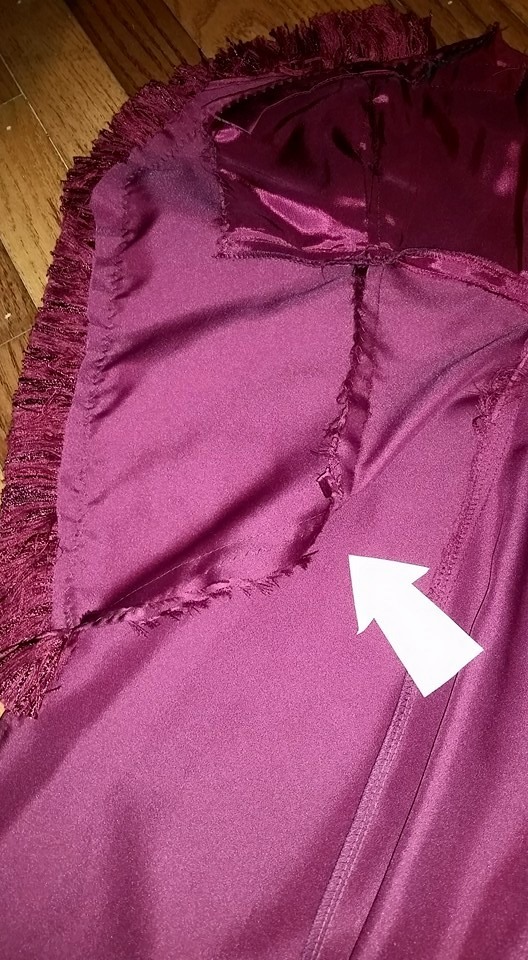
As I folded the bodice across the front of the cape . . . I really wanted more coverage in the front. I measured about how wide I would want the front “capelet” to be across the body, and then how long I would want it, marked the area with pins, and inserted rectangles of fabric on both sides. When I got to the part where I needed to make the right angle, I made sure the sewing machine needle was down, lifted the presser foot, and rotated the fabric to make the right angle. The large piece of fabric is actually the straight edge of the front of the cape. It “turns” because of the shape of the inset, and the pivot of the needle.

I have a feeling that is probably as clear as mud. I will try another explanation:
The front edge of the cape is still actually a straight line. The line now goes horizontal across the chest, makes a right turn, and then goes down the front edge of the cape. This does make the front bottom edge of the cape pull up and become a bit shorter than the back. The first picture shows the front edge pulled as straight as I can make it, the second shows how it wrinkles as it folds to make the corner, the third is flipped over and shows the opposite side, where you can see the right angle the stitching makes as the corner is turned. It is hard to see . .but I clipped the seam allowance to help the fabric make the turn.
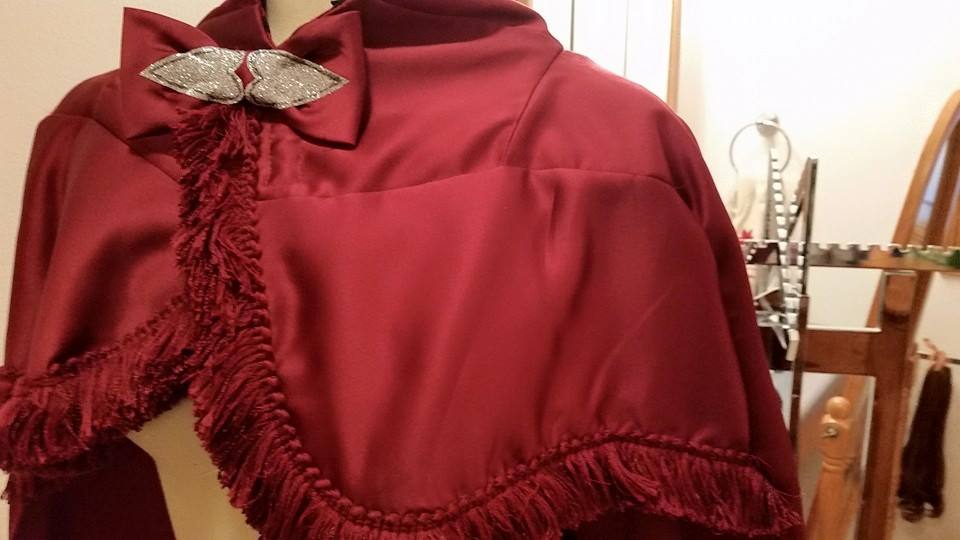
I then added the trim along the edge, making the curve, and trimmed the “capelet” fabric along the stitching line. I also put some velcro on the front to close it, and used a second bow (that had been on the dress somewhere) to make the base for the “clasp”. I also made a hem along the front edges (where I had cut out the front gore in the original step). After my daughter tried it on, we decided we did not like the longer train in the back, so I cut that off and rehemmed the back of the cape. The silver clasp is one of those sheets of glitter “suede” type fabric you can find at craft stores, often around the felt section. I outlined the heart with the a black sharpie.

Inside view of cape . . you can see the structure of the original dress, with the added front insets.
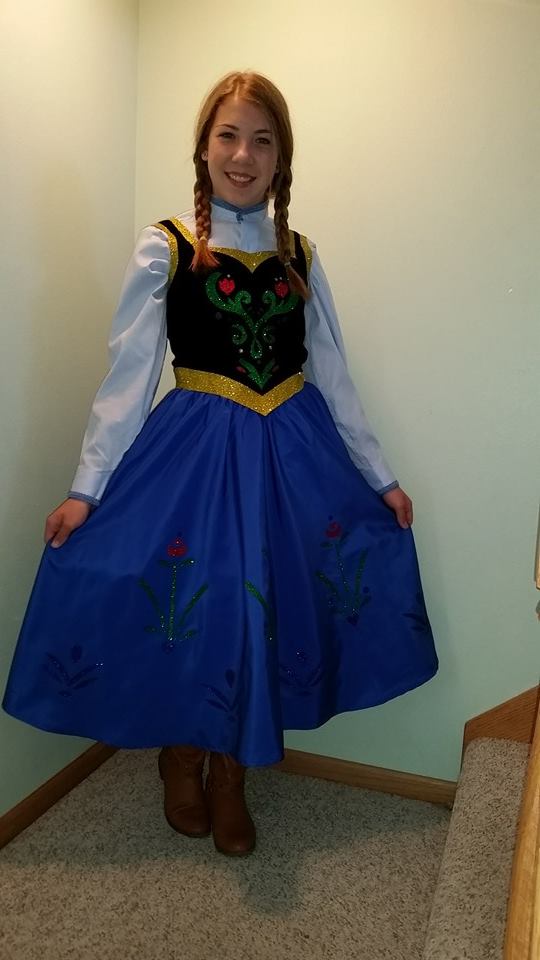

This is the finished dress and cape.
As you can see from the pictures of the sewing . . .the is a costume. I do zig zag edges to keep them from raveling terribly, but I don’t sweat about careful trimming, cutting out all the extra “stuff”, or even using exact thread colors–you can do a lot of black & white/beige. I only press when needed (ie for hemming–it goes much more quickly). This is not an heirloom piece . . . this is costume sewing.
One more tip for tonight: fabric care. The first thing I do when I bring anything home from a Thrift store is to wash it. Most modern garments–wedding dresses & ball gown Prom dresses included–come out just fine. I have a HE front loader, and wash on the gentle cycle, and hang dry. I do not want to make a costume that needs to be dry cleaned. Vintage garments don’t always fare so well . . but . . I want to know that before I start.
Total cost: less than $15
Thanks for reading! Happy sewing!


Your model is very cute!
LikeLike