Sleeping Beauty is one of the classic “Princess” characters. I have had her dress on my “list” for awhile, and several years ago (years!!! gulp) I had a really fun Prom dress with a multi-color tulle skirt in shades of pinks, purples and blues that would have made a pretty fabulous “Fairy-fight” costume. However, it was used for a different project, so, something else would have to do. What I came up with isn’t nearly as fun and perhaps turned out a little disappointing, but, as with all projects, there was learning in the process and so, I will share away, glitches and all.
To start the project, I did a online search of both Sleeping Beauty images and costumes. This costume can have a fair amount of variability: pinks, purples, blues, even cream, and even a newer red & dark purple dress as well. The iconic features seem to be the white collar/shoulder drape, and to a certain extent, the pointed peplum. Beyond that, there are themes, but not absolutes. Sleeve length is usually either long or sleeveless. A sleeveless costume will often be accessorized with long gloves. While the animated character is shown with an off-the-shoulder look, costumes are often made with a small shoulder strap. Her crown is small and simple. She also wears a gold circlet around her neck. The skirt can be sold, or have a contrasting panel in the front. The bodice and skirt are of different shades in the picture below, but are often the same color in costumes. The sleeves and peplum are often the same shade. The collar is almost always white, although it may have decorative embellishment.

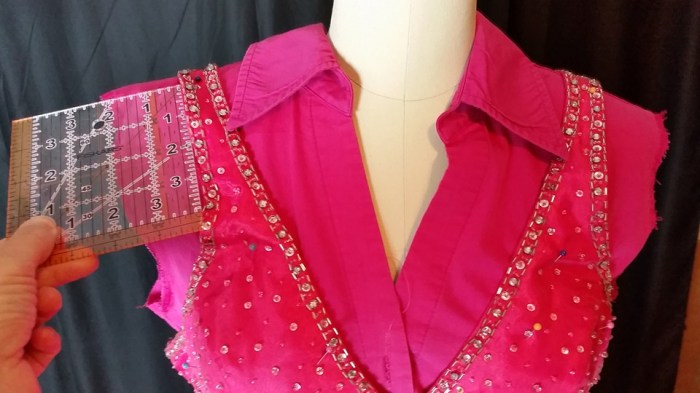
Screen shot of a online image, I do not own this image.
Since I had used my multi-colored dress for a “Grease” prom dress, I looked through my stash and decided to use this dress:


This is a (small) size 3 halter top Prom dress with rhinestones and beading on the front and around the dropped waist. The zipper is pulling out in the lower back. There also is a small burn hole in the center front. I knew I could cover up the hole with the peplum, so that made this dress very appealing for this project, even if some of the other design details were not ideal. But then, something that is part of the challenge and the fun.

As I worked on this project, it became clear that it would have been much easier to do if I had picked a strapless dress. Ideally, if the dress had a higher back, that would be really helpful, those 3-4″ would make a huge difference. A strapless dress would also have had the boning & internal construction to support itself, whereas with this dress, much of the dress was supported by the halter straps. The whole Sleeping Beauty look of off-the-shoulder white collar thing would be easier with a strapless dress.
The other challenge was that due to the shape of the bodice, and the way the back dropped at the sides, adding the long sleeves would not happen easily. I accommodated, as you will see, but, starting with a different dress would have made the whole process easier, and perhaps more satisfactory in the end.
A final consideration is the jewels and the horizontal wrapped detailing on the bodice. When I look at it I sort of shrug and say “it is a Princess dress, it can have jewels, no one will focus on that”. When my daughter looks at it, it screams “Prom dress” and she has trouble NOT seeing it.
The Dress:
I knew that I would need some sort of additional bodice. The neckline was too low, and I needed something over the shoulders to support the dress, as well as something to fill in the back. I could have sewed a bodice, but the only fabric I had was a rose velvet, which actually looked nice, BUT, velvet frays horribly, and for what I was doing, I didn’t want to deal with that sort of fabric. I also didn’t want the addition to stand out.
I cut a tiny piece of fabric out of the a seam, and went to a thrift store and found this shirt:


And here they are in combination:


At this point, I nebulously determined that I would put some sort of corset closure in the back. I also decided that this would be a one piece dress, so the dress and shirt would be sewn together. The first thing I did was to cut the back apart, by folding the shirt in half, and cutting along the fold edge.

I carefully removed the sleeves, because I didn’t want the armscye to be any larger, and I wanted to use the sleeve itself as a pattern.

Next I removed the buttons, and sewed up the center front, just overlapping as it was designed. Then I began to try and figure out the front design. I cut the halter straps apart along the center back seam, and attempted to place them.
I tried moving them quite over to the sides, thinking that the nice beading could be along the edges of the neckline. The bodice would have done this nicely, with just a couple small darts around the armpit level where you can see the fabric wrinkling.

I really was liking this idea, until I looked back at the original picture. The emphasis on the “V” shape was just not compatible with my end goal. So, painful as it was, I cut the straps off right above the bust. I went ahead an included this picture though, because I really liked where this redesign was heading . . . for a different project.
Along the way, I also decided at about what level I thought the neckline should end, and I marked that with pins (and a faint pencil line that isn’t visible in the pictures). I ordered the Frixion markers that were recommended to me by one of the blog followers . . I needed something like that for this project!

I didn’t like the look of the blouse in the center, so I opted to use the discarded straps as a fabric source. I cut them in strips, and pieced them into the gap.

These I sewed in place with either straight, or zig-zag stitches as worked around the beading. If you go slow, you can sew over the beading reasonably well. Some of the smaller beads I hit broke. I tried to avoid the sew-on rhinestones as I figured in the needle-vs-gem battle they would win. I wasn’t in the mood to stop working on the project that day, so I just cut and then sewed. I will probably go back now and do a little fray-checking, and possibly glue some of the gems back down with some Fabri-Tac glue. If I had wanted to, I could have used glue & fray check on the cut pieces BEFORE I pieced the top and sewed them down. That would no doubt have helped the beading threads from pulling out.

I then sewed the bodice to the shirt. I ran a row of stitching close to the beading, and then I did a row of zig-zag on the other side. I used a regular presser foot, but a zipper foot may have facilitated sewing along the beads.

Next came the peplum. I had a piece of pale pink thin velour with a bit of stretch that I thought would work well for the pepum and sleeves.
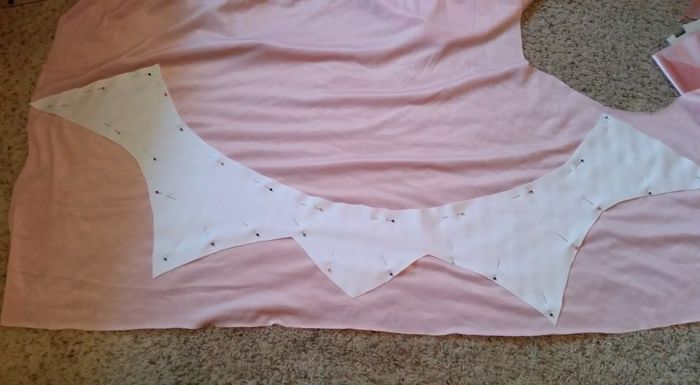
I used a plastic garbage sack to make a pattern. Tissue paper would also have worked, or any other medium that you could see through, in order to trace the curved line of the base of the dress bodice. This was not hard to do using a dress form. I think it could be done with the dress flat, but, I think it would be harder especially on the sides.
Next drew the pointed shapes. You can see my attempt ended up a bit far forward, and the second version is more centered on the sides. I only drew them on one side, and then removed the bag, lined up the top curve, and cut it out together so it was symmetrical.


Once the pattern was cut out, I put it back on the dress and made any necessary adjustments using tape. The top edge wasn’t perfect, but I figured if I ran an easing thread along the top that would help solve any fitting issues.


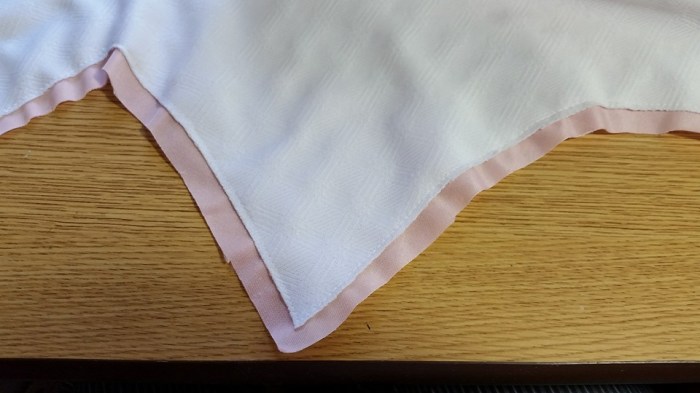
I cut the peplum out of a fairly heavy white double knit. This served as an interfacing, as well as a tester for the shape.
I cut the fashion fabric a bit bigger than the white fabric. I then folded it to the back and stitched it down. I sewed a couple rows of pink iridescent flat sequins to the edge because, well, because why not?
The whole easing thread idea didn’t work so hot. The fabric was a bit heavy. I was able to make it ease on one side, on the other the thread broke, so I just faked it.


At this point, I was studiously avoiding even thinking about how I was going to deal with the back of the dress. I figured it would solve itself in the end.
I made some annoying errors trying to sew this peplum on. The lining of the dress was separate from the outside dress. I attempted to pin the peplum on and sew it without putting the dress back on the dress form or really clearing my ironing board so I could line all the layers up. What a joke. While on some costumes it hasn’t made a difference if the lining pulled, on this one it does. You can still see on the right hip where the lining pulls a bit funny. I probably will end up going back to fix this as it irritates me. I should have taken the time and care to make sure all the layers where hanging straight at the outset. I also don’t have the center point hanging quite straight (but that I can live with)
This project was really funny in that my daughter never could see it ending up with a Sleeping Beauty dress. She would come and sit and look at it, and look at it, and look at it, and finally say “Well, I just can’t see it, but, you know Mom, that is OK. As long as YOU can see it, that is all that matters”.
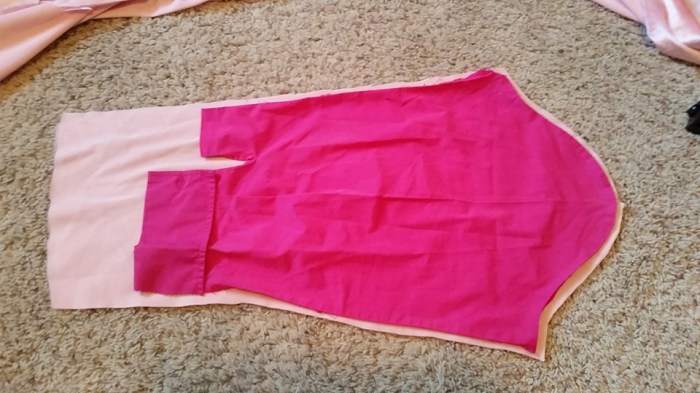
The sleeves were cut out of the same velour using the original shirt sleeve as the pattern.
Next came the white collar part. I made this out of white felt. Originally my intent was to make this out of satin with interfacing of some sort to stiffen it. However, I decided just to go with the felt because that was much easier (no finishing of edges or trying to figure out how to finish the lower edge where it sewed on to the dress, and this project was rapidly becoming not-my-favorite, so I wasn’t in the mood to spend a lot of extra time and effort.
The original shape looked like this:

I measured around the shoulders to figure out the length. I measured across the front of the bodice to determine the slanted parts. The wide parts are 6″, narrowing down to 3″ in the center front. The lower edge has some rows of flat sequins that were already sewn on from the previous life of this piece of felt (would you believe as a giant loaf of bread?*)

I pinned the felt to the bodice and re-positioned, folded and shaped until I had something that I liked. The points are still 6″, but I folded down the front and back to shape it differently. The center front also has a small tuck for shaping:

The back:
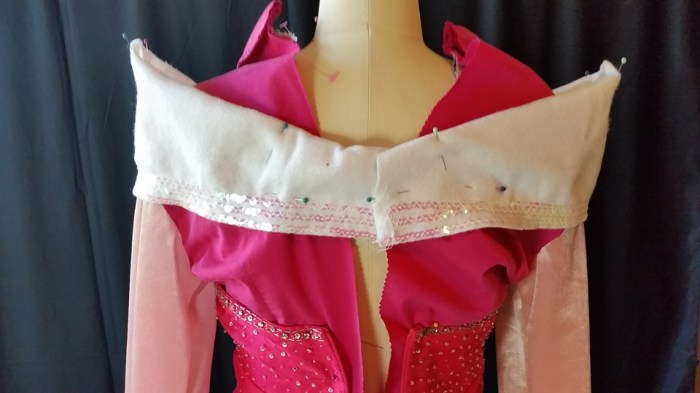
I am going to point out an error-to-come: Note where I have the collar positioned at this point, and then notice where it ends up in the end. Ouch.
But, back to where we are. I sewed a narrow hem along the folds at the top, and then trimmed the excess felt away very close to the stitching line. This doesn’t look super great, but, the folded down felt didn’t look great either. Another row of stitching, maybe zig-zag, might help to hold it down.
The pointed ends are sewn together just a little ways to help keep the shape.

At this point, I sketched out a back neckline, and then cut the back and front of the shirt away (leaving a small amount to be turned under).
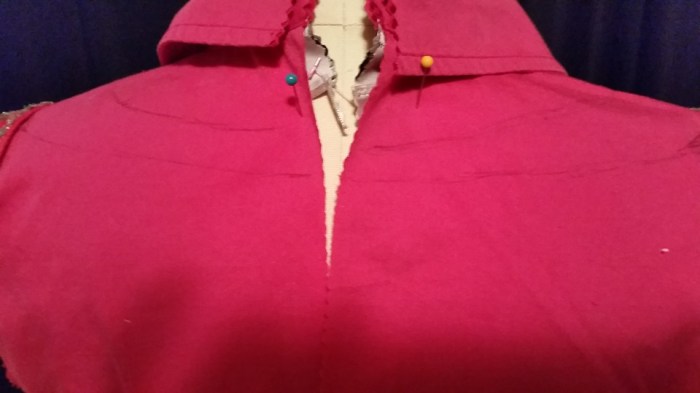
I finally was to the point where I couldn’t avoid the back of the dress. I decided to make facings for the center back to give a little extra width.
I cut strips from the discarded sleeves and sewed them to both sides of the center back. I then put some snaps in to close the back. I made ANOTHER error here, grrrr. I intended to extend one side with the facing, so that I didn’t lose width in the back, and perhaps could even add some to give a little flexibility in sizing. Instead, I just overlapped both sides. I lost about 1/2″ with the two seams, and then another 1/2″+ from the overlap. Totally NOT what I was planning, sigh.


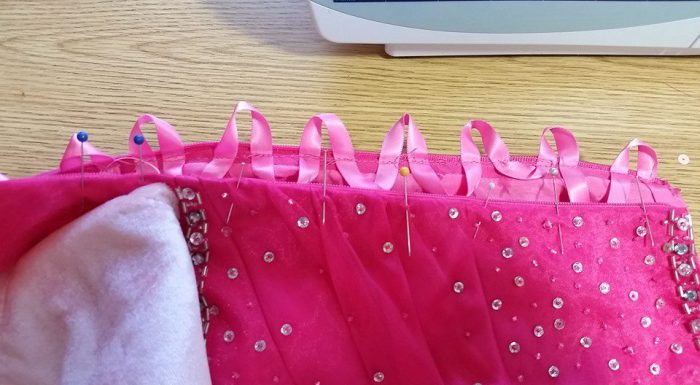
I made a corset back with some ribbon. I put the ribbon on in one continuous piece so I wouldn’t have to deal with all those cut edges. I did one side, and then lined it up on the second side and marked where the matching loops should be with pins. I left the zipper in to provide stability to the opening. I sewed the ribbon on using a zipper foot. All that worked really well. I ended up making the loops too big however. Yes, it is easier to lace them that way, but, I can’t really make the dress as small as I would like. I am also not wild about the color. The pink actually seemed fairly close to the dress color. I think the “shiny” of the satin lightens it out. I might even have preferred a burgundy or even just black. I would definitely go for a darker color another time.
Amazingly, at this point, I was able to just sew the two back peplum pieces together and they actually look decent.
My last REALLY BIG mistake is that somehow, I put the back collar way too high on the shoulders. Unfortunately, I chose to do this with snaps. Lesson learned. I should have pinned it in place and looked to make sure it was where I wanted it. I could add more snaps, but, I think it will be OK. I also added snaps to close the back of the collar.

As a final touch, I put some silver hologram heat press “sequins” down the center front and side bodice seams. This was much harder than I thought due to the beads, plus I was afraid I would melt the fabric with the iron. My center front line is also not quite as on center as I would have liked. There is quick, and then there is sloppy, and I feel like I blurred that line a little too much on this project.
The Accessories:
Sleeping Beauty is often seen with a crown and a necklace. I found an online templates for both.
The Crown was pretty straight-forward. It was actually a Disney template, so that was easy.
The necklace I cut out free hand based on a template I saw, and then adjusted it on the dress form so that it would lay flat.


I cut both of these shapes out of white felt, and covered them with scraps of gold glitter heat press material. The glitter will stick to itself so it is easy to piece together. The necklace closes with a small piece of velcro. The crown is covered in gold glitter on both sides.

The Finished Project:


The golden hair adds to the look! (and make the back look sooooo much better!)


I need a mannequin with a head. This is kind of creepy in an Ichabod Crane sort of way. (My daughter is rebelling. She says I only want to dress her like a real, living doll. When I ask her to try something on she gives a big sigh, and then reminds me of the episode on one of those “Criminal Minds” type shows where the bad guy kidnaps women, drugs them, and then dresses them up like living dolls to have a tea party. So, no “real life” pictures this time, lol.)
Cost: Pink dress $5.95, pink blouse $3.79. The rest of the supplies were things I already had and scraps.
Time: About 5 hours for the dress, and another hour for the accessories.
Overall, I don’t think this is my best project. But, I do think it is identifiable and functional, and I did learn some things along the way, as well as get some good ideas for the next project. So, on to the next idea!
*The secret, previously untold, life of the white felt (as a loaf a bread):


Great job! I, too, find myself adding extra fabric onto bridesmaid or formal dresses to avoid having to sew things from scratch. It’s just so much easier not to have to deal with lining and boning and stuff…
LikeLike