This project began with a curtain and an idea:
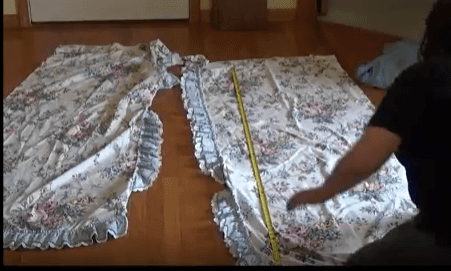
The curtain was a double panel ruffled curtain joined with a curtain rod pocket at the top. The panels were about 30″ x 72″, with the double ruffle along the inner edge and the bottom. I also had two ruffled curtain tie backs. I paired this up with a ruffled blue bedskirt and an idea and went from there. (You can find the corresponding YouTube video here).
My idea was that I could use the curtain to make the overskirt for a hoop skirt dress. The ruffled split in the curtain could be the front of the skirt, and the underskirt could show through. I began by measuring my bedskirt. The panels were 30″ wide. If I cut the panels in half, I could have a total of about 120″ of width. The panels would be about 36″ long, which seemed reasonable for an overskirt.
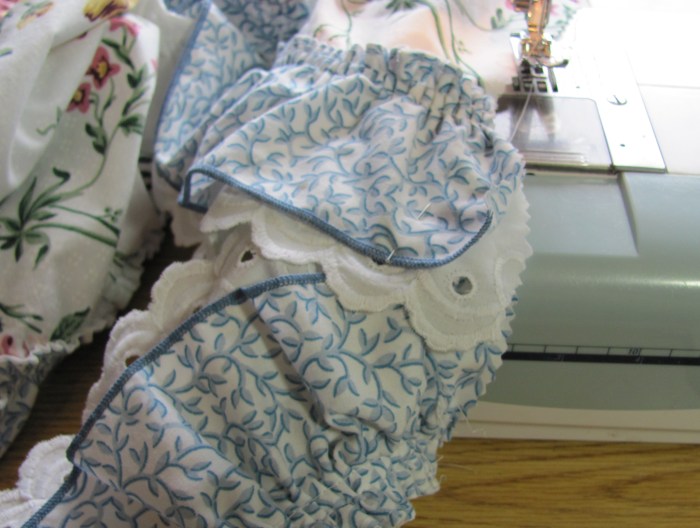
The curtains had a rod pocket at the top. I removed this, attempting to save as much fabric as possible. One section came off easily, but the second layer had button holes along the top. I just left this in place and used the length, guessing that the buttonholes would disappear in the gathers of the fabric.
I then re-measured the length of the panels and divided them in half, accounting for seam allowances (I thought). I cut the ruffle off the side of the top sections and appliqued it to the bottom. These panels became the back of the skirt. I left a 8″ section unstitched at the top of the center back seam for the waist opening.

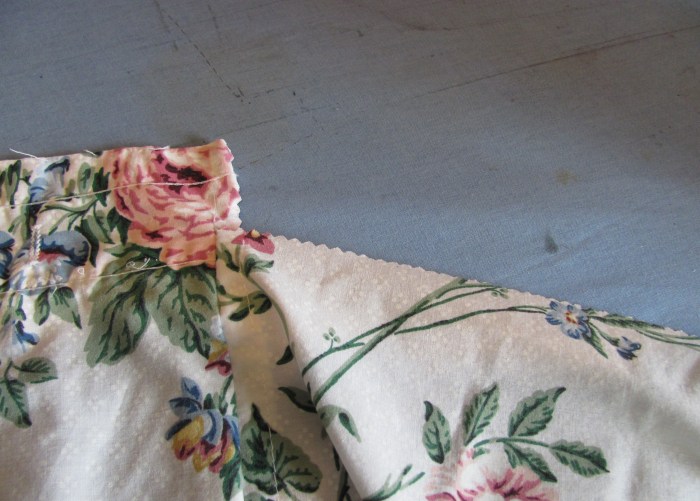
I overlapped the front ruffles, and basted them together to make sewing the waistband on easier. I left this section flat so it would look pretty on the finished skirt.
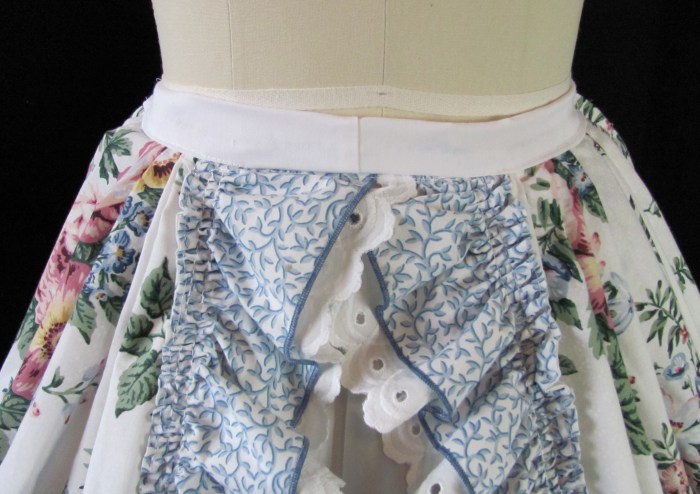
As it turned out, despite measuring and thinking I had planned correctly, my center front panels were somewhat shorter than my back panels (you can also see the buttonhole in this picture).
I decided that I would put an inset into the front for a flat waistband, and then make a casing in the back with a drawstring to make an adjustable back.
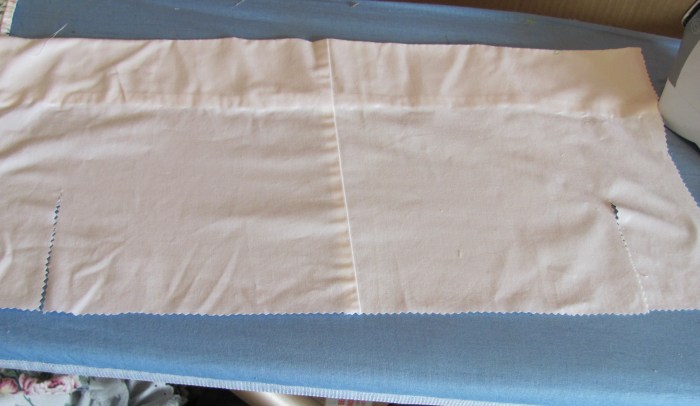
I considered using some of the piece of fabric I have removed from the top of the curtain for the waistband, but, I was hesitant since I didn’t have a plan for a top. Instead I decided to use a piece of scrap white fabric. I centered the seam even though it seemed to waste a lot of fabric since it would look better. In retrospect, I should have used some of the fashion fabric, even if I had only used it for the narrow front strip.
I pleated the front panels to the waistband, and then inset the band. The top section of the back panels already had a channel stitched in, so I just ran some twill tape through the channel and stitched it in to the waistband seam. That part worked out really well, and I like how the front of the overskirt looks finished, and yet there is a lot of sizing flexibility with the drawstring back.


The finished overskirt (ignore my fancy hoop–it is leftover Dressing “Charlotte”: Cinderella (Broadway Version), and the only hoop I have in this size right now):


This is a 30″ diameter, three-boned hoop that ends about 10-12″ off the ground (at the level of the first row of pink lace). Originally when I received this size hoop I didn’t like it at all, however, it has grown on me. This particular hoop I shortened the top section to raise the first hoop to provide more width at the top of the skirt and create an enhanced bell silhoutte. I like this size on stage–it gives a nice hoop look, but isn’t HUGE so if you are doing a large-cast show they can still fit, and get through doors, etc., and, since it is considered a small hoop, they can be found at affordable prices.
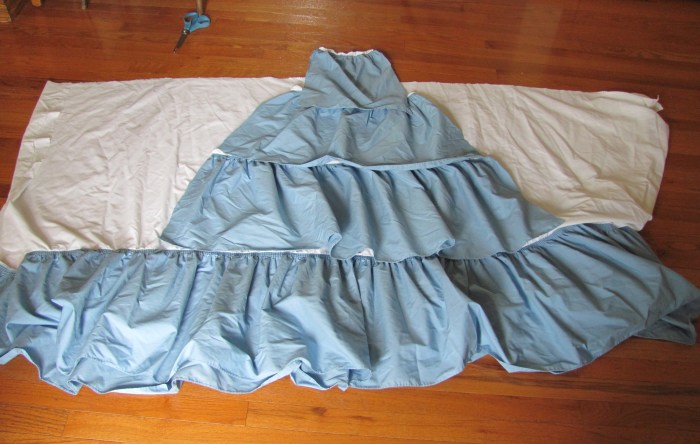
The underskirt was made from a ruffled full-sized bedskirt.

I have described how to make a petticoat from a bedskirt in previous posts, so I won’t review the basics here. This one was a bit different. Since my overskirt was open in the front, I wanted color all the way to the waist, so I divided the removed-end of the bedskirt, and made a tapered front.
I marked the center of the panel with a heat-sensitive pen. The I marked the center of each strip and pinned them along the line. I measured the amount of overlap, and mirrored that amount on each strip.
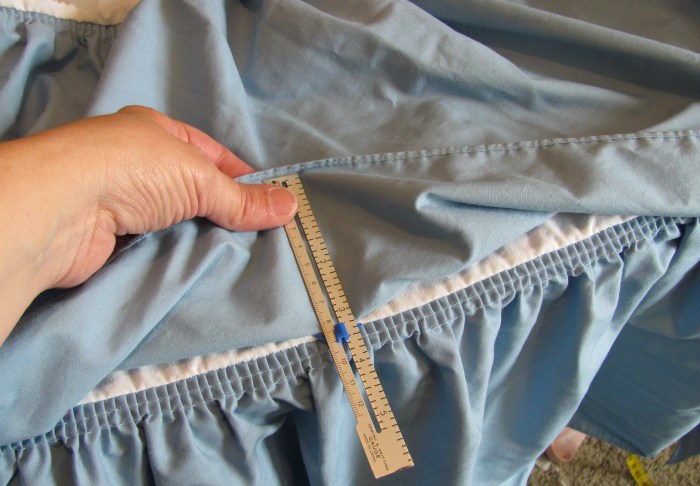
At this point, I had stuck a bum pad under the overskirt and liked the shape, and so I adjusted the petticoat for that use. I needed to add about 3″ of length in the front. I cut a strip of fabric and stitched it across the center of the front of the petticoat. Where that strip ended (12-15″ from the ends), I cut a slit. I bound this slit with some bias tape. I then stitched the front panel to the back panel and added 5″ of length between my bound slits. This makes the back of the petticoat longer (to go over the bum pad, petticoats, or whatever) and also makes it a little fuller, since somewhat more than half of the width of the underskirt is in the back. Typically, a few extra inches isn’t problematic in the back if a bum pad isnt used, and if it was, since the skirt is made on the straight-of-grain, it would be easy to shorten with a tuck.
Here the underskirt is added, and the hoop and bum pad are in use:


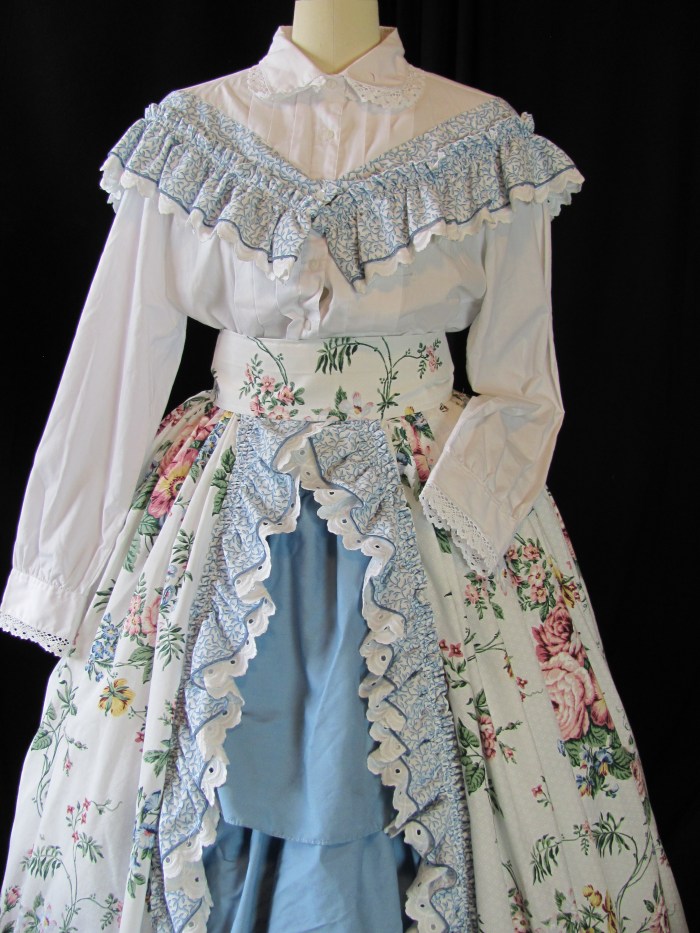
Next I needed some sort of top. I decided to go the easy route and I found a white blouse:

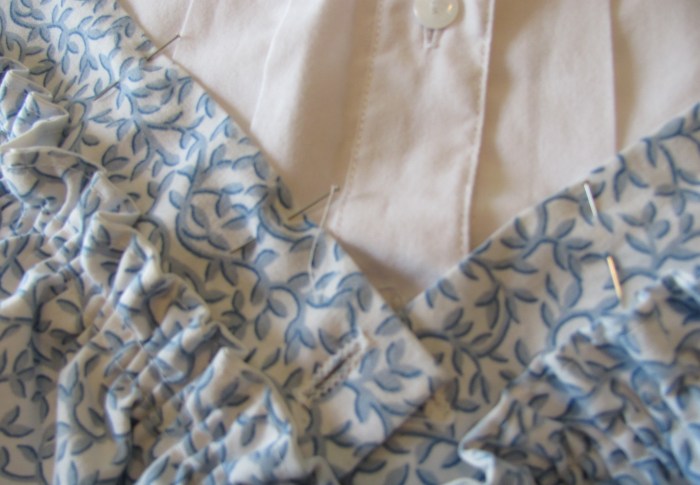
I picked this one because it had the front pleated details and the small rounded collar. I played around with the curtain ties and the strip of floral fabric I had and ended up with the curtain ties in this position:


The curtain ties had button holes on the end, which I positioned so that they could be buttoned to the existing buttons on the shirt front, which gives it a nice finished look when they are buttoned. I stitched these on. I positioned them to the far edge of the shoulder to give it a mock-dropped shoulder/front yoke look for a more Civil War era feel.
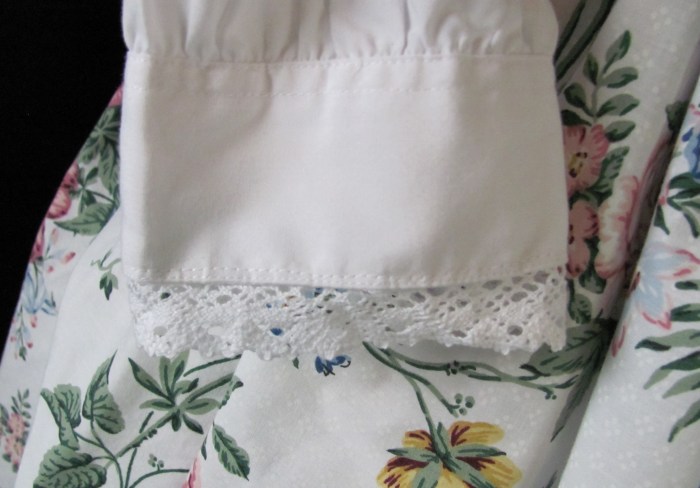
I added a bit of crochet lace around the cuffs and collar.
I considered inserting the floral fabric into the sleeves, and I do think that would have been a nice touch, but, in the end I made a simple sash. I folded the strip around a piece of medium weight fabric and hemmed the edges. The sash ties around the waist, and is nothing fancy.
Unfortunately, part way through the project I realized there was a stain in the curtain. While you can certainly see it if you know it is there, and if you are not too far away, it does disappear into the back of the skirt.


What I really like about this outfit is the versatility in the fit. Here is the outfit on a size 4 dress model (bust 34, waist 26) with the bum pad:


Remove the bum pad:


Put it on a dress form with the bust 44, and waist 36:


While the blouse is pretty maxed out at this point, the skirt could be worn by a larger person. The trim on the blouse is also just stitched on with one row of stitching, so could easily be removed and added to a larger sized blouse.

Cost: curtain $6.99, bedskirt $1, shirt $0.50, plus some fabric scraps.
Time: 4ish hours.
Overall, I was happy with this outfit. I call this a generic-historic look, or fantasy-era . . . elements of history, but not aiming for a specific date. This went together quickly, and I like the flexibility of the skirt sizing. You could dress this skirt up for a party or ball with a different top. The blouse could use a brooch or bow at the neckline. I am not 100% in-love with the blouse, but, it was a quick use-what-I-had adaptation.


I can see that finished dress for many different shows. I love the use of the curtains and the bed skirt. I don’t think they have those at our Goodwill but I will have to check. I think the tie back ruffles on the blouse make the whole thing. Great job.
LikeLiked by 1 person
I always keep an eye out for ruffle curtains. They obviously aren’t in style, so they aren’t always available. Bedskirts come and go as well. The nice thing is they often have little wear as it isn’t something you wash regularly. One lady who works at one of the local thrift stores told me she hates seeing them come in–I think because not too many people want them.
LikeLike