This costume was inspired by some fabric I found while helping with a youth sewing project this week. Our church makes school kits for refugees as a summer youth project. The quilting group saves donated fabric that is suitable for school bags throughout the year. I was helping trouble-shoot sewing machines for beginning sewers, and as I was chatting with the “cutters” I spied a few really nice pieces of fabric in their box (they had some other gems they tried to pawn off on me–but enormous bright blue and green flowers didn’t quite fit with my color palette).
I used these fabrics to pick my other pieces from my collection of “possibilities”.
I had a print blouse:


And teamed it with a crochet vest:

I found a linen dresser scarf for 45 cents. It had a few small stains–but–the better to give the peasant look. I cut it in half and joined the two panels with a piece of twill tape for reinforcement.


I ran a narrow gathering thread across the top and stitched it to a piece of twill tape.


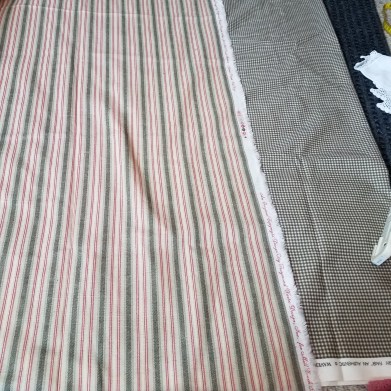
I used the checked fabric for the skirt base and cut out the pieces to make an apron waist skirt.
I first divided the fabric in half. Then I cut four strips off the end for the ties. I cut off one wider strip which divided in half would make the waistbands. Then I divided the skirt panels to allow for an insert of my second fabric.
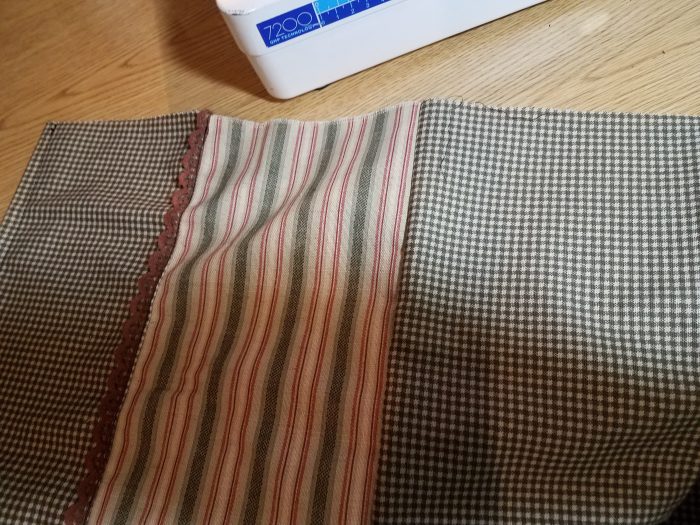
I cut the striped fabric into strips, making sure to cut them so that the stripes lined up.

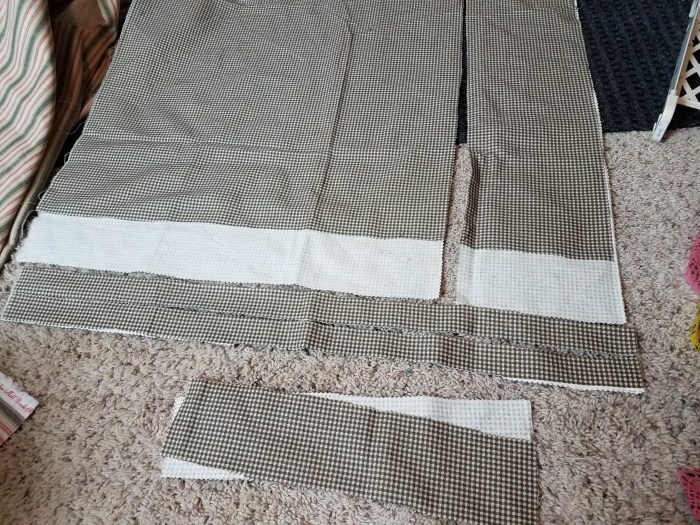
I stitched the striped pieces into one long strip. I did the same to the two skirt panels. I stitched the strips together, and added a bit of brown lace (only on the lower edge as that is all I had).
The last thing I did was sew the second skirt side seam. This made constructing the skirt much easier. Since there were multiple seams in the skirt, I evened up the top edge before adding the waist pieces (lesson learned from the skirt in #5).
The skirt ties were made by ironing the long strips in thirds (No reason, other than I find this the easiest way to fold them). A wide zig-zag down the center finishes the tie. I find pressing the ties first makes them much easier to sew (although I’ve done plenty without ironing them too– but I typically regret my “time-saving” efforts).

And the skirt was done:

The outfit all together:


The apron looks a little less pristine after a few wrinkles were added. It was well ironed and (probably) starched. It will probably look even better after being tossed in a basket or on the floor, lol.


I regretfully made the skirt waist band pieces a little too short. I was trying to preserve skirt width, but using another length would have allowed me to make the waistband pieces longer, and thus the skirt more versatile. The gap on the side is hidden by the vest and the apron, but, I wish there was more overlap. I could add a wedge of fabric to one side of the opening, except, I used all of it, so I don’t really have that option.


The wedge would work like this:

I found a vintage circle skirt that had a waistband that was constructed this way, and it works well for a non-gathered skirt.
This was another quick and easy outfit. The shirt and vest are unaltered. The apron was quick. The skirt took a little more time, but a plain thrifted skirt could be substituted. I do like the band of striped fabric, and think it gives that folk-wear look I’ve been aiming for. Even adding the stripes to the skirt, the whole project took me less than 1 1/2 hours.
Cost: Shirt (between 50 cents & $4, vest 2.59, dresser scarf 45 cents, fabric–I swapped a different piece I had; plus a bit of lace and some twill tape.


