My sister is involved with a youth production of the Broadway version of “Cinderella” this spring . . . so my mind has been full of transforming dresses (although they are renting theirs), armor, wacky stepsister dresses, and of course, how to outfit a chorus in ballgowns on a budget. I have been digging through my “stash” as well as picking up a few new dresses (who can resist?) and now finally am beginning to have a little “me” time to play with some upcycles.
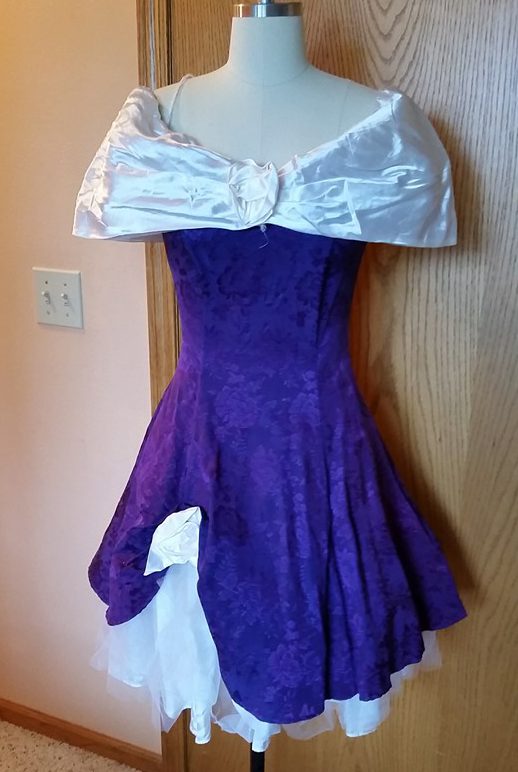
Original dress:
I started with a dress that I had picked up when we were doing “Grease” thinking of a possible 50’s upcycle. It is a little wrinkled and limp, because, as with almost everything, I ran it through the washer on gentle cold, hang dry before I started. It is my philosophy that dry cleaning is WAY to expensive for the type of costuming that I am doing. So, for the most part, if something won’t wash, I move on to something else.
I started looking at the collar and I was super excited to see how they had done it.
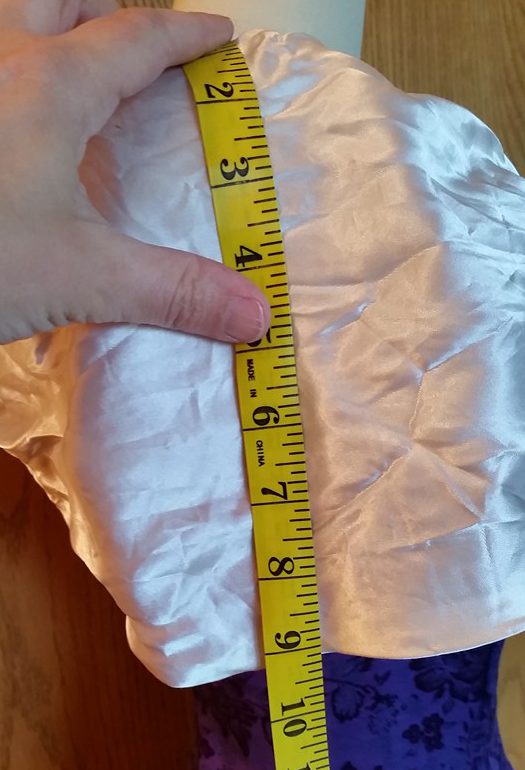
The collar is basically a 9″ strip of satin backed with petticoat net (not tulle, that isn’t stiff enough). Don’t forget to add seam allowances.
The bodice is actually quite similar to a strapless dress (and we know there are TONS of those around). The shoulder straps are elastic. They took a strip of satin and made a casing. The seam faces the neck, and includes the two sides of the strap tube/casing (sewn wrong sides together), as well as the raw edge of the shoulder drape and the petticoat net. The drape just follows the neckline, and in the back is turned under with some tucks at the zipper (see pictures of the back below).


The front is shaped with some tucks. This has all possibilities for various adaptations. This sort of neckline looks very Civil War era to me, as well as being useful for this “Fairytale” adaptation.

Tucks shape the front drape.
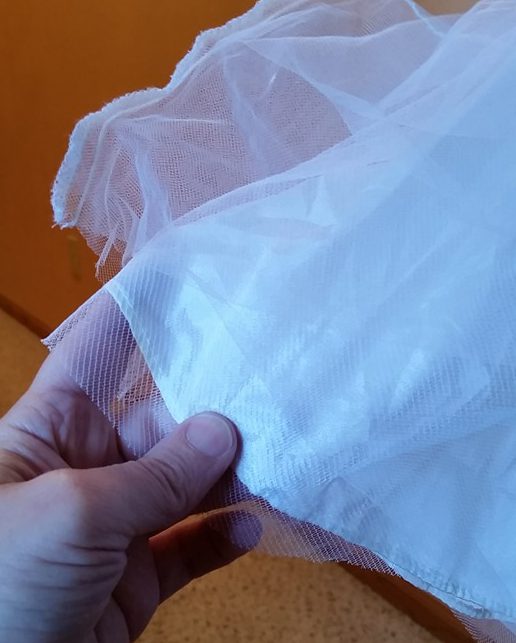
The skirt of the dress has the purple gored and flared overskirt. The underskirt is petticoat net on the top tier, and gathered to that is a second tier of four layers: a satin layer at the bottom, a layer of petticoat net, and 2 layers of tulle on top. These are strips, not shaped pieces. The bodice is lined, and the underskirt is ruffled to that.
I vacillated a bit about what to do with the underskirt . . did I want the tulle layer to show? should I cut it off? I probably could have gone either way. I opted to sew the new skirt layer to the seam where the layered tier attached to the petticoat net. It now is part of the petticoat under the dress. I could also have sewn the skirt layer to the white satin layer, and maybe added some embellishment to the tulle (rows of satin ribbon? flowers?,) and used it as a part of the dress details.
The skirt:
I found a white textured satin shower curtain in my “stash”. The first thing I needed to determine was whether I would have enough fabric to make the lower skirt.
I measured the seam in the underskirt where I wanted to attach the fabric. It was 40″ from side seam to side seam, for a total of 80″ in diameter. The top of the shower curtain was 64″. I planned to cut the shower curtain in half width-wise, so that would give me about 126″ of width (double, minus seam allowances). This is about 1.5 x the 80″ circle.
I wanted to put the dress over a hoop. I measured my small hoop and the bottom hoop was 108″ in diameter.
 I did wonder if the roughly 20″ extra would be enough to look good. I folded the curtain in half and pinned it to the seam and gave it a look and it seemed like there would be enough fullness. And if not . . well, that is the whole point of a quick “concept costume” . . just to see what might work and what might not.

Since the texture in the satin has a visible direction I couldn’t take the easy way out and use the top and bottom hems on the shower curtain for my dress. It only took a little bit of time to open the lower hem, press it, and zig-zag the top (to help prevent raveling).


Next, I carefully lay the curtain down on the floor and folded it in half. I made one side a bit longer than the other as I would need to hem it. I cut along the fold. I was careful to make them as even as reasonably possible, but I didn’t obsess over it . .this is a quick costume after all.

I finished the raw (newly cut) edge of the top piece with zig-zag, and made a narrow hem in the second piece. To make a hem, I like to press in the first fold, and then just fold it over and sew while at the sewing machine. Folding the raw edge into the hem eliminates the need for finishing the raw edge, and prevents fraying in the wash. I do almost all of my sewing on a “3” setting. This allows stitching to be easily taken out if the costume needs altering at some point in the future.


Next I sewed the two strips of fabric together so I had a tube. I just let the finished side edges of the shower curtain be the seam allowances. I could have gained about 2″ of width if I had opened the seams. That is a lot of work for 2″ of width. I sewed the side seams from the bottom to the top because I wanted the bottom edge to be even. If the seams weren’t exactly the same in length, it wouldn’t show under the purple overskirt.
The next step was to attach this skirt-tube to the dress. I like to divide things into quarters. The dress already had a center back and side seams, and I could easily see center front. I divided the tube in half at the side seam, then I folded it in half and marked those two folds with a sharpie (sorry for the terrible picture). You can use a pin or a tiny slit in the fabric, but I think a sharpie in the seam allowance works perfectly fine.

I then pinned the quarter marks of the new skirt to the dress, and then pinned in the pleats to gather the new skirt to the seam in the dress. You could run gathering threads, but pleating is much faster, and time efficiency is the goal here.
Do you have to pin? Probably not. However, I find it much easier to make the distribution somewhat even if I pin. I also find I have to do less ripping and resewing as I can concentrate on keeping the sewing line clear of extra fabric instead of focusing on making the gathers. It just works better for me to pin . . . but if you are one of those people who HATE pinning . . . go for it. This particular dress was easy since I was sewing the new skirt to an existing seam. Typically I am trying to topstitch the skirt to the waist so I am either squishing the entire skirt into the little space under the arm of the machine, OR, I am fighting the weight of the skirt as it wants to fall off my table as I am squishing the bodice into that space.


And here is the new skirt under the original dress:

I was pretty pleased with this. I actually could have left this dress just this way and it would have been fine.
I decided I wanted to make a scalloped edge. This particular dress did not work to make two hip puffs (like the traditional blue Cinderella dress) since the fashion fabric does not extend up to the waist. I could have appliqued a scrap piece of white satin to the petticoat net if I had really wanted to do that. The original purple dress had three small tucks to make the raised portion. I continued with that on all of the seams of the dress (except center back). I then sewed them in place. I didn’t measure them, so a few weren’t exactly “right”, but these were easily fixed with a safety pin (and could always be sewed in if desired).


There are all sorts of things you could do at this point to decorate the dress. Artificial flowers, adding a third color somewhere, adding a fancy waistband or sash . . almost endless possibilities which could significantly change the look of the dress. I wanted to do something quick with supplies I had on hand. I decided to make white bows (since I liked the look of the white flower on the original dress) and then add some streamers of purple tulle. My dress is going to be a “Fairy Tale” ball gown and is not meant to invoke any particular time period.
To make the bow I used some 3″ grosgrain ribbon that I have on hand for making cheer bows. I messed around until I came up with a size I like, then I unfolded it and measured the length.

To make the bow (and these are quick and dirty temporary costume bows) I folded the ribbon in half to make a fold line. Then I opened it up, and folded the raw edges just over that line, making two loops. I ran a line of large basting stitches down that line. I gathered it up and wrapped the thread around the center a few times and then tied the thread down.


For the streamers, I just held two colors of purple tulle up to the dress and cut a double length. I used a cow hitch like you do when making tutus and just tied the tulle around the center of the bow. I then pinned them to the dress.


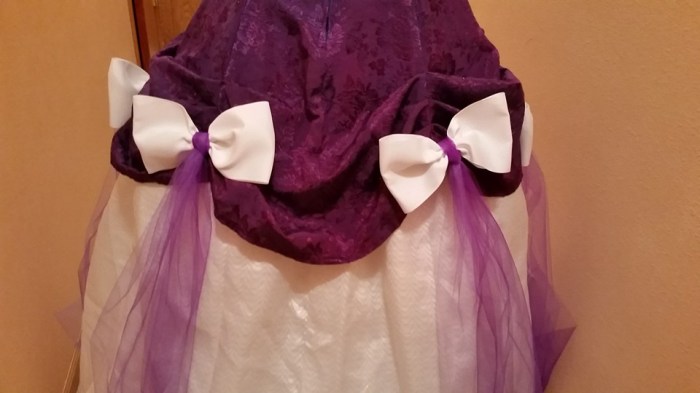
And . . . Ta Dah! About 2 1/2 hours later (and that included digging around for fabric and trim inspiration) I have a dress ready to go to the Ball!


Cost: Purple dress $3, shower curtain $1.38. Ribbon and tulle I had. I used about 3 yards of 3″ grosgrain ribbon and probably about 24 yards of 6″ precut tulle (give or take). Each bow has four streamers. Time, as mentioned, was about 2 1/2 hours.
Obviously, in this example I attached the new skirt to the underskirt of the original dress. However, this basic idea could be used with a separate overskirt and underskirt. I did like the idea of using a different lightweight fabric at the top of the underskirt. This was also a good way to get a floor length skirt out of a shorter piece of fabric. I was particularly pleased that the shower curtain worked, as often they come in wonderful lightweight fabrics. It would also be a budget-conscious way to conserve on fashion fabric.
This would also be a potential way to use dresses you already have. For example, I have tons of tea length 50’s style dresses after doing “Grease”. I could ruche up the skirts, either with tapes & pins, or with loops of ribbon, and create temporary ball gowns, and still have the original dresses in use-able condition for their original purpose. The satin prom dresses from the late 80’s would also potentially work well for this.
If I needed to lengthen the dress, a ruffle at the bottom, or a strip of satin, lace or ribbon would work fine since the bottom edge is a straight line.
I hope this inspires you to create your own Fairytale ballgown!
Addendum: We finally had a good picture taking day!


