I have been wanting to do a “start-from-the-beginning” post and had been trying to decide what sort of costume to create. I have lots of ideas rattling around in my head, it was just a direction of picking a direction to go 🙂 I got inspiration from a comment my sister made on on of my previous posts.
My sister will be costuming “Footloose” this spring and has decided to use the “Gunne Sax” look for the big dance scene at the end (early 1980’s). We were discussing altering those dresses, and potential “looks”. Something to think about other than 1950’s has been a welcome diversion!
Since I was in high school back then (gulp), I know the look well–Senior Girls Chorus, 1982. That is me in the back row left in the pink dress. That was a legit Gunne Sax dress. I was pretty thrilled with it. My Mom had made my Sophomore prom dress (a cream Gunne Sax look alike) and I had sewed my Junior Prom dress (blue with a lily-of-the-valley print and a little white lace jacket), but that fall, on clearance, we had found dresses for $15. So we bought them! (My middle sister as well). My Mom NEVER spent the kind of money on dresses that it would take to buy a REAL Gunne Sax dress . . so this was big stuff in my teenage life.
 My memories of Gunne Sax dresses include pastels, sheer gauzy fabric, lots of lace and ribbons, and tiers. My dress that year had spaghetti straps, but, long sleeves were also popular, and you also can see some 3/4 length sleeves. The dresses were lined and full, however, you didn’t wear a petticoat . . . hoops came in a few years later.
I came to realize that really, the early 80’s were at the end of this style of Gunne Sax dress. This peaked my interest, and I found a really interesting article about Jessica McClintock and the Gunne Sax Brand.
http://www.sfgate.com/news/article/Design-empire-began-with-Gunne-Sax-2459610.php
Researching the dresses:
The next step was to look at pictures of these iconic dresses and try to figure out what the key components were:

This pattern shows sheer sleeves, rows of parallel trim on the front, a gathered skirt, slightly shaped waist, and satin ribbon trim.
This dress has the same waistline shape, satin ribbons, lace, lightweight fabric and gathered waist.
This is a variation . . . . note the long sleeves in a contrasting fabric, satin ribbon detailing at waist, the corset lacing up the center front, and again, lace & ribbons.

This dress has a shaped neckline, the center front corseting, and the ribbon outlined waistband. Note the large floral print.

Again, large floral print, contrasting sleeves, lace & ribbon trim. The neckline is deep–with almost an Empire look.

Sleeveless, tiered skirt, ruffles, ribbon trim and again the waist detailing. This is a smaller floral print. The skirts are gathered at the waist, the skirts are also gored so that the hemlines of the pieces are larger than the top (like a piece of pie).

An aside at this point:
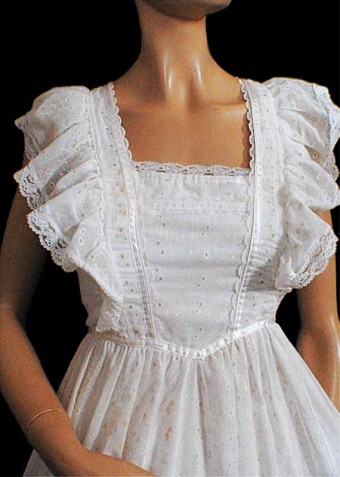
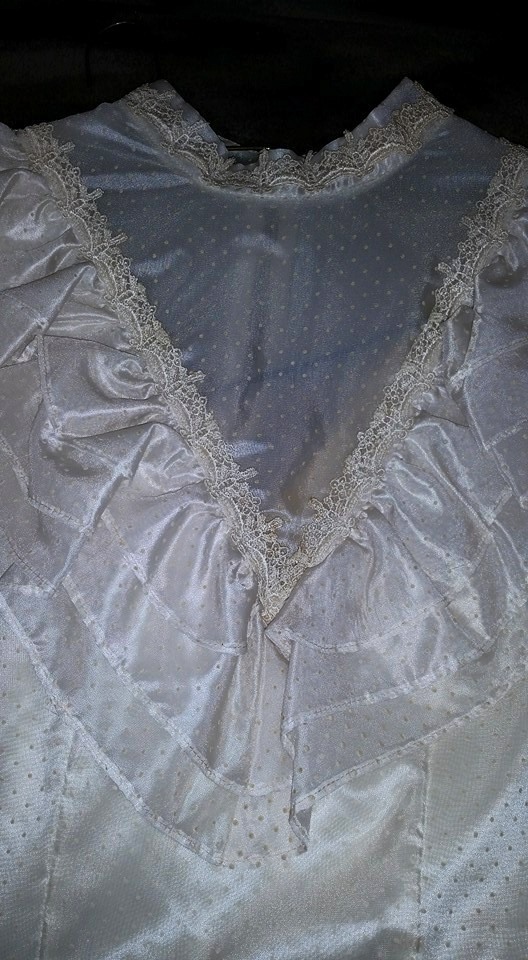
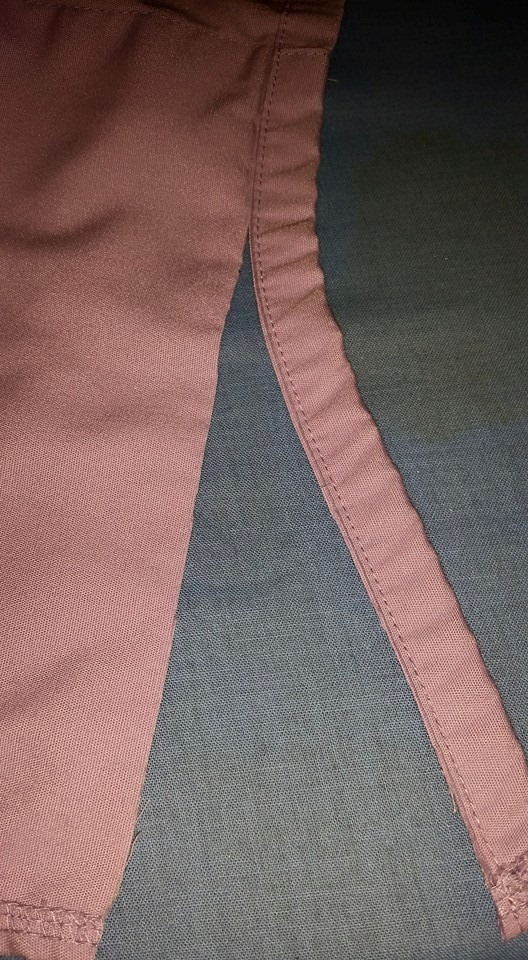
After I was mostly finished writing this post, I found a vintage dress to look at. Some of the construction was interesting. This dress had a 3 part front (and was less fitted than you might have thought). The back was one piece, with buttons at the top, and the back was not fitted at all–but had a piece of elastic sew in at the waistline to provide the shape. The fabric was a sheer dotted swiss.
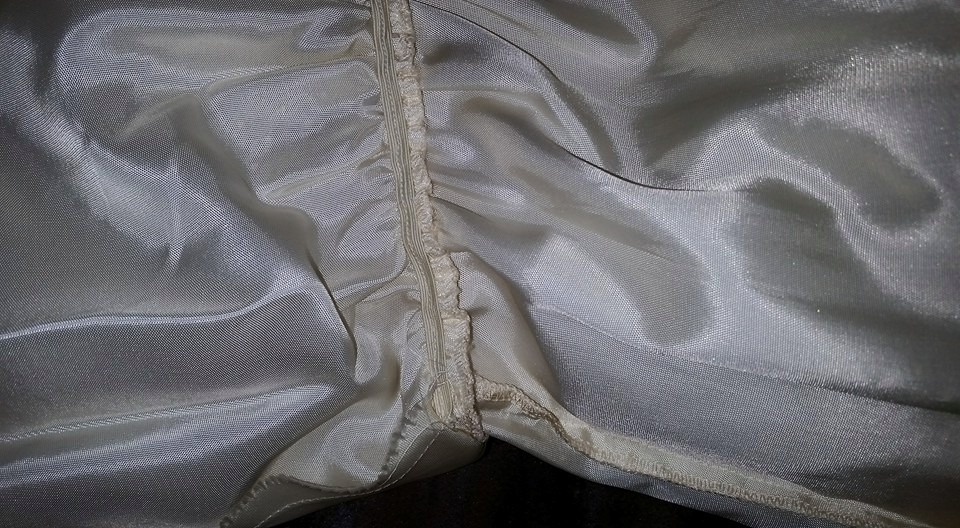
Elasatic at waist in back

One piece back, and opening 1/2 way down. Closes with pearl buttons and elastic loops. Dress is lined with a shiny polyester fabric.
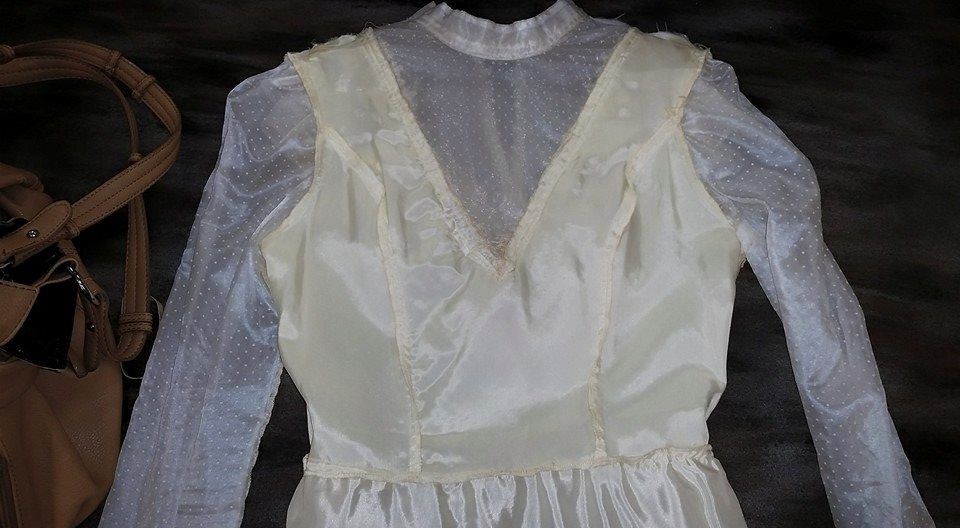
Front is a simple 3 pieces, with less shaping than I recalled.
Front detail.
What is it about Gunne Sax?
No doubt almost every high school and community theater costume collection has at least a few vintage Gunne Sax dresses. Their prairie style, full skirts, and modest look make them the classic look for productions of such musicals as “Oklahoma”, “Music Man”, Hello Dolly”, “Cinderella” and more. These Prom dresses, perhaps more than any others, have a value and “life” beyond Prom.
So back to my sisters production of “Footloose” . . . she has a collection of about 30 vintage dresses. Vintage dresses are great, BUT, they often have one major drawback: they run small. People today are much larger than they were in the past. The odds of having, or finding, a vintage 2x dress in this style are pretty slim (at least in my experience). The next issue is the fabric. Many of these dresses had that characteristic pastel gauze fabric. Most dresses that are available for upcycling run towards satin and specialty fabrics, and long sleeves have been out FOREVER.
The next best sources for large quantities of fabric are linens: sheets, comforter covers, shower curtain and drapes. The best fabric to recreate one of these dresses will probably be from sheer curtains, and curtain linings, and possibly sheets, and, for the white for the contrasting sleeves, the fabric that comes from the middle of bedskirts might be surprisingly useful.
I do think there might be possibilities in upcycling a bridesmaid dress, even in a satin, IF it was a pastel color, and you could add long sleeves to the bodice. Then, if you added some ribbon & lace trim, a mock waistband, and a ruffle around the bottom, the fabric might well be OK (but, you’d have to try it and see). If you only had one onstage it might stand out, but if you had several of them, I think it would work, and they would just blend in.
On to the upcycling:
For my project, I decided that I wanted to try to make a plus-sized version of the dress. This adds some additional challenges. The body shape, and where the plus-sized person carries their weight makes a big difference in how the garment will fit. That seems really self-evident, but it makes a difference when measuring and designing a costume, and if special alterations will need to be made.

One big consideration is what to call the “waist”. You can measure the natural waist, BUT, for most people who I have worked with, it is the smallest part on the person that will “become” the waist, even if it is very high, ie directly under the bust (as in a pear shaped person). This is something to think about when deciding on skirt length and garment construction.
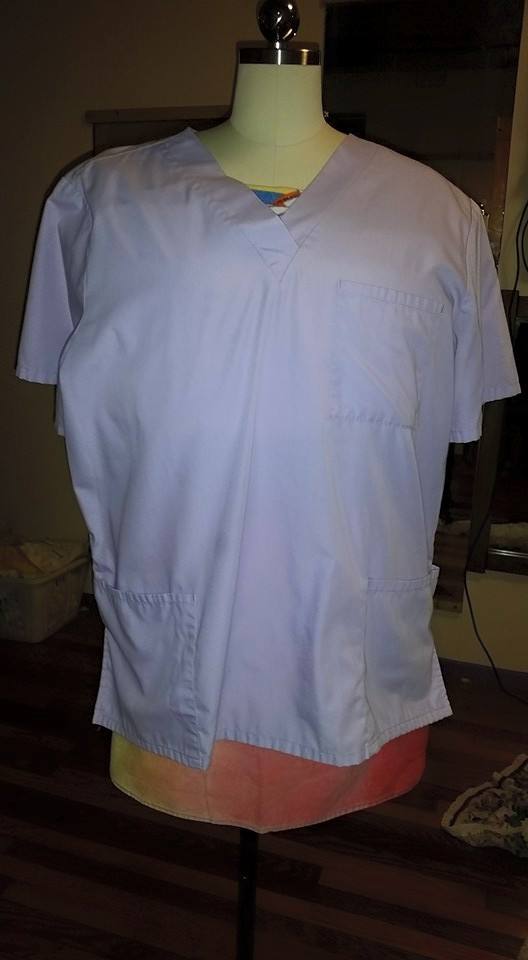
My first thought was that I would look for a blouse, and then find a coordinating fabric for the skirt. THAT was easier thought about than actually found. Either the style or the fabric were totally wrong. (I have subsequently thought that a button down blouse might be a starting point–if you recut the neckline). I ended up in front of the scrub section . . and I thought . . why not? The colors are good, they come in lots of sizes, the fabric is cotton, and they tend to be readily available, and a significant plus is that the ones at thrift stores tend to be very well washed, which may be as close to that soft gauzy cotton as a person can inexpensively get.
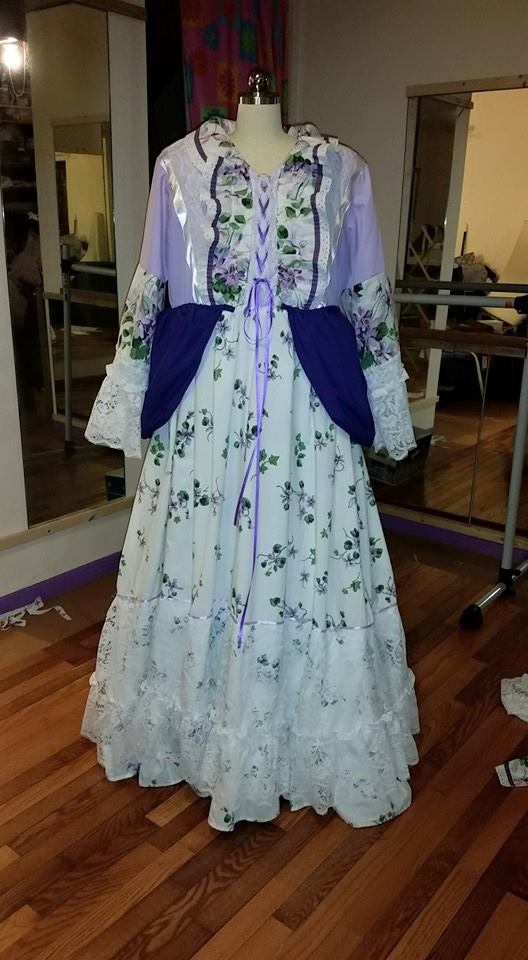
What I ended up with was far from perfect–this is why I call it a “concept costume“. To me, that means that I have some ideas, and I want to play around with them, and see if the concepts will work. I don’t want to “waste” fabric that is “perfect” on an idea that just doesn’t work. So, this post is really about experimenting, and trying to figure out what might work and what doesn’t.
This is what I started with–less than perfect, but not horrible:
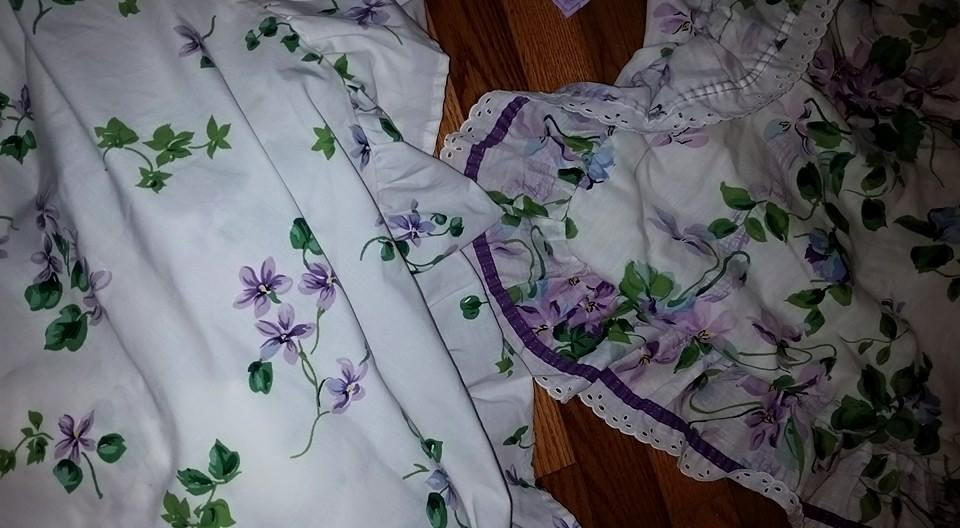
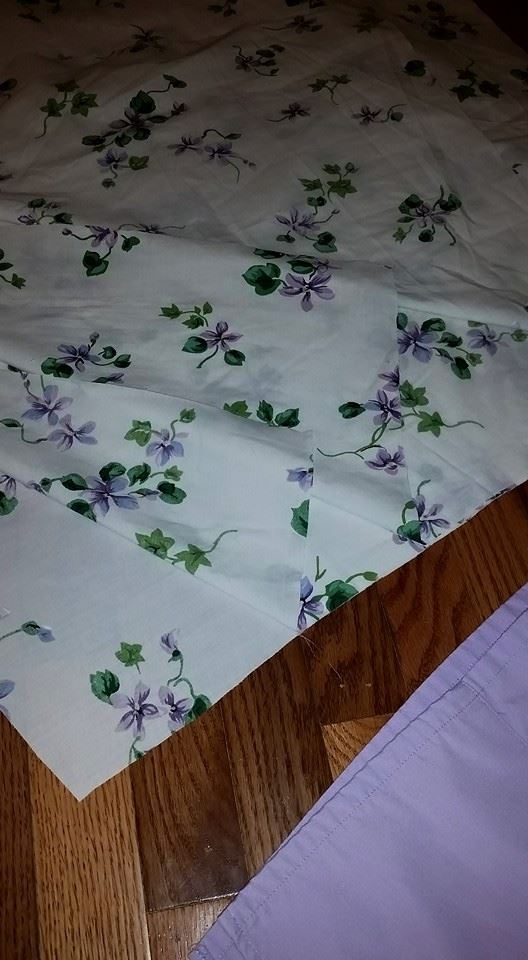
A lavender scrub top, a single flat sheet and matching pillow sham, and two lace curtains. I later added a pair of large purple scrub pants.


First, I started by padding my dress form.
It ended up being around 44″ for the chest and hips. I later also added some padding in the shoulder area. My dress form is a size 4, and is non-adjustable (but it does have a soft body you can poke pins into). At some future point I hope to do some creative padding to make it easier to adjust the size, but for now I just wrapped some beach towels around it. Far from perfect, but, better than it was.
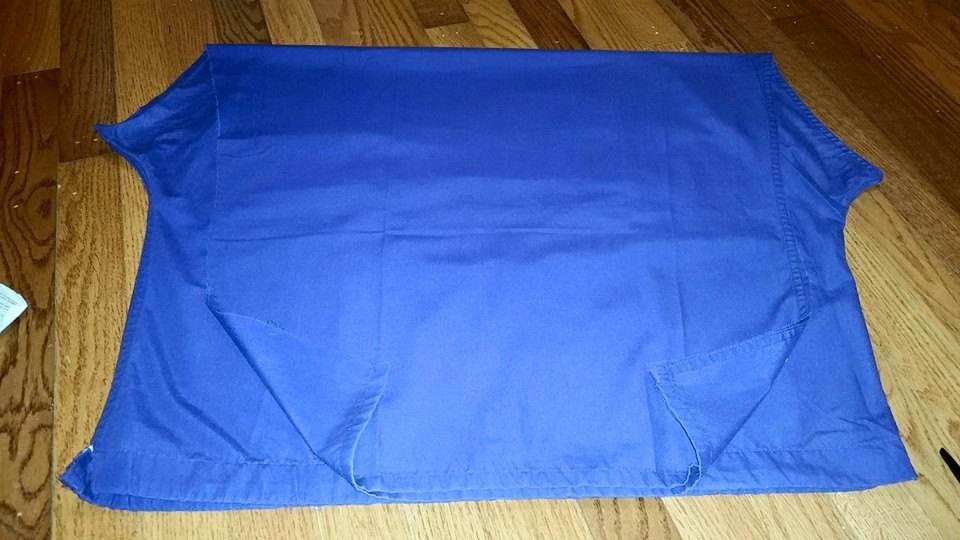
The first thing I did to the scrub top was to carefully remove the stitching from the pocket.
I know this does not look anything like the fitted tops of the inspiration dresses. However, my thought process was this: it is always easier to remove fabric than add it. Therefore, if I started with a relatively loose fitting garment, once it was actually on a cast member, a few strategic darts or tucks could be added to improve the fit. As the project evolved, this idea of flexible fit persisted. I am not wild about the lack of fit around the sleeve, however, once a fitting is being done, I think that taking a tuck in the shoulder seam to pull the top of the armscye up, would improve the look.
My next plan was to use the pillow sham on the front. (I briefly considered switching to a purple dress as the “base”, but then, went back to my scrub top, as, that is a more readily available option). This look did not inspire me at all . . . so I put that aside for awhile and worked on the skirt.

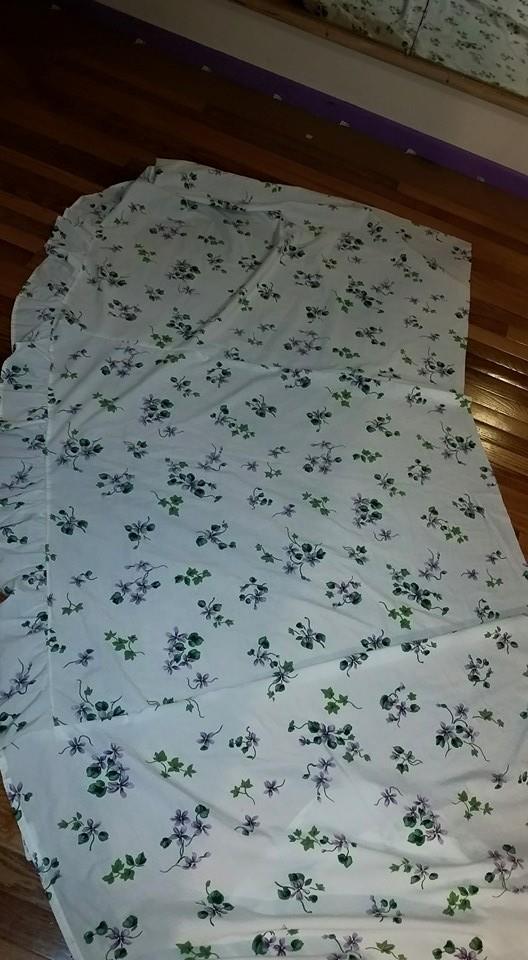
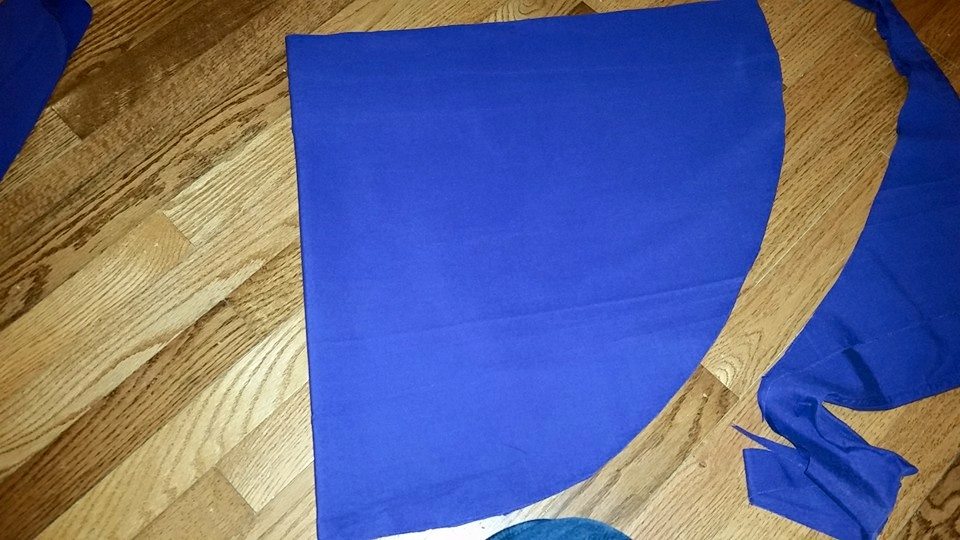
The skirt is made from the sheet. The sheet had a small ruffle on one of the short ends. I decided to put that in the front of the dress. I also wanted this skirt to be relatively easy to shorten by making a tuck in it, so that meant that it needed to be more rectangular (and less pie shaped), especially at the bottom. I folded the sheet in half top-to-bottom, and then in half side-to-side (this only works IF the pattern is not one-directional, if it is, the fabric will need to be sliced and layered to keep the pattern right-side-up).
I put the top (folded in half) along the folded sides, and decided how long I would make the dress. A gored skirt typically has a rounded bottom. However, as I wanted to preserve the ruffle on the bottom, I fudged it and just angled the cut on the side part of the way down, and left the bottom of the piece flat. These pieces were not that full, so it worked out fine. I lay a tape measure on the fabric as a cutting line.
When I was done, I had four skirt panels (I flipped them up for visibility):
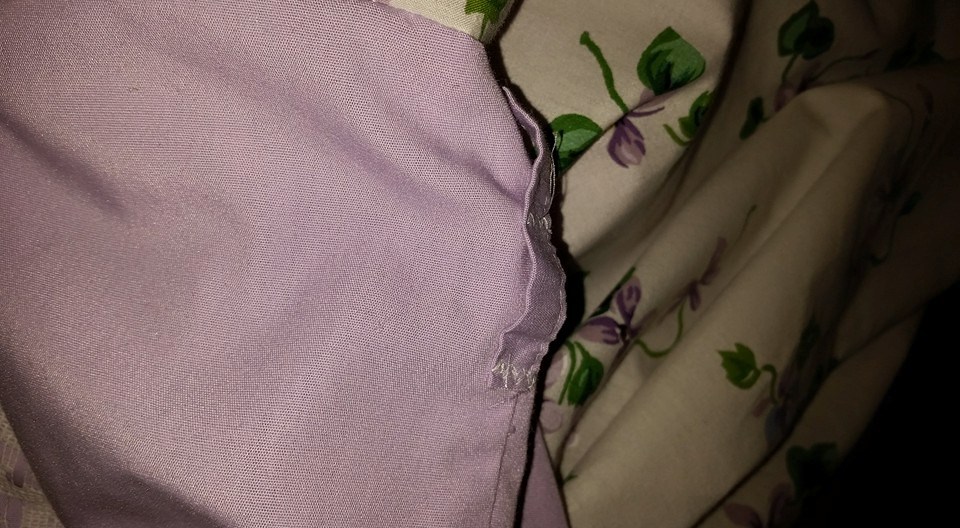
Next, I sewed the panels into one large piece. I did make one mistake here . . .I sewed the two front panels together as is, which meant that I had a seam in the center front of the dress. In the end, it doesn’t really show, but another time, I would slice one of the panels in 1/2 and sew it on either side of one center front panel. If I had not had the ruffle, it wouldn’t have mattered, as I could have adjusted the panels so that the seams were not center front. You can see the curve of the skirt from the wedge shape of the gore panels.
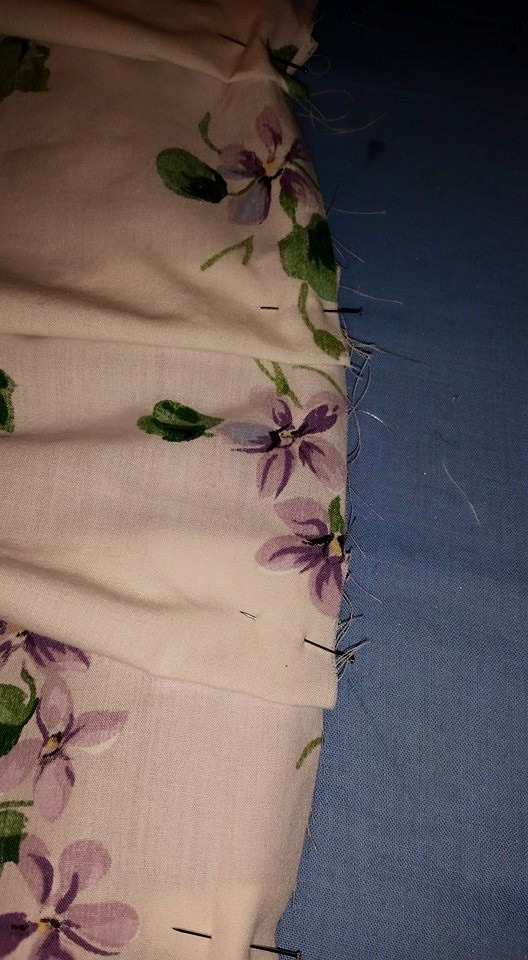
Next, I wanted to add a lace ruffle to the bottom of the skirt, so I cut the ruffle off the curtains, and sewed it to the skirt. It was easier to do this with the skirt flat.
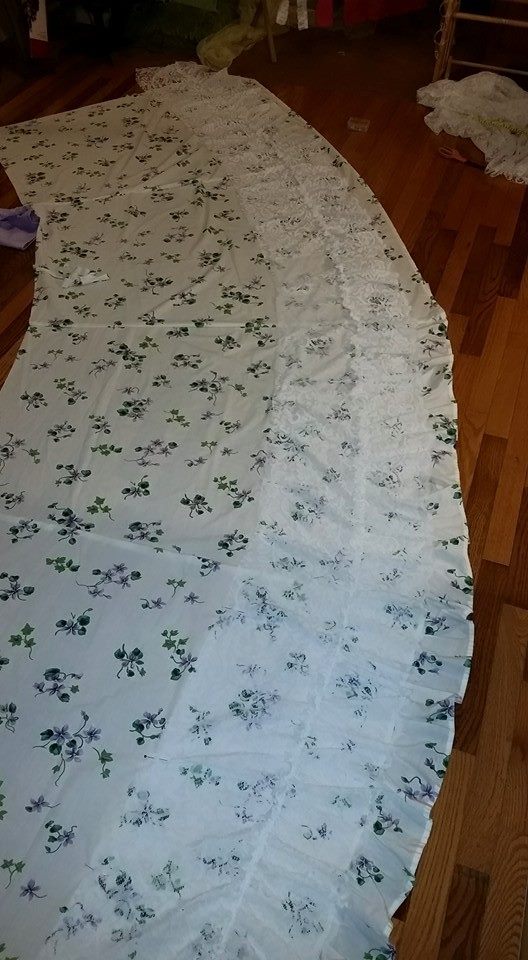
I then wanted to add a row of satin ribbon above the lace. Do you think I had any purple? No. I looked through my bias tape, seam binding, lace, other trim . . . NO PURPLE. I finally found a spool with just enough, but it is narrower than I would have liked. Last of all I sewed the skirt together into a circle.
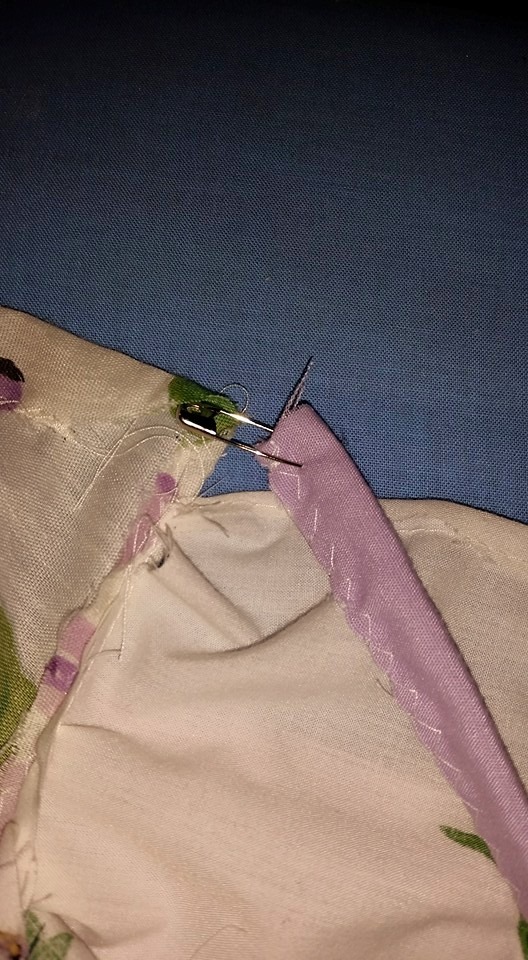
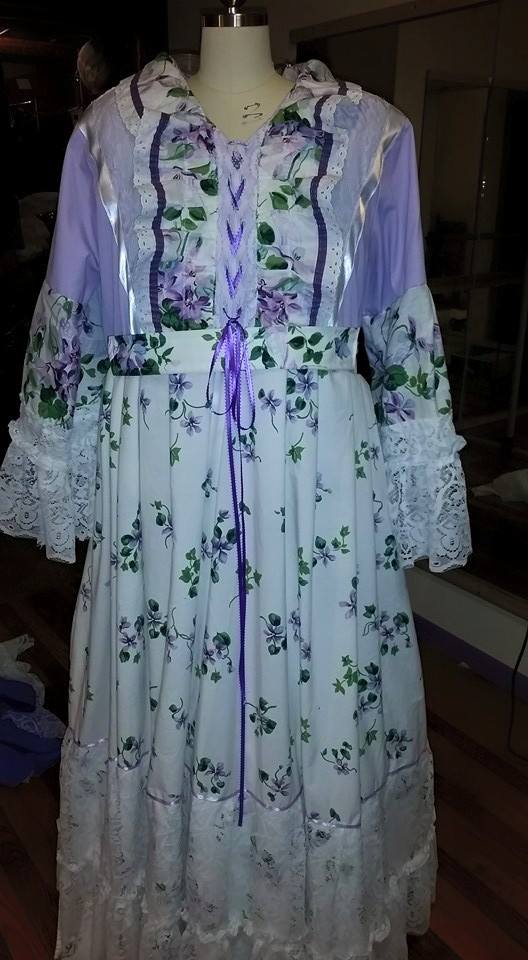
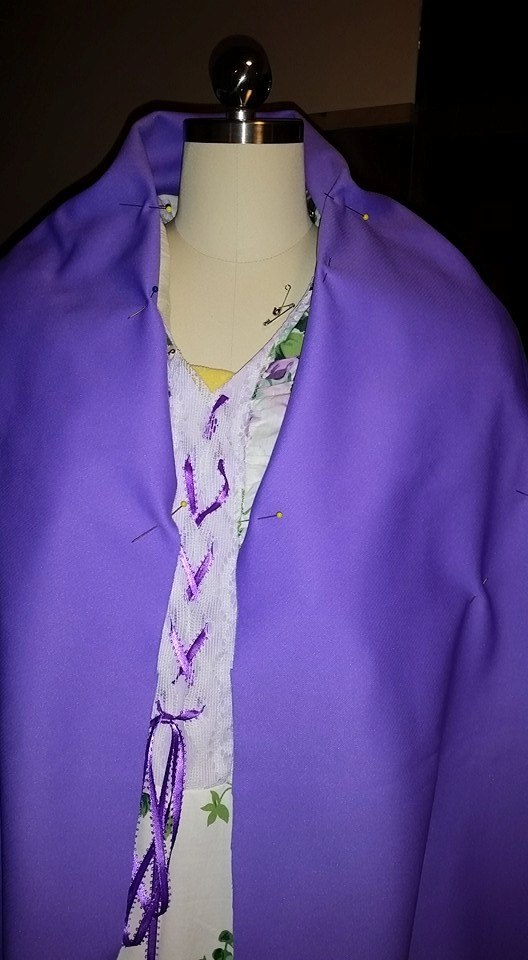
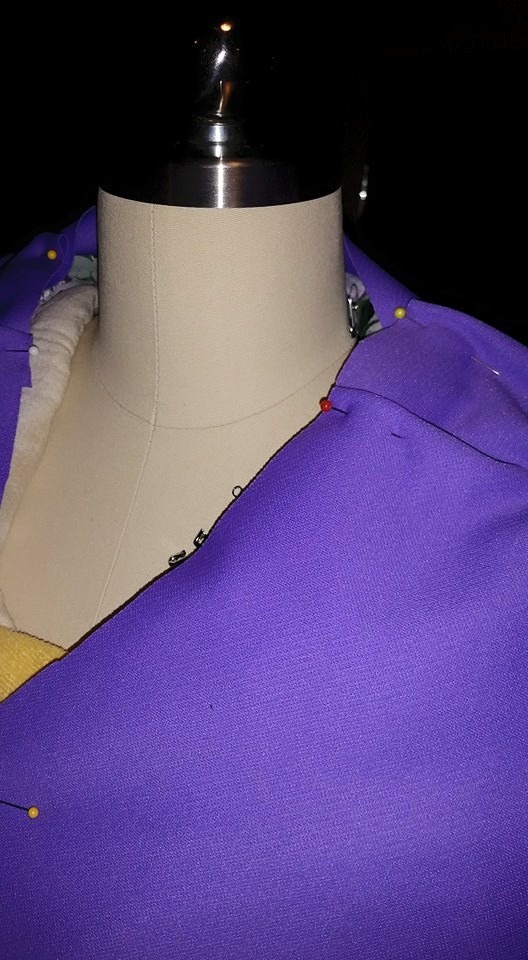
At that point, I had to go back to the bodice. Luckily, as I had been cutting the lace curtains, I noticed that there were beading holes along one edge. I recalled the corset detailing on many of the original dresses, and decided I would try to emulate that. I cut the scrub top off, and lay the lace on top of it.

I cut out a shape that I liked, and then I flipped it over, and cut another one out of the lace, and then I pinned them both to the top, and sewed them on.
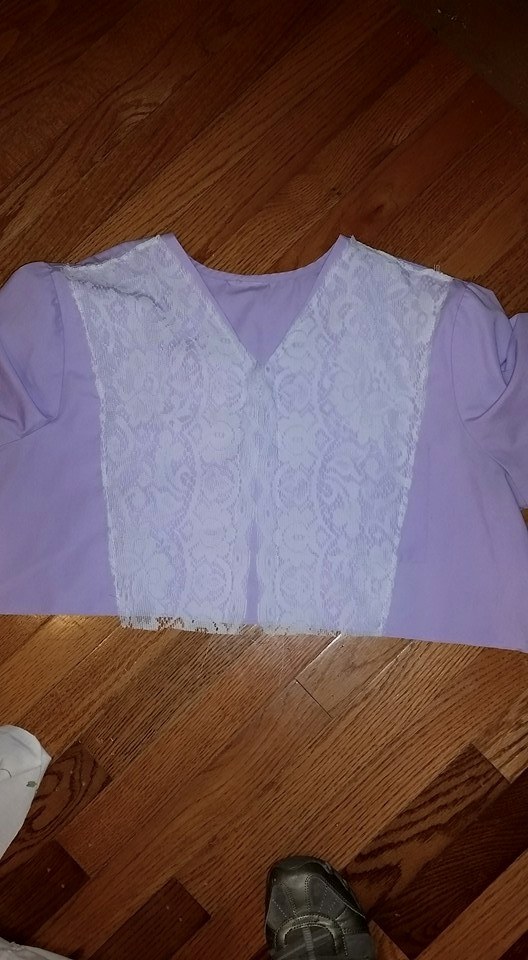
I decided to use the ruffle from the pillow sham to decorate the front as well (this maybe was a mistake . . but . . it is what it is).

I thought it was kind of floppy, so I ran a row of stitching up the center of the ruffles, to about the height of the opening of the neck. I then added a row of white satin ribbon on the edge of the lace. I found a piece of dark purple ribbon, and used it to lace the front up.
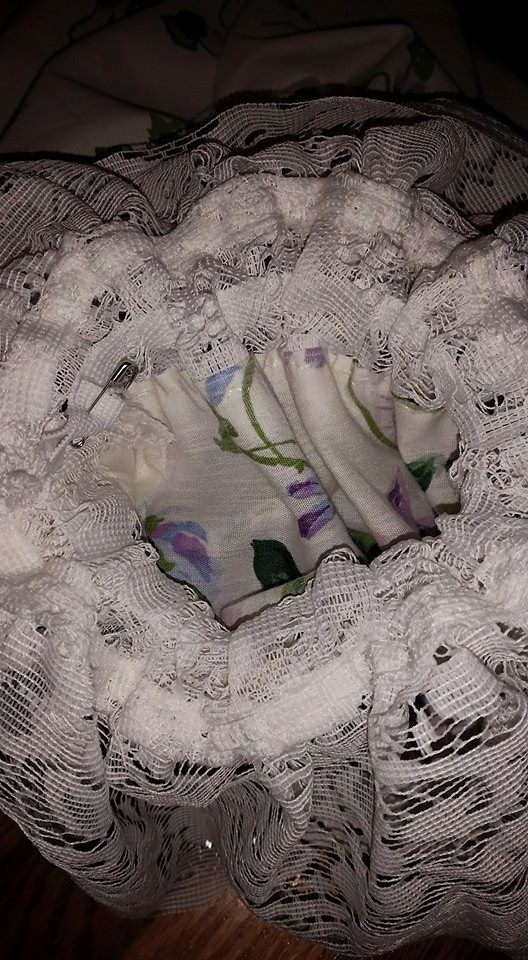
Next were the sleeves. I had this “great” idea to use the back pieces of the pillow sham as the top part of the sleeves, and then I added a lace ruffle. The curtain rod pocket was in these pieces, and I thought I could use that to potentially run elastic through.

I sewed the lace to the fabric, and then sewed it into a tube. It was a bit bigger than the sleeve bottom of the scrub top, so I matched it along the bottom and then sewed in a few tucks at the top. It is not a bad sleeve, BUT, I don’t know that it has the “Gunne Sax” feel. In retrospect, I probably would remove the scrub sleeves, and cut new ones out of the lace curtains.
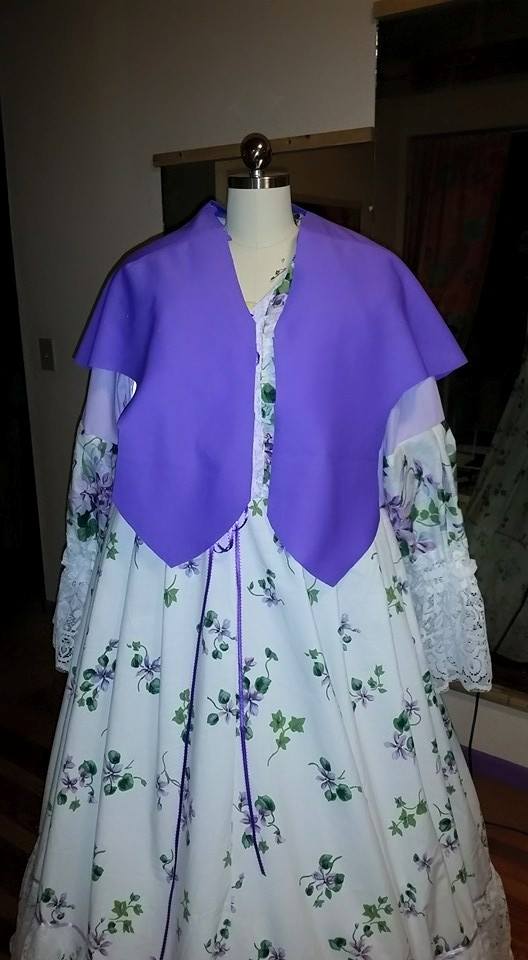
Next step was to attach the skirt to the top. I did this using pleats because I LOVE pleating on skirts and I can do it in about the amount of time it would take me to run a gathering thread. That said, the dress would probably better reflect the look I was going for if it had gathers.
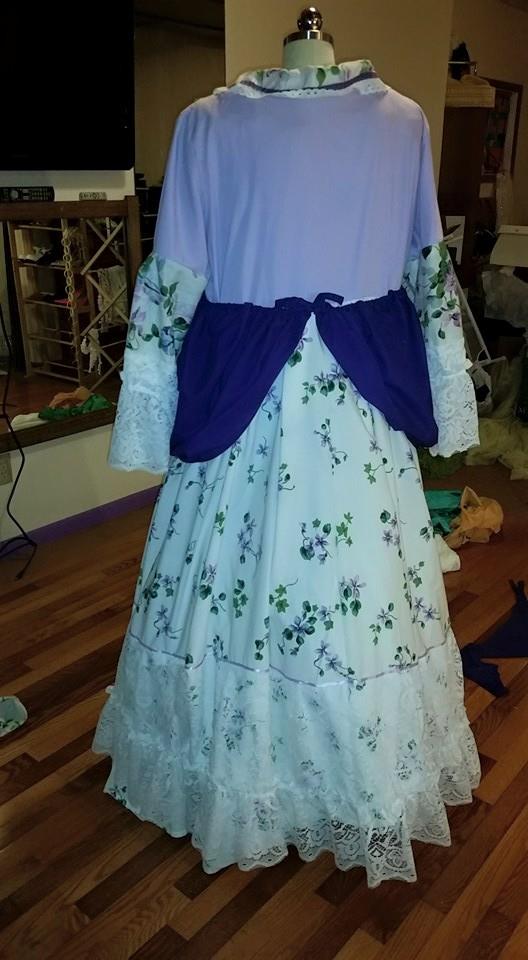
I sewed the skirt on, and popped it on my dress form. At this point, I had been working on this project for about 3 hours. (Note: in these pictures there is no petticoat. Later, I add a petticoat and you can see how much nicer the skirt looks).

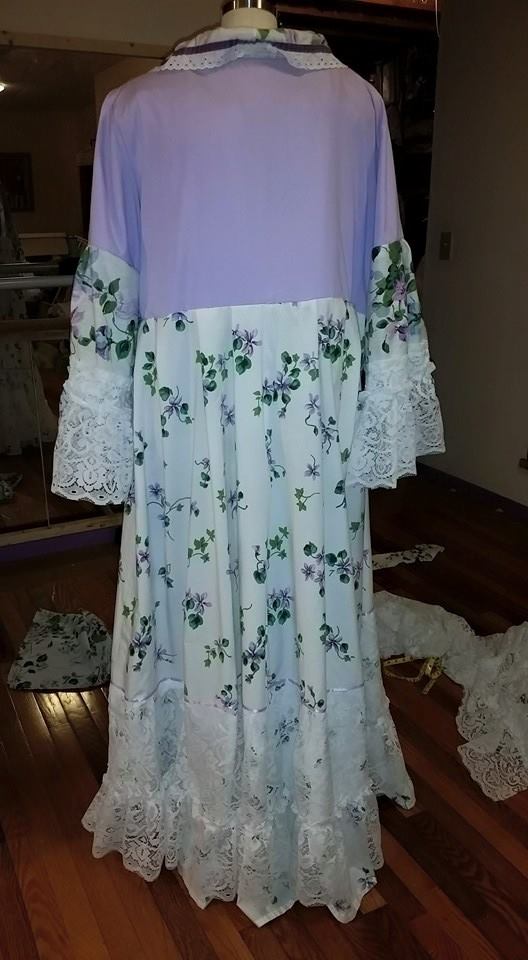
This is not the best costume in the world (aside from it being a “test model”), but I have $7.50 invested, and 3 hours (not including thinking time, LOL). Not bad, if I do say so myself. This is why I really like upcycling.
At this point I decided to take a break (since it was about midnight anyway). I wasn’t sure what I wanted to do with the sleeves. If I put a cuff on the bottom, it would have a more 1980’s look . . but . . I kind of like the way the loose ruffles are, and I thought that gave it a nice look, perhaps, even more versatile in potential “era tweaking”.
I knew I wanted to do something to shape the waist . . . attached waistband? sash? side ties?
Then . . .as I was looking at it, I wondered if I could make some simple components and change the look?
One base dress, multiple looks, in other words “era tweaking”:
Here are the next nights additions:
First, I went back to the thrift store and looked for something that would go with it in a purple color. Yes, I could have used a white sheet, but that seemed really boring.
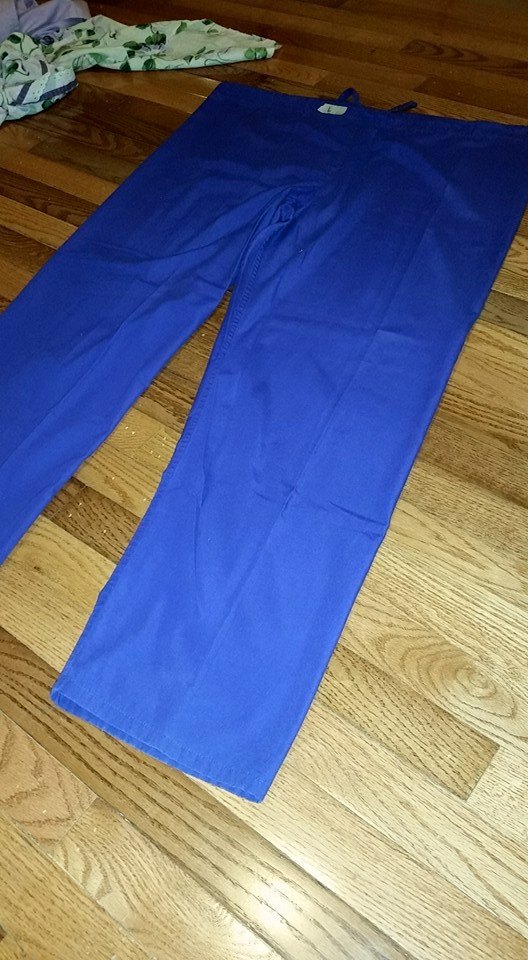
I went with dark purple scrub pants, size large for $0.50.
I wanted to make side puffs (like Cinderella wears). There are different ways to make those, and I started confusing myself with conflicting memories so I pulled out a pattern:

I like to use patterns as references. I can see the shape of the pieces, and sometimes find out how to sew them together. I try to buy them when they are 10 for $10, and if I have time, I will search through the ones at thrift stores for vintage and costume patterns, and patterns in assorted sizes.
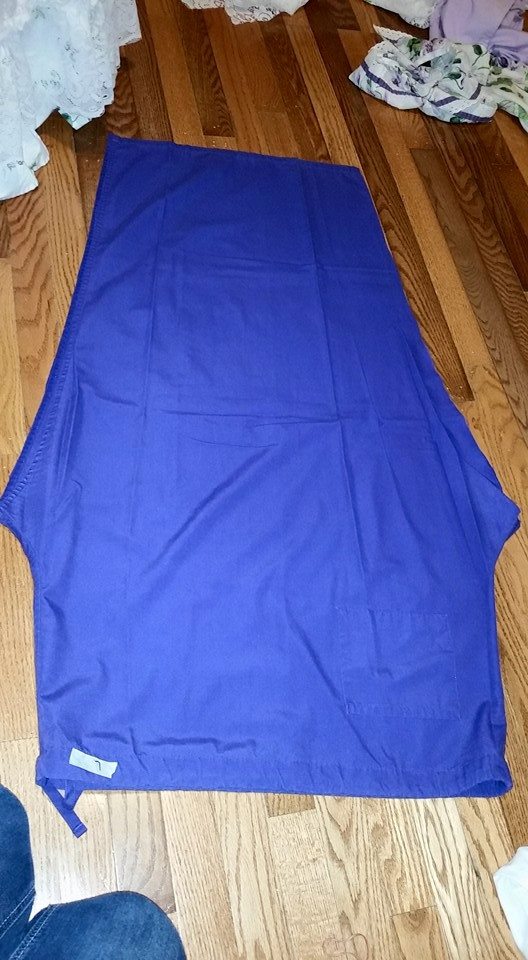
Once I had my shape in mind, I cut the pants apart at the inner leg seam, and lined them up flat:
In order to get two of the same shape, I folded them in half, making sure to keep the grain line straight, trimmed off one edge, and cut out my poof shape.
I then made a narrow hem on the STRAIGHT side of the poof (that is the part that always gets me mixed up). I then had a brilliant idea . . . in order to go with my theme of flexible fitting . . . instead of running gathering threads along the curved edge and sewing them to a waistband . . .what if I made a casing, and ran a cord through, and that way they would be adjustable to waist size as needed?

At first I was thinking bias tape (and then I remembered I had no purple bias tape) so I just ironed a “casing” in and then sewed it down. This worked really well. The fabric was cut on the bias so it was happy to curve. I next cut the side seam off of the discarded scraps and used that to thread through the casing. Flat fold seams and hems are a great place to find pre-sewn strips of fabric for ties and loops. I divided the original waist tie in half and sewed it on the ends of the tie (it just seemed nicer for tying) and sewed a small loop on the end that would be at the front. I didn’t have a clear vision of exactly how it was going to attach to the dress at that point, but later I decided to cut another strip of seam and just tie the two fronts together.


It would have been better in the same light purple as the scrub top, or maybe if I could have found a skirt that matched so the poofs could be a little bigger . . but . . overall, the concept works, and it gives the dress a different “look”. (This is where I am additionally regretting the ruffles on the bodice).
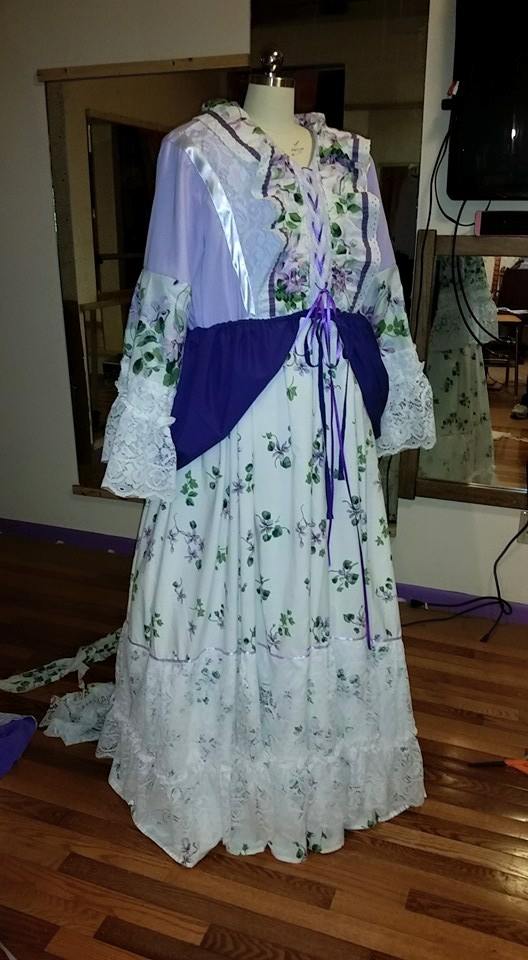
My next thought was to make a “bustle” out of the rest of the pillow sham and the lace (plus I had a 25 cent piece of purple double knit). I messed around with it for a while and just didn’t get inspired, but, I DID keep coming back to the front of the pillow sham.
So, I trimmed that and ran a casing across the top and then re-shaped the lower sides. I put in a narrow hem, sewed in a few pleats and sewed back on the ruffle I had removed earlier. I made a drawstring out of strips of the bottom of the scrub top, and threaded the piece I had just made on to it.

Definitely changes the look. Obviously, a bustle in the back would be nice, but, this gives a “feel” of a Victorian dress, especially if you had shawl or jacket, or were a part of a big chorus scene. You could also add a back bustle. Again . .this is just playing around with ideas, not re-creating a historically accurate gown.
I was then back to the waistband which had started this whole thought process. I took my last piece of pillow sham and trimmed it into a rectangle. I next pulled out a piece of white scrap fabric (out of my trash can actually, LOL), and made a lining. I just folded the print around it and sewed it down. I attached ties, and it was done:

My final thought was to put some “belt loops” on the sides and back of the dress to run the ties of the “add ons” through to help keep them were they were supposed to be. For actually wearing of this costume, the “add ons” might need to be basted and/or pinned once adjusted to the size of the cast member.
My final thing was to run some elastic through the sleeves:

Adjustments that could be made during a fitting include: shortening the skirt (make a tuck right above where the lace is sewn on), raising the sleeves (tucks in the shoulders), and fitting (tucks on the sides and waist). Keep in mind that if you fit it too much, the back will need to be opened and a zipper or some other method of closure added. The dress could also be shorted at the waist by taking a tuck in the scrub top right above the waistline.
I’ve mentioned things I would do differently. I think the most significant change I would make to recreate the look I was originally going for would be to add white sleeves. I think either lace, or some other lightweight white, would have been fine. Cuffs at the bottom of the sleeve would definitely help as well.
Total cost of this project: $8 ($2 sheet & sham, $2.59 x 2 curtains, $0.50 x 2 scrubs), plus some assorted ribbon & elastic
Total time: 3 hours for the base dress, 2.5 for the three “add-ons” (including messing with a back bustle that didn’t happen).
End results: 3 different looks and a lot to think about! (And a dress my daughter says, “Well, that is “interesting”. It probably would look OK onstage . . . .” that is daughter-speak for “Make me something better!”)

WAIT! I’M NOT DONE YET!
Addendum: So . . . after I went to bed last night, I started thinking “What if I put my HOOP under that dress?”
One thought led to another, so tonight the hoop went on the dress mannequin and on popped the dress. What I was very pleased to find out, is that this skirt fit nicely over my small hoop. Good thing to know–since this skirt was made with one twin bed sheet. Another thing learned in this concept costume!
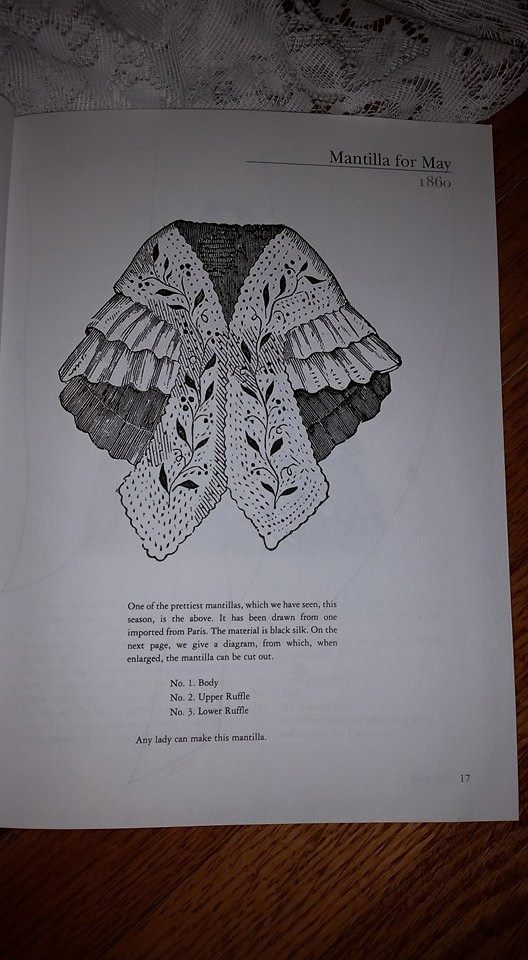
I had looked at pictures of Civil War era dresses trying to figure out what to do to make this one have more of that “look”. I didn’t want to do a corset (defeats my plus-sized easy fit costume project). I had the leftover lace from the curtains, so I thought about an overskirt, and then I had my $0.25 piece of purple double knit that I hadn’t used. I messed around with the lace and just didn’t feel it. So I turned to my book “60 Civil War-Era Fashion Patterns” by Kristina Sleshanko (Dover Publishing 2007) and there, right there, on page 17 was my answer!
 I
I
I draped my “lovely” little piece of double knit around the shoulders of my dress form and started tweaking. I wanted to just leave it one piece of fabric, so I pinned in some darts to help it go around the shoulders. I marked center back, and the point where I wanted it to taper to in the front.
Then I took it off the dress form, compared the two sides, and made a “shape” with the pins. I cut off a little less than the pins indicated, because it is always easier to cut more off later.

Next I tried it on the mannequin and then repinned the neck darts and sewed them in (these could have been a bit more even, but this was a quick and dirty project). I then made a pin line with how I wanted to cut the sides.

Next came shaping the front drapes. I just lay the two sides together and free-hand cut a shape similar to that seen in the picture.

After that was done, I tried it on the mannequin, and decided I wanted a little more length in the back, so I added a piece.
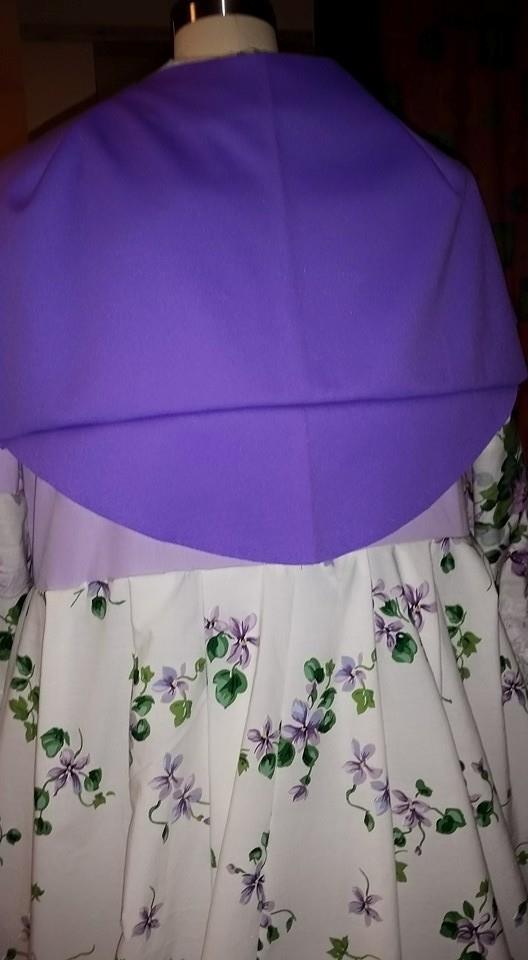
This isn’t great because this seam is pretty visible in this fabric, but, for a concept costume, it is OK.
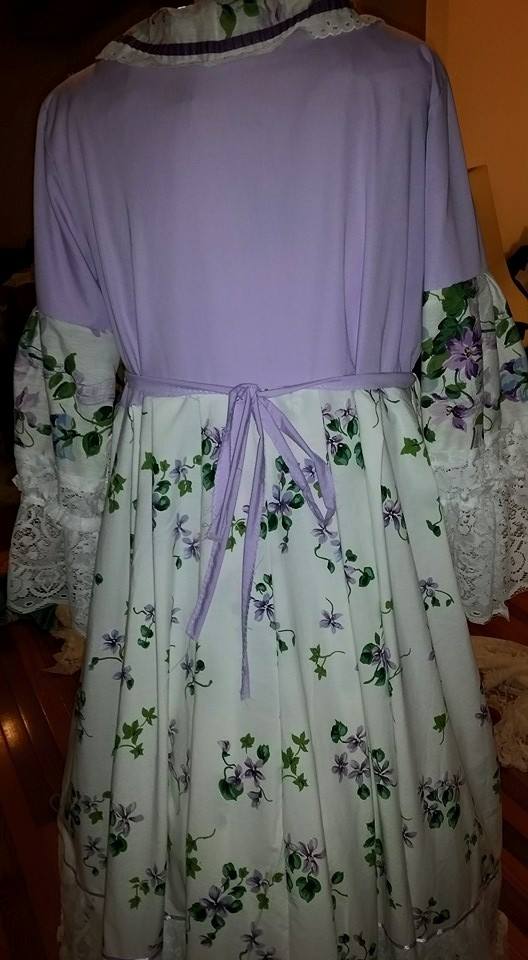
I looked at the lace ruffle layers in the picture, and decided to use the left-over preruffled curtain edge (the same as is trimming the bottom of the dress) as the top layer, and one of the curtain edges for the longer ruffle. I first carefully & evenly folded up the curtain with the edges together and cut it to the length you see in the back. I wanted it shorter in the front, so I opened it up, folded it in 1/2, and cut a taper in the non-folded sides. I then matched center back, and tuck-pinned it to see how it would look. Other than the fact I pinned it to the wrong side, I thought it looked pretty good. So, I pinned it right-sides together and zig-zagged the ruffle to the mantilla. In retrospect, I had a little bit more of the lace edge (I had used some of it for the bodice). I should have spliced a piece in so there was a bit more fullness in the back.
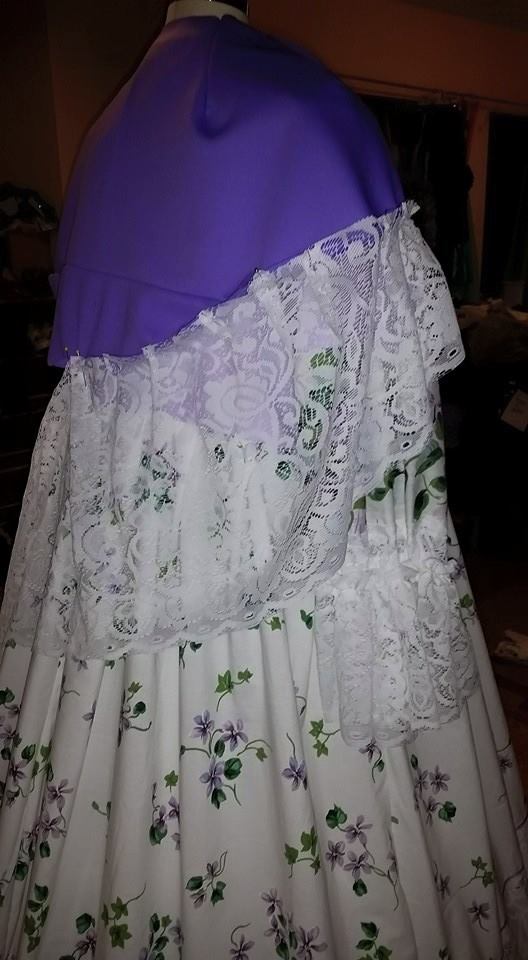
I sewed the pre-gathered ruffle on top of the longer ruffle. In this picture you can see the longer lace pulling just a little. I didn’t redo it because this is the back of a costume (that may or may not be worn), and would be seen very little on stage, so not worth my time and effort. I was happy with the double ruffle look.


The final step was to embellish the front. I tried just laying some lace on it, but that seemed really boring. I didn’t have any good lace motifs to applique on, and, the pieces of the patterned fabric I had were small, and the violets don’t really lend themselves to cutting out and appliqueing. I wasn’t in a mood for an elaborate pattern (as shown in the picture). I happened to have the scraps of the dark purple (from the Cinderella poofs) sitting on the floor . . . so I cut out some random shapes. Truly, these are random and the shape was pretty much dictated by the shape of the scraps.
I sewed them on with some lace for trim, and then sewed some flat eyelet around the front drapes and the front neckline. I added some little tucks in the eyelet as it went around the back of the neck to help it make the curve.
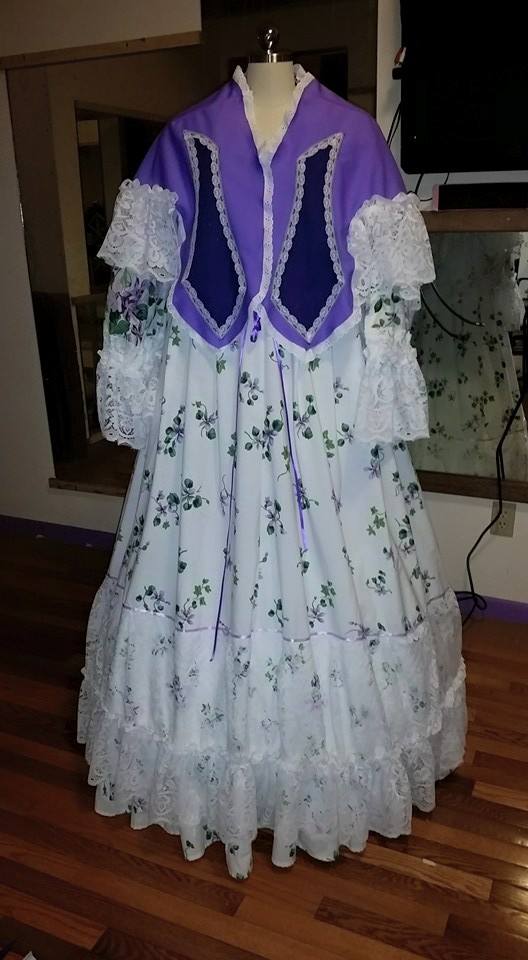
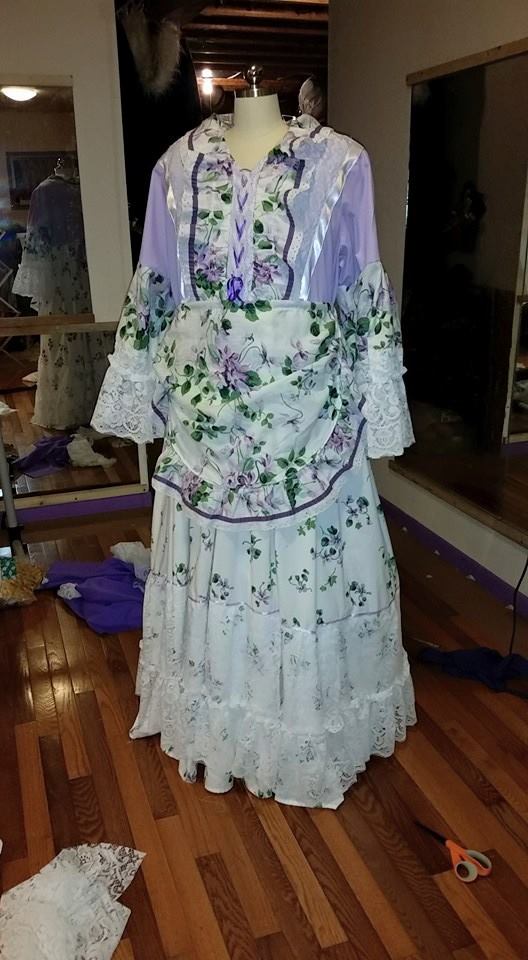
So . . .there you have it. 1.5 hours, and $0.25 later (plus a yard or two of lace and eyelet I had), and I have created another “look” for this basic dress. I am actually pretty pleased with this. I could see Anna in the “King and I” wearing something similar to this when she arrives on the boat.
Link to referenced book:


This is just so informative! What an experiment–and it looks great. Your comments about shape/size and “where is the waist” are right on.
LikeLiked by 1 person
The final product looks really good! Interesting to follow through the transformation.
LikeLike
Very interesting! I like the way you were thinking about a multi-purpose base. Would love to knwo if you ever put it into practice!
Reminded me of my grandmother and her six sisters (1890s) modifying their shared wardrobe each year to keep up with styles. Some of those dresses got changed more than ten times, and worn by all seven girls!
One suggestion: If you still have this concept piece, you might consider turning the dark purple scaps upside down – the wider part at the bosom, and the narrower part toward the waist. Plus sized girls will appreciate a little extra hour glass!
LikeLike
Good point on the scraps . . now that you mention it, that would have been a much more flattering look. I have never actually used this costume–haven’t had a good “matching” show, and while I probably could have made it work for “Cinderella” this year–it was the wrong colors :(. I like the idea of component costuming. I do think that as I have gained more experience I am looking at ways to make things more adjustable. As it has turned out, much of the costuming I do is “one of a kind”, so thinking how to make it multi-use hasn’t been a huge part of my thought process. I do find myself collecting “core” costume pieces, however. One issue I have come up with is how do you store the costume, and how do you keep track of the pieces, and how do you let other people know what they are for? I’ve spent a lot of time thinking and organizing in the costume storage space I use, planning for the time when I am not there any more. I have been talking with a woman who has been costuming for 30 some years, and she does much more “from scratch” sewing, and so changes out sleeves, front decorative panels, etc to alter costumes. I think the idea of “planned alterations” is something to consider! It alters the cost/benefit ratio if you think you can re-use things. I’ve also found that for high school kids, and I imagine younger ones as well, the more pieces you have, the more pieces you LOSE! Thanks for the comment and the memory of your Grandma.
LikeLike