Another red dress??? I know, I am about at the limit of red dresses for the ballroom scene. I spent some time in the Costume Room this week, and assigned the dresses I had to chorus members, so I have my list of “holes”. I am trying to do things the easy way and start with a bodice that will fit (or is a bit on the too-big size) as it is a whole lot easier to make things smaller than it is to make things bigger. I was happy to find a few dresses with some embellishments so I wouldn’t have to do that part . . .so, one more red dress.
When I pick up dresses at thrift stores, I wash them, mark them with the price I paid, and hang the on my rack by color. I like to collect dresses of the same color because you can do so much more when you have extra fabric. It is rare that you can do an upcycle with only one dress, especially if you want sleeves.
These are the three dresses I started with:
Dress #1: This is my base dress. This dress has a separate bodice with the skirt hanging behind it from the lining. Typically there will be a few thread chains attaching the bodice to the skirt. Often these bodices will be quite heavily boned (as was the one I used for the Mouse Queen Upcycle: Burlesque/Steampunk Style (ala Fastrada) project). This particular one was not. The dress has some pretty beading on the bodice, and an organza overskirt. It has a zip back.


Dress #2: This dress is tiny. I didn’t even try to fit it over my dress form. It has a fitted a-line shape with a nicely gored skirt. It has an overlapping band across the top of the bodice, and a zip back.


Dress #3: This is the final dress. It has red embroidery accented by red-pink sequin flowers with little beaded centers. The flowers extend across the bodice. The also extend in an angle pattern across the skirt. The dress has a self-fabric drape across the back that is sewn into the side seams. The dress looks like it has more of a train than it actually does. I just hung it on the front of my dress form so it looks longer than it is. However, it is there, and I should have made a mental note of that before I began the project.


I began the project by prepping the dresses. I started with dress #1. The bodice and skirt were sewn together with the zipper. I carefully cut the organza off the dress. Then I cut out the petticoat and lining. As I wanted to leave the zipper intact and I wanted to preserve skirt length, I opened the waist seam on the underskirt (instead of cutting it out) except for about 1″ on either side of the zipper. The last step was to cut the skirt along the center front fold.


Dress #2 was just going to become the side skirts. I removed the zipper, and opened up the center back seam by cutting out the stitching. I then cut the dress along the center from seam all the way up to the top. I did save the band at the top as I wasn’t sure if I would want it for something.
In a previous post, I had suggested that it might be easier to leave the dresses in as long a piece as possible and cut the bodice off once the skirt pieces have been sewn together. That way you could make them the right length at the top. That is a nice theory, and if you have a large, flat space to lay them out in, it might work. If you actually broke down and used a ruler and measured the skirt pieces it might work as well. The tube of skirt is huge, slippery, and awkward to line up.
How do I know this? I tried (and not very well!)
Dress #3 was a bit more complicated. I forgot about the little train. Big oops. However, that will come later. In the beginning, I treated this dress the same as #2. I cut out the petticoat and removed the zipper. I had to deal with the drape in the back, so I left the long side in the seam, and opened up the opposite seam just enough to release the drape. I cut the back seam out. This dress was left in one piece to be the front.
As I was cutting the dresses apart I pinned the skirts together. I then sewed all the skirt pieces together in a long tube, starting all of the seams at the hem end, so the hem was even. Then, I tried laying it out and cutting the tops of dress #2 and dress #3 off. I think I did OK with dress #2. I was struggling with dress #3, and trying to get the fabric to lay flat and not pull weird (this was the forgotten train). I SHOULD have realized something wasn’t quite right and slowed down, gotten out a tape measure and figured out what my problem was. If nothing else, if I had measured the center back length, and then measured that same length on my center front, I could have gauged my cutting line better. Hindsight is 20/20 you know. However, at the time, it was full-steam ahead, consequences be damned.
Once I had the whole skirt sewn together I spend an extraorinary amount of time trying to get it lined up to pleat the skirt to the bodice lining. I must have twisted the skirt and the bodice and the lining in about 15 different ways trying to make sure I had it oriented correctly. In desperation, I finally put it on the dress form and quick pinned the skirt up . . . and this is what I had done.


Oh . . . I was not a happy camper. On the good side I liked how the sequin flowers looked and I had plenty of fabric left on the bodice:

In retrospect . . how did I even begin to think I was cutting in the right place?????
At any rate. It was bedtime then. So I set it aside for the next morning. A break is good sometimes. Sigh. And a glass of wine.
The next day I evened up the bodice edge, and sewed the bodice back on to the skirt. I knew it was about 4″ too short in the center front, so I measured that much and then tapered it out to the sides. (Measuring, what I concept, I know.)
After much twisting, I DID manage to get the skirt pleated to the top. Only, I like to start in the center front and then do mirror pleats across the front as I go. I also decide where I want the different skirt panels to go, and pin those in place, and just pleat the spaces between. And I COULD.NOT.MAKE.IT.WORK. Then I realized that I had mismarked the center front. Things went much smoother from that point.
Bodice spliced, skirt sewn on and here we are:
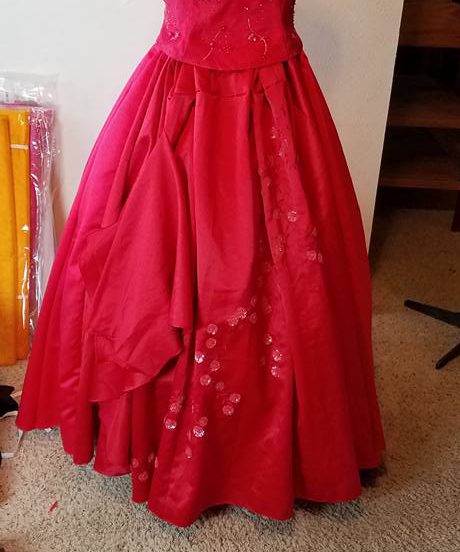
Notice that the position of the sequin flowers, the drape and the fullness of the front of the skirt is much different from the quick mock-up I had done. This is OK, and I wasn’t in a mood to change it. However, with front detailing like this, if I were going to do it again, I would have put less fullness in the skirt front, similar to the “quick look”. The side drape also looked better when it was farther off to the side. The splice seam is not horribly noticeable from a distance. However, since I had that drape, I was able to pull it to the front instead and cover up a lot of my mistake.

I did fold the top of the fold in the skirt to show the sequins flowers, and put a tiny bit of tacking to hold the folds so that the detailing wasn’t lost. I pinned the folds in the drape up under the bodice, and just ran a row of stitching to hold them in place.
The last thing to do was the sleeves. I had the organza overskirt to use. I played around with some different sleeve shapes, and ended up just deciding to attach the pieces of organza to the existing straps. The organza overskirt, when cut in half, was almost the exact size of the straps–now THAT was luck. I had cut the organza with a pinking shears, but I went ahead and turned under 1/4″ hems along the cut edges.

I folded the organza around the straps and used a really large zig-zag to secure it.

Last step was to cut out all the sequin flowers with a pinking shears:
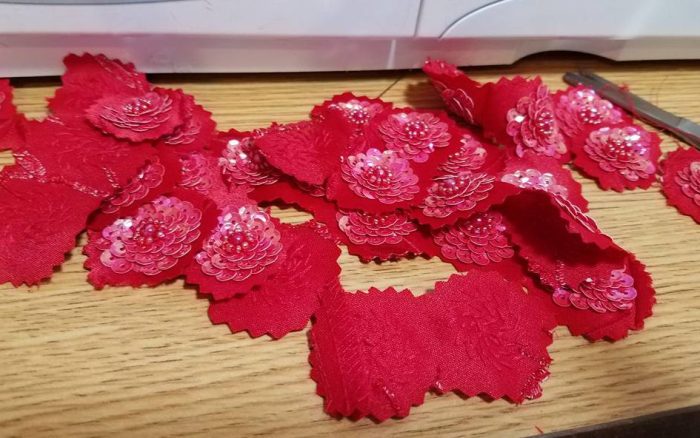
And sew them on to the straps–oops! Hit a sequin just wrong with THAT stitch!

Bodice top:


And the dress:


I think I would like the sleeves to have a row of elastic at about elbow or wrist height, but I will wait for the time being.
The bottom isn’t quite even, but it is much better than it was, and I don’t care!
Cost: Dresses: $2, $2.69 & $6
Time: 4-5 hours.


