I have posted a couple of times previously with suggestions on how to make a simple costume overskirt using elastic and a bias tape casing. The drawback to the elastic version is that it is a little harder to put extra fullness in the back, and while the elastic has stretch, the skirt is more size limited. The bias tape method works fine, unless you don’t have any correspondingly colored bias tape (and don’t want to buy any). I’ve also used random other fabric to make a waistband/casing, but, I can’t always find a compatible color. As a result, I altered the process just a little bit in order to make a self-fabric casing.
I started with the same basic tablecloth and roughly folded it in quarters. Instead of cutting a circle, I cut more of an oval shape.

You will noet I am not careful about this at all. I just cut out a hole, and pay very little attention to the straight-of-grain or anything. (I have been chuckling to myself because sometimes we come across costumes that have been sewn with some pretty bad “technique”. The sewing on these overskirts is pretty marginal. Someday, someone in the future is going to roll their eyes wondering who on earth sewed these,and why the sewing is so bad!)
By cutting the hole a little bigger, the skirt can go over the head, and so (in most cases) an extra opening slit can be eliminated. It also gives enough extra fabric to make a waistband and creates enough fullness to go over the bum pad. I wanted to have elastic in the waistband so that the gathers can be adjusted to suit.
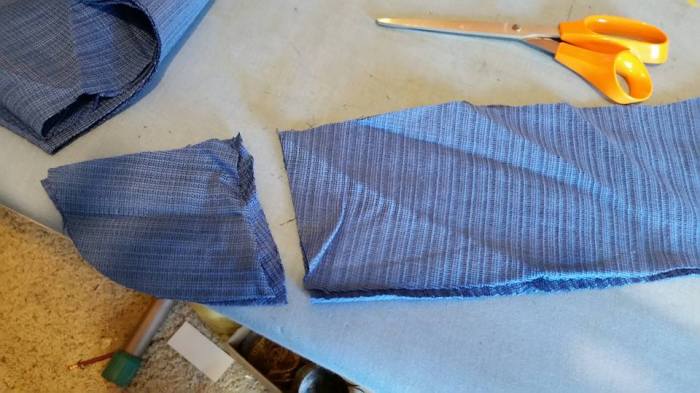
I cut 3″ strips from the center.
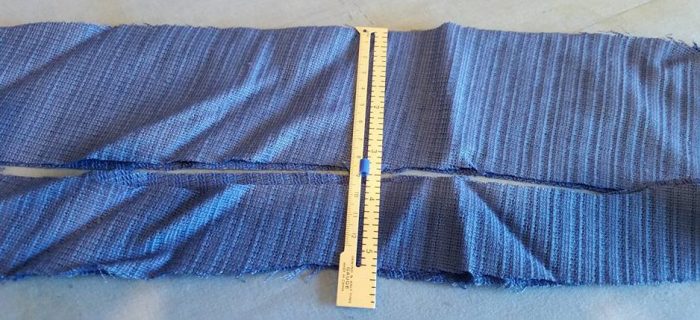
And cut off the curved ends:
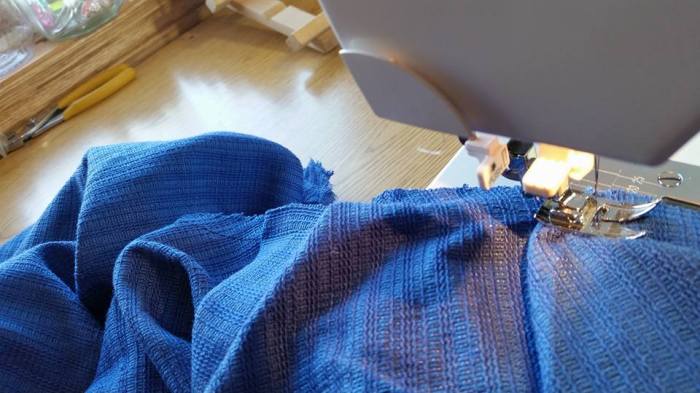
I sew these strips together in a long strip, and run a row of zig-zag along one side if the fabric seems to want to fray.
Next, I take up some of the fullness in the skirt by sewing around the hole with a single row of stitching and making random pleats as I go. The row of stitching serves double purpose as stay-stitching on the curved/bias opening.
Done.

A few of the skirts I have added extra pleats in the back. But, as a consequnce, I have to mark the back. Will my high schoolers pay attention? Not holding my breath.
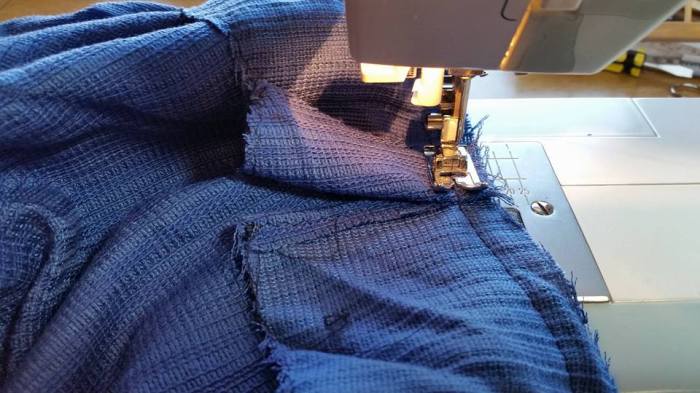
I make a small hem on one end of the waistband strip and sew it on to the skirt. I use no pins, and the sewing is fabulous (lol).

When I get to the other end, I turn that end over. I may trim it, I may not, depending on how much is left.
I turn the waistband over to the back, and top-stitch. I don’t press or pin. The waistbands tend to be a “bit” uneven, but I don’t care. I do flip them over and take a look to see if I managed to catch the other side of the waistband (which makes the casing). I usually have one or two places were the fabric pulled up and I need to go back and fix.
Last step is to thread some elastic through the casing. I use a generous amount (28″ usually . .why? because my sewing machine has a 7″ ruler on the front of it, and 4 x 7″ is 28″). This was I can pull the elastic tighter and secure with a pin as needed. The elastic is sewn together and the skirt is done.

Shown over a bum pad:


These are super fast, especially when you use really bad sewing. They are also pretty brainless to do, so a good filler when you are tired or don’t feel like thinking. They are totally non-historically accurate.
Time: 15-20″
Cost: varies from free to $3 (for thrift store tablecloth).


