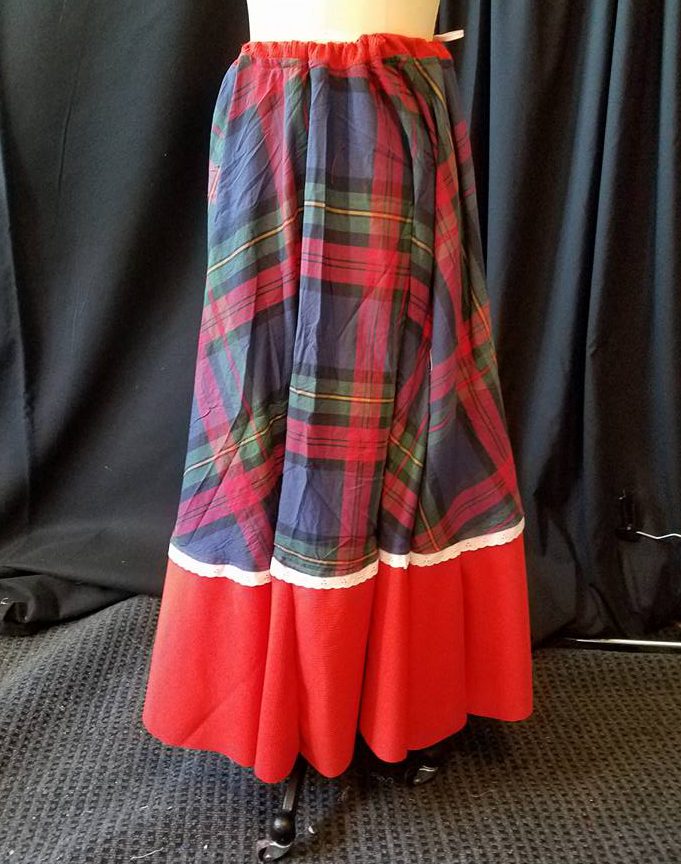
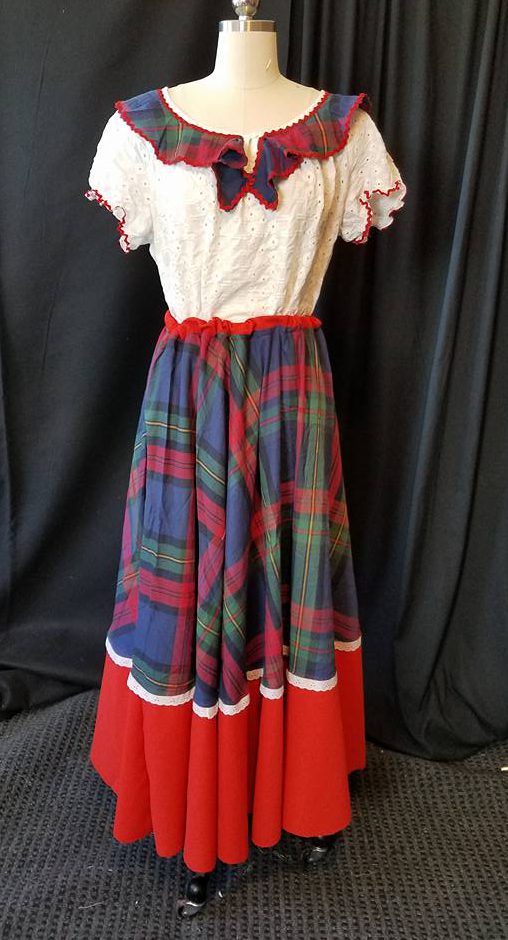
And here we are, in the fourth installation of the seven part “Peasant Girl” series from Young Frankenstein. For this outfit I went back to the round tablecloth method of making a skirt, and if I do say so myself, I think it turned out pretty cute.
Circle Skirt Musing:
I want to talk a bit about upcycling round tablecloths into skirts. Round tablecloths make the BEST skirts. The glorious part is that the never-ending curved hem is already done for you. Even purchasing a round tablecloth can be an economical decision as they come in all sizes and are often way cheaper than purchasing the fabric (and it can be difficult to find fabric in those wide widths–like the 132″ diameter ones I used for these capes). There are a couple of things to think about before you begin:
The first thing you want to do is find yourself a circumference calculator online (you can work it out yourself if you are so inclined–I’m too lazy).
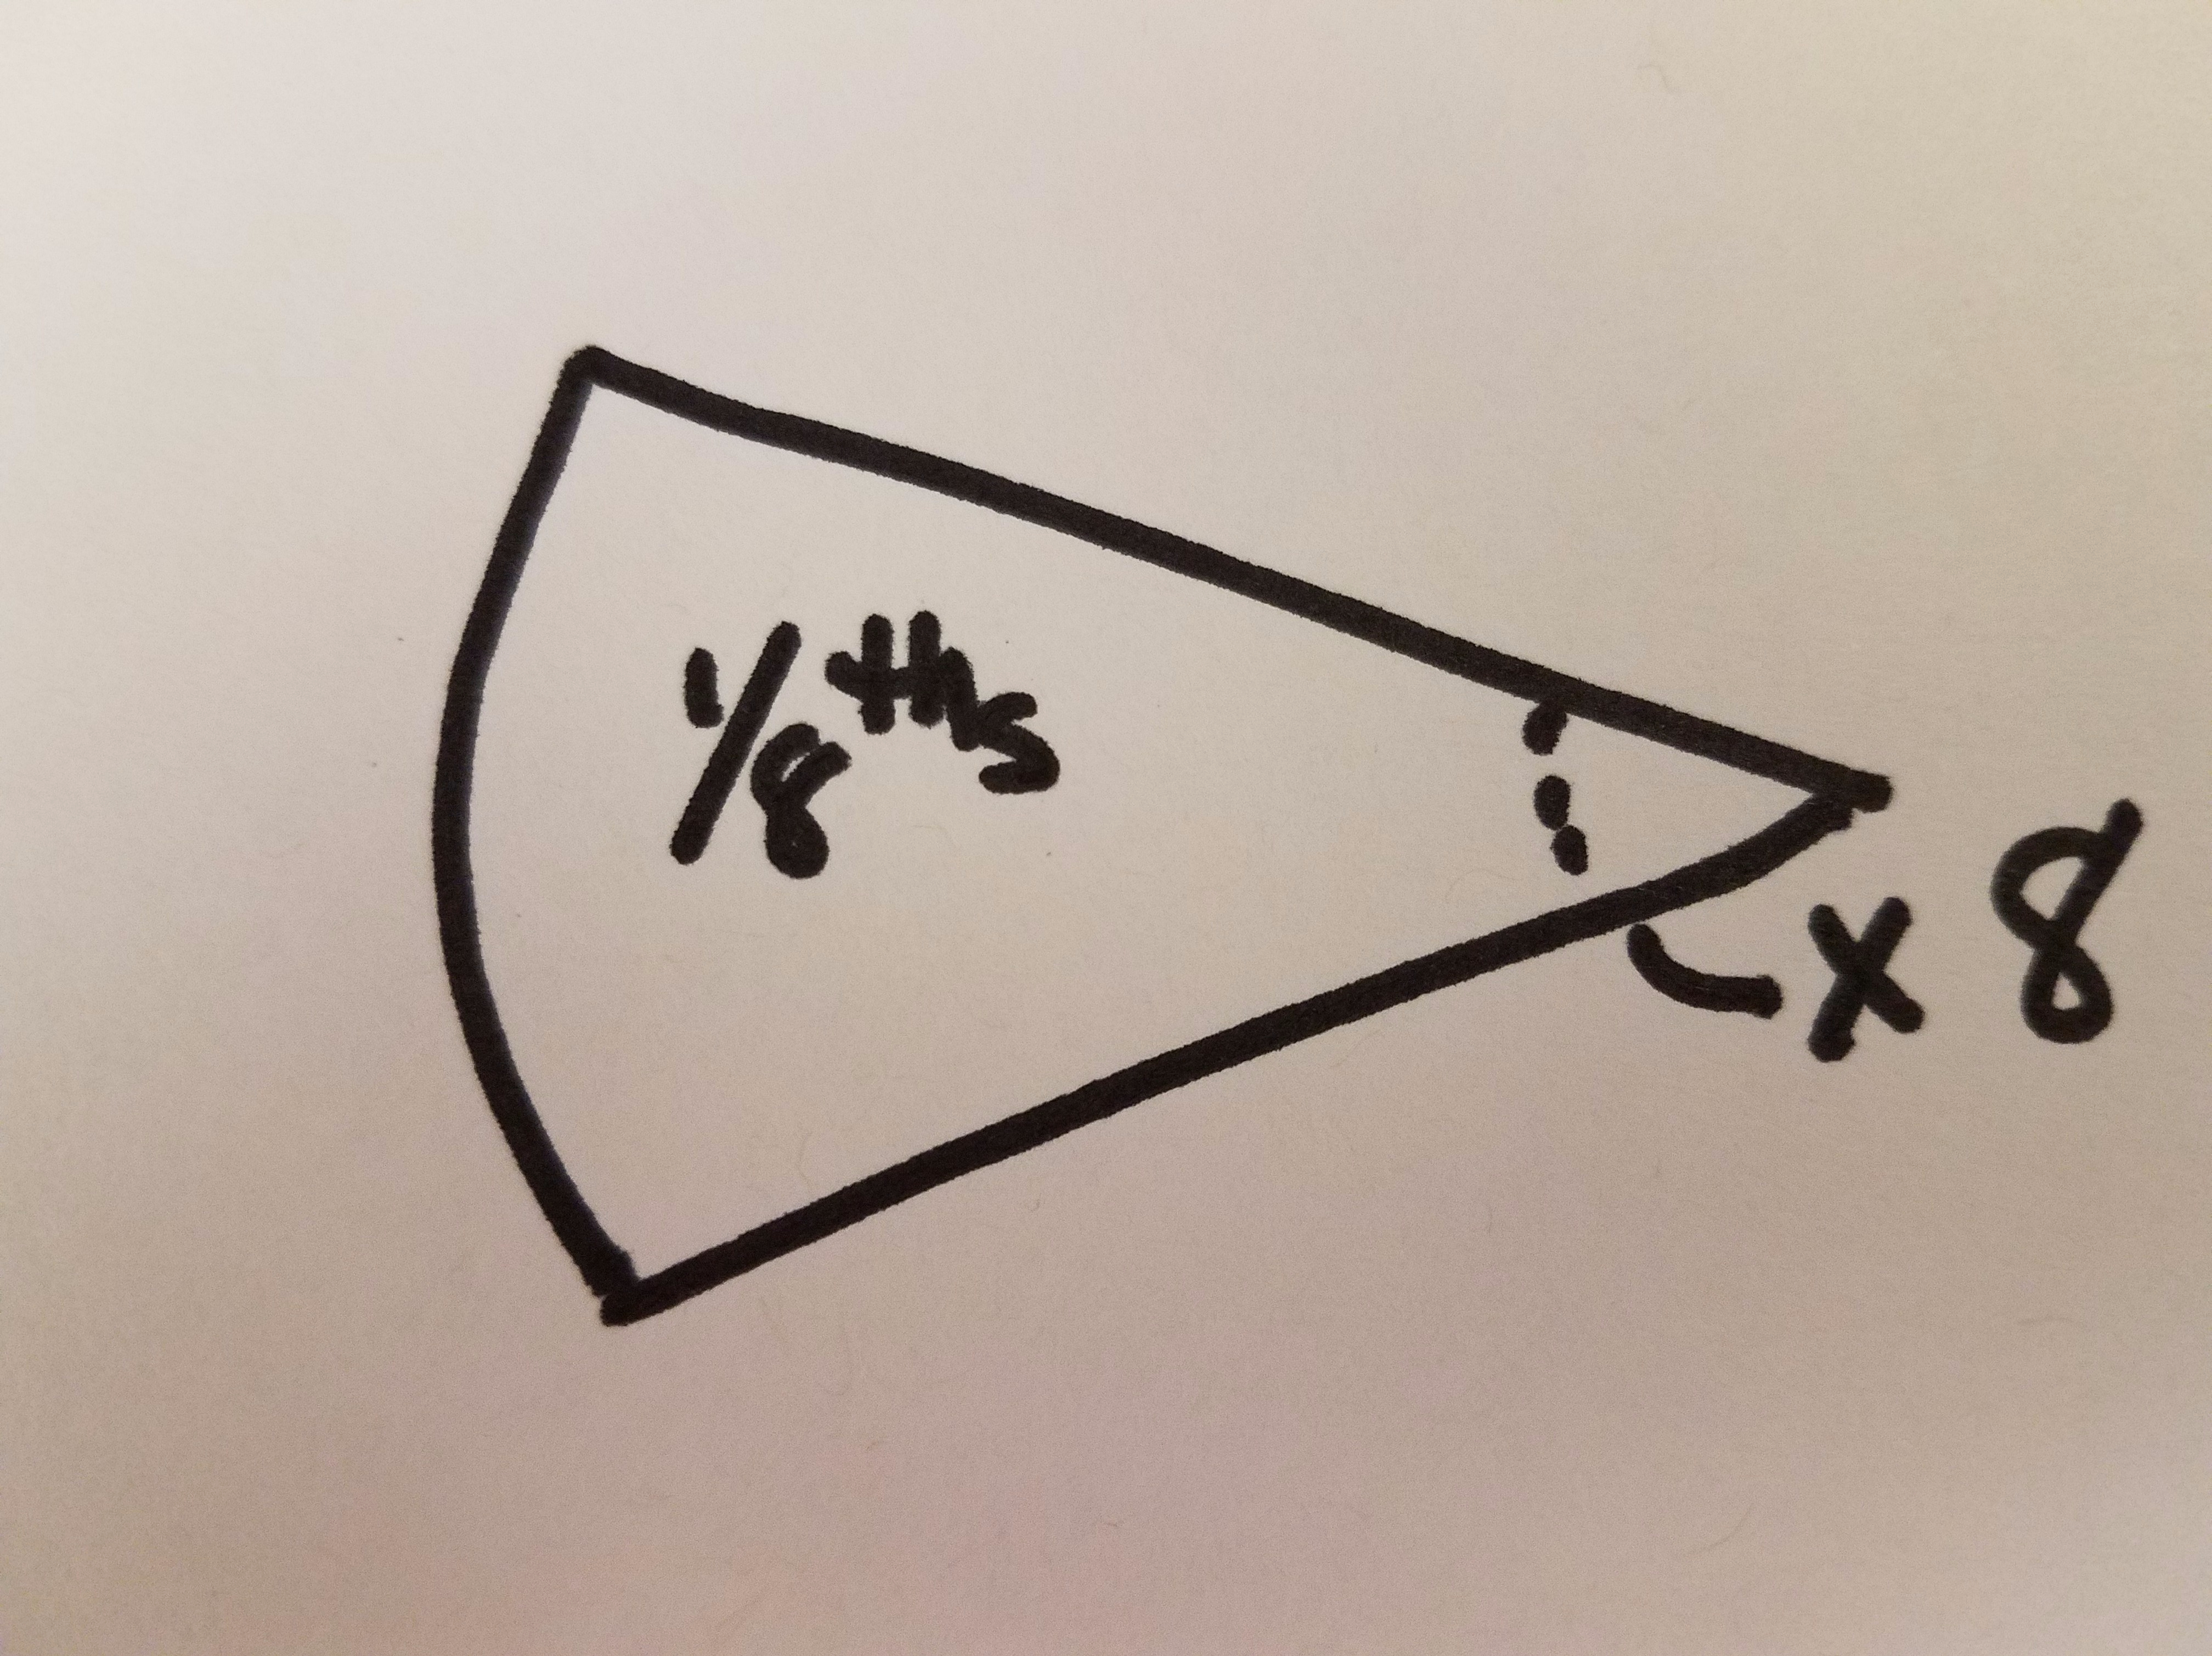
The second thing to do is CAREFULLY fold your tablecloth in quarters, and then in 1/8’s You want to make sure the hems are even, because if they are not, your skirt will not be even.
And third, it’s time for some math. Circumference (or the distance around the outside of the circle) can be calculated by knowing the radius (the length of one of the sides of our pie shape). It is important to figure this stuff out because it will affect where we cut, how much trim we might need, and how much fabric is needed if you want to make a border at the bottom.
If you want to make a 50’s style circle skirt, you will want to pay attention to the center (where you cut the point off). Typically 50’s skirts are not gathered at the waistband, so you will want to know your desired waist size. If you put that number in the equation (circumference) , it will tell you how far down to measure (radius). It will seem like you are only cutting a tiny bit off, but the resulting hole will be bigger than you think because the tablecloth is folded in 1/8’s. It doesn’t hurt to have a little bit of ease or have the waistband slightly gathered–so don’t panic if your hole is a bit too big, or if you had to cut the hole a bit larger than your ideal to make the skirt the correct length. If you are putting in a casing or stitching on wide elastic, you may well want your waist hole to be a little bigger. Keep your desired finished length in mind when picking out the size of your tablecloth.
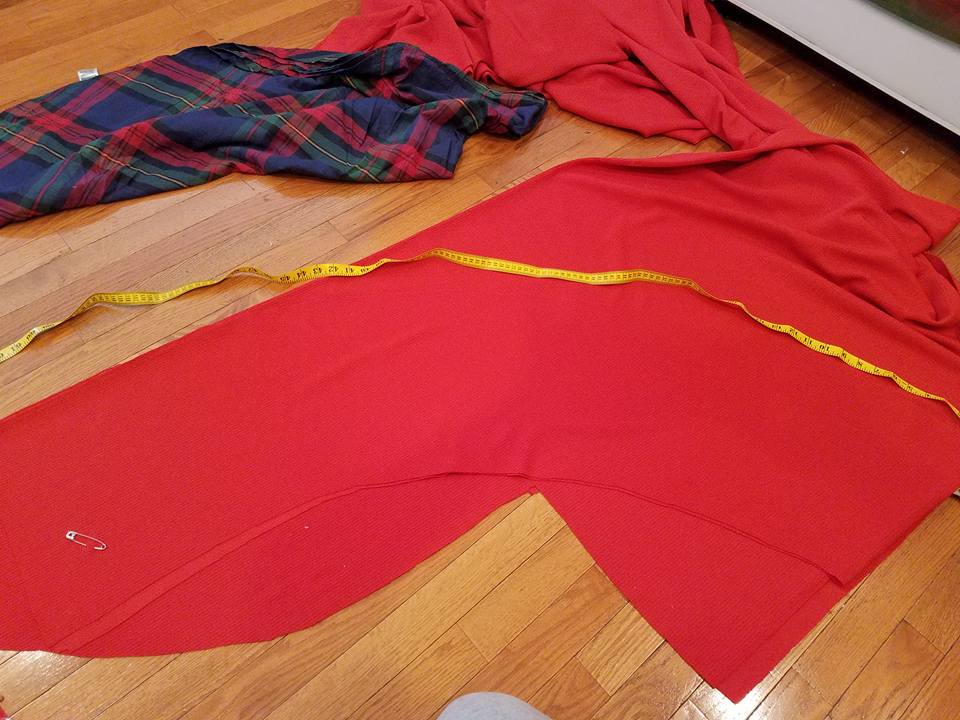
When you are measuring for the cutting line I usually measure up from the bottom and make little dashes. You can then measure down from the point to double-check that your line is correct. If you cut straight across you will get a star shape and not a circle.
Let’s say we want to make a longer skirt, as I am doing for this project. I wanted a fairly full skirt that would be gathered at the waist, so I cut the point off farther down.
I wanted my finished skirt to be about 36″ long. I began by deciding how wide a border I wanted at the bottom. Then, I measured up the skirt to determine where to cut the point off. For example, I began with a 70″ tablecloth, so 1/2 of that was 36″. If I wanted a 10″ border, I measured up the tablecloth 26″ for my cutting line.
I like to add trim to the seam and/or the bottom of the skirt. It can be helpful to use the circumference calculator to determine if you have enough on hand. Don’t forget, that when you plug in your radius, you need to include the part that you cut off. So, the radius for this skirt is NOT 36″, but instead 45″ (border + skirt + cut off part). This makes a big difference. The circumference of a 45″ circle is about 8 yards, whereas the circumference of a 35″ circle is about 6.5 yards.

If you are trying to decide if you have enough fabric for the bottom border, or trying to decide how much to buy, don’t forget that the pieces will be curved, and if you are cutting them out with the fabric folded (as most of us do), the length is doubled. How much you need depends upon the width of the border and the width of the fabric. You may also note in the pictures, that my border pieces are not always perfectly shaped. Since these were costumes, I couldn’t get too worked up about whether the 8 yard bottom hem was perfectly circular. As long as the edge that attached to the tablecloth was long enough for a smooth seam, if, by chance, the lower edge was a bit larger or smaller than it really should have been, I was OK with that. It goes without saying, that if you are using 60″ wide fabric that you will not need to cut as many border pieces as if you are using 45″ wide fabric.
This project:
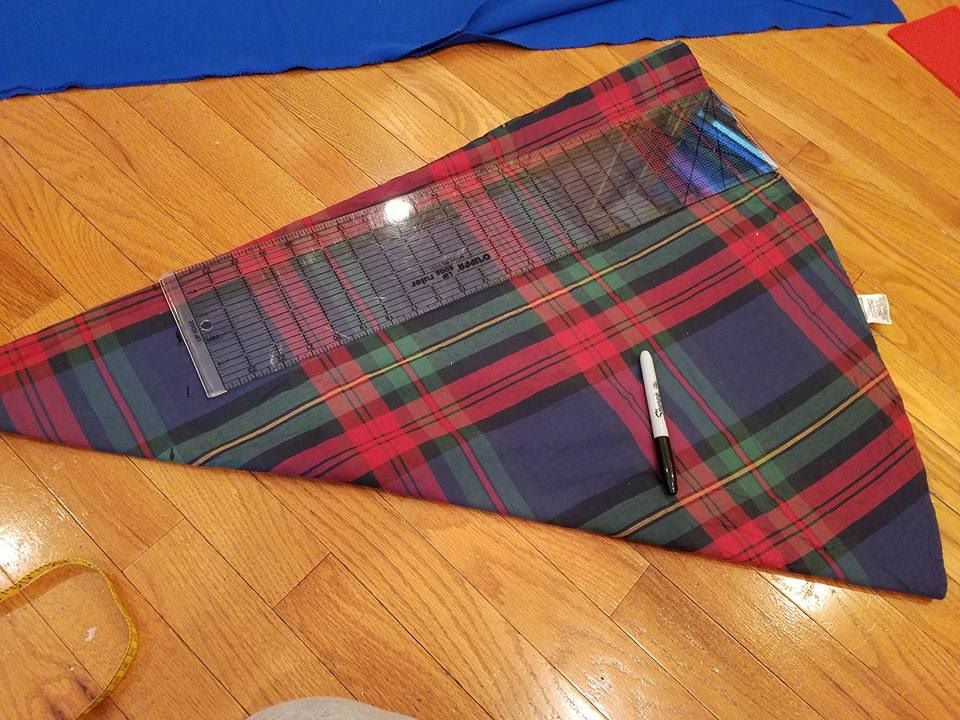
I began this project with a jewel toned plaid tablecloth. As mentioned, I folded the tablecloth in 1/8’s, and measured up from the bottom curved hem. I begin on the two sides, and work my way around. The second picture shows the marks where I will cut the point off. This line should be curved–if it is straight you will cut out a star, not a circle.
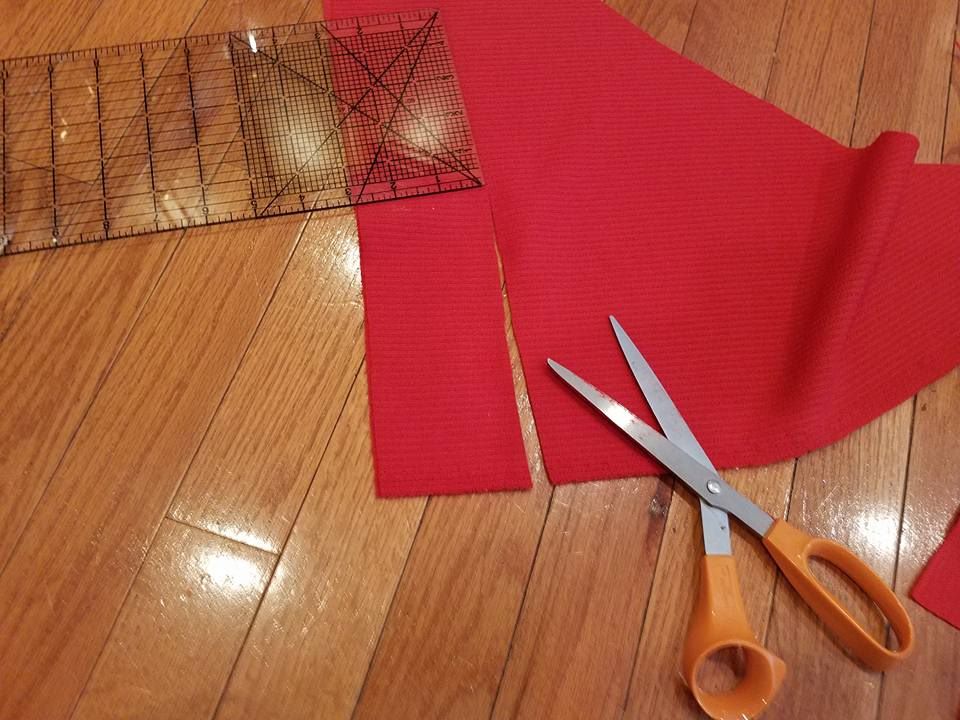
Next I lay the tablecloth on the border fabric. I made sure to leave enough space all around to cut the border the width I wanted.
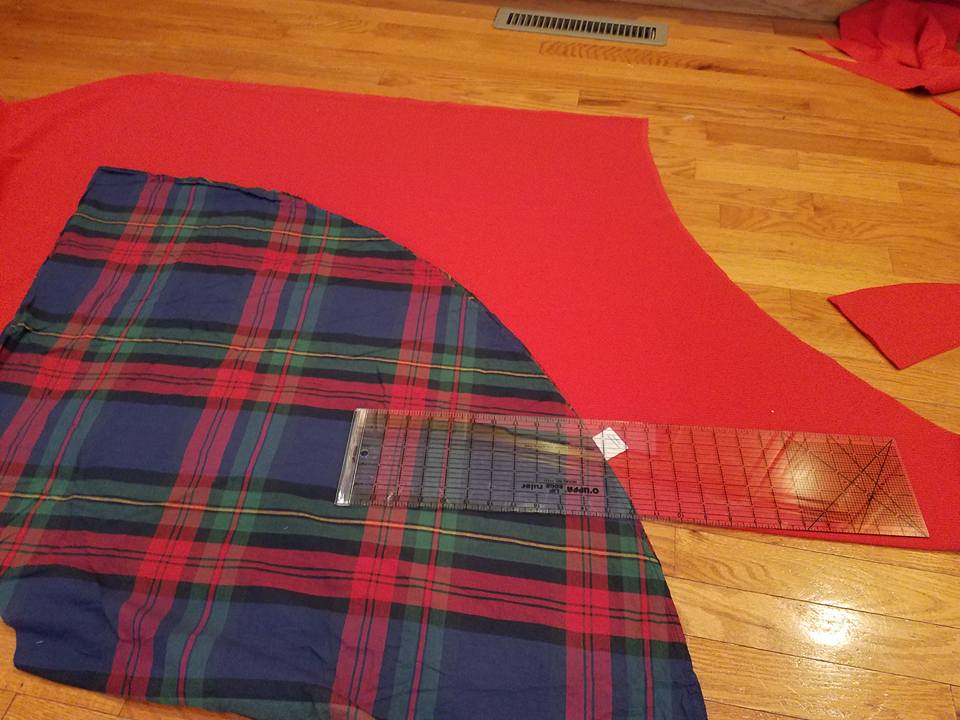
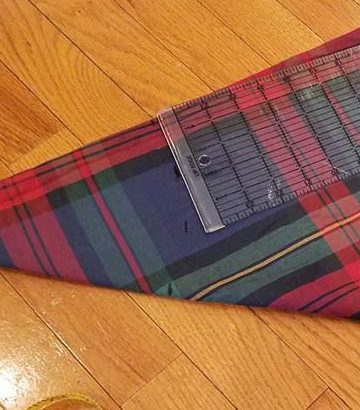
Once the bottom edge was cut, I removed the tablecloth, and cut the upper edge, using the ruler as I went along. You can see my arc isn’t quite perfect.

I used this piece as the pattern for my next pieces.
I then cut some strips out of scraps to make the waistband. I did have to splice these together to get a long enough length.
I stitched the waistband to the skirt right sides together and then folded it to the back and stitched it down. Since the waistband was straight and the skirt was curved, I made a few little tucks here and there to make it work.
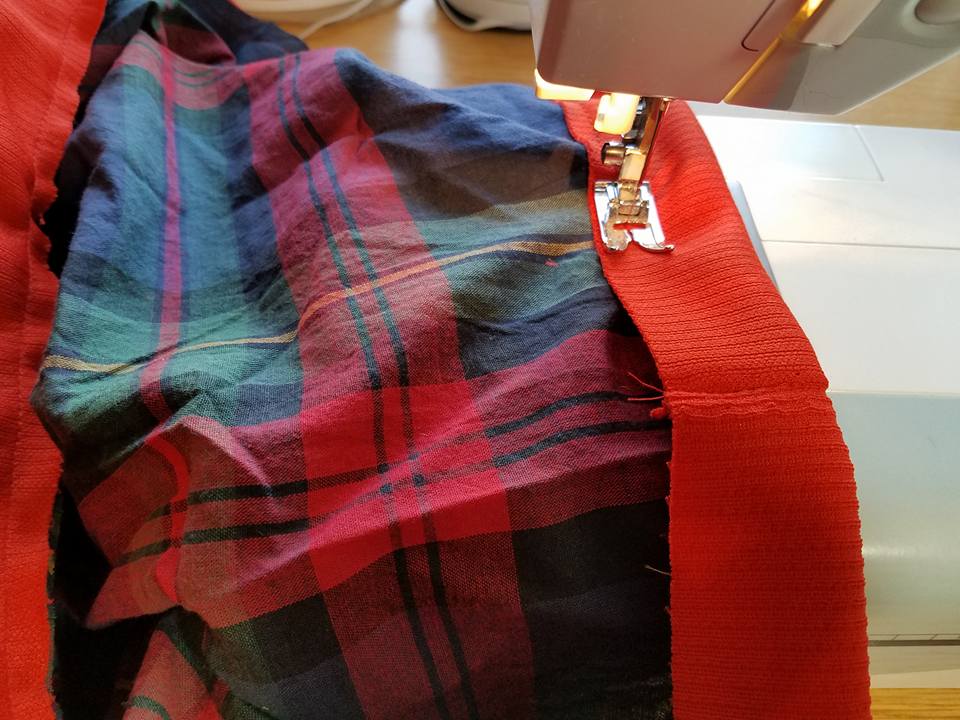
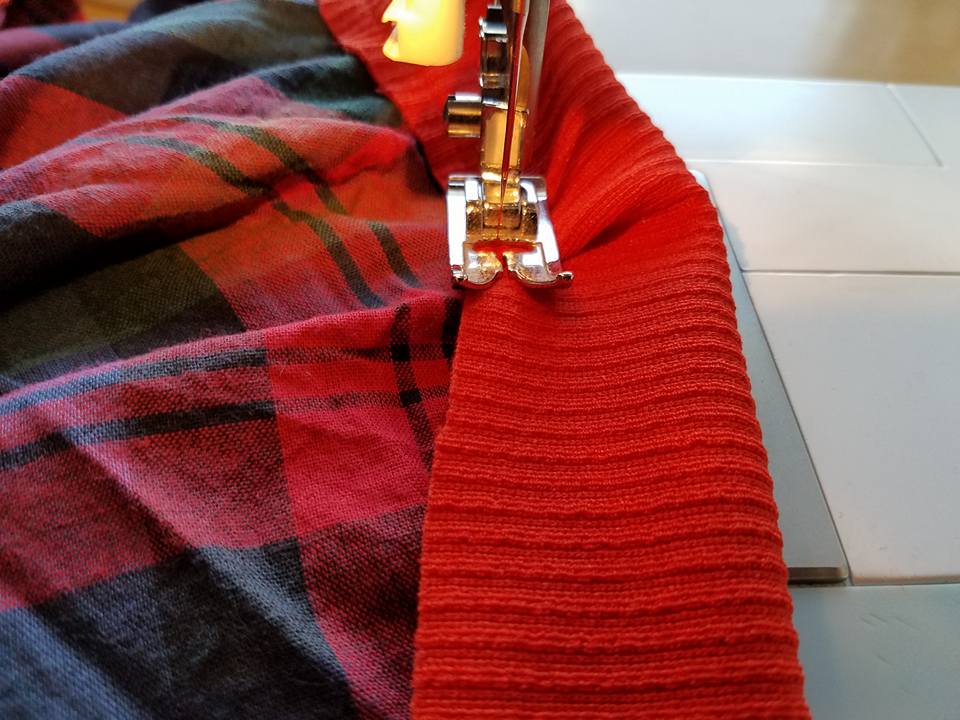
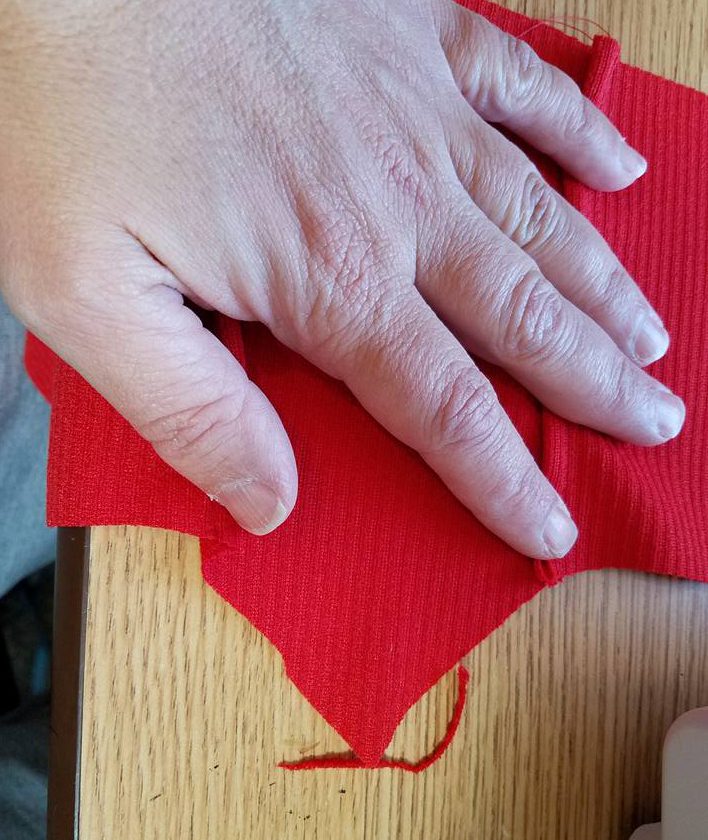
Keep watching the underside as you stitch to make sure it isn’t folding. Oops! Here was a little ripping–of course where I had backstitched.

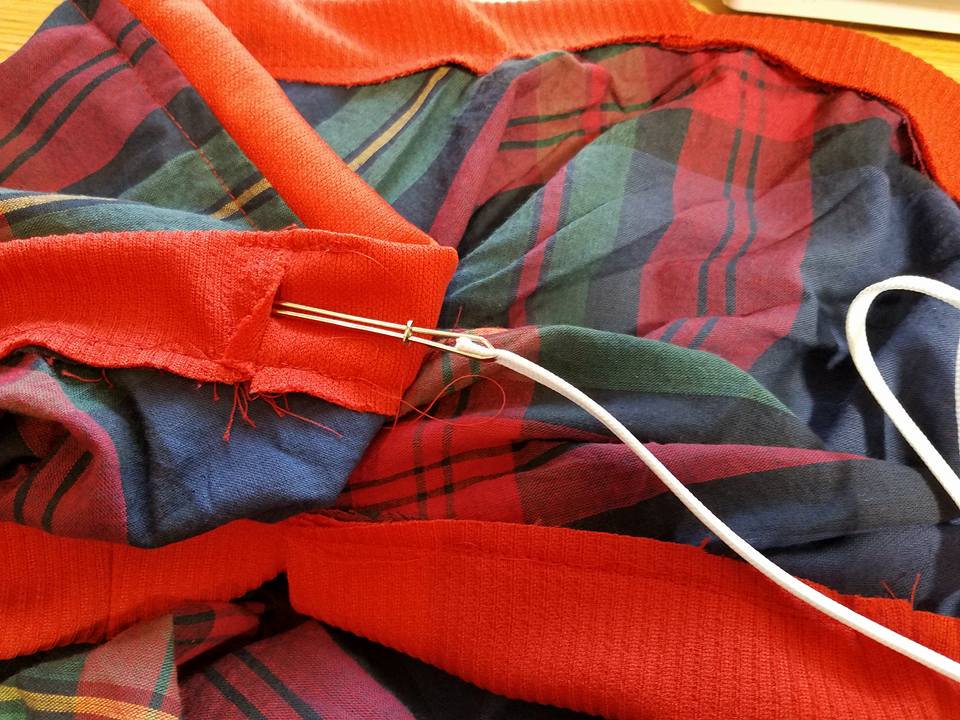
I don’t make sewing the waistband casing overly complicated. I begin and sew around until I meet where I started, trim off the strip of fabric and call it good. Depending on the project, sometimes I leave the casing completely open, and sometimes I add a bit of stay-stitching on the top edge of the casing to hold it together (which you can see I did on this one). I like to make my casing wide enough that if I ever wanted to run elastic through it I could, although for this project I used a drawstring. Of note, when I took these outfits to the school that would be using them . . . several of the girls were unable to figure out how to make the drawstrings work. The concept of pushing the gathers along the string to distribute them was also a struggle. As I usually do, I tack the drawstring down in the center back so it is unable to be inadvertently pulled out.
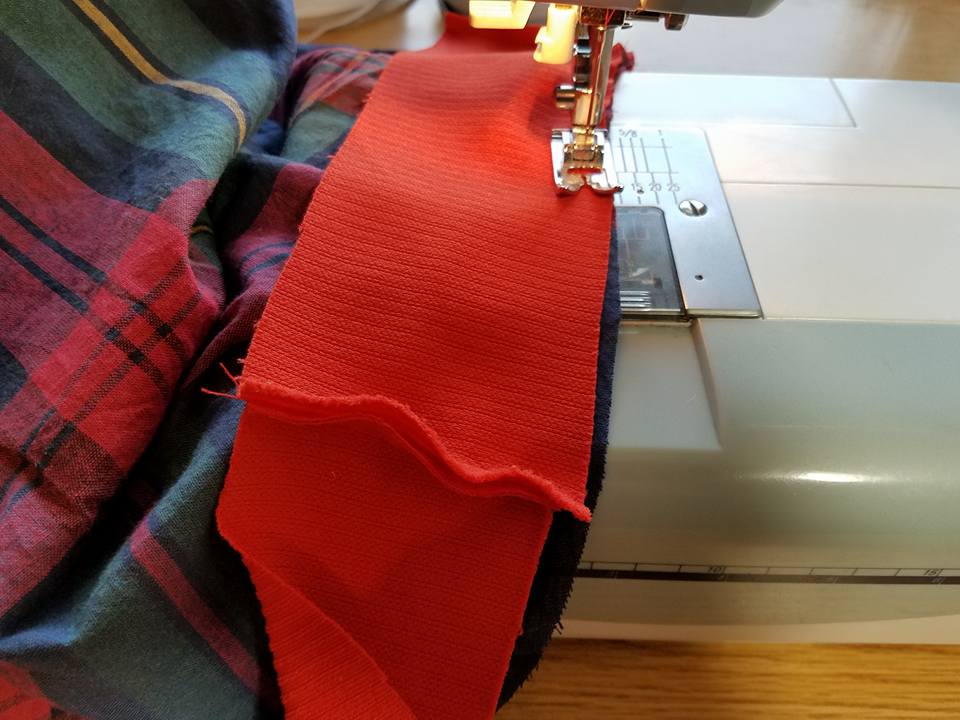
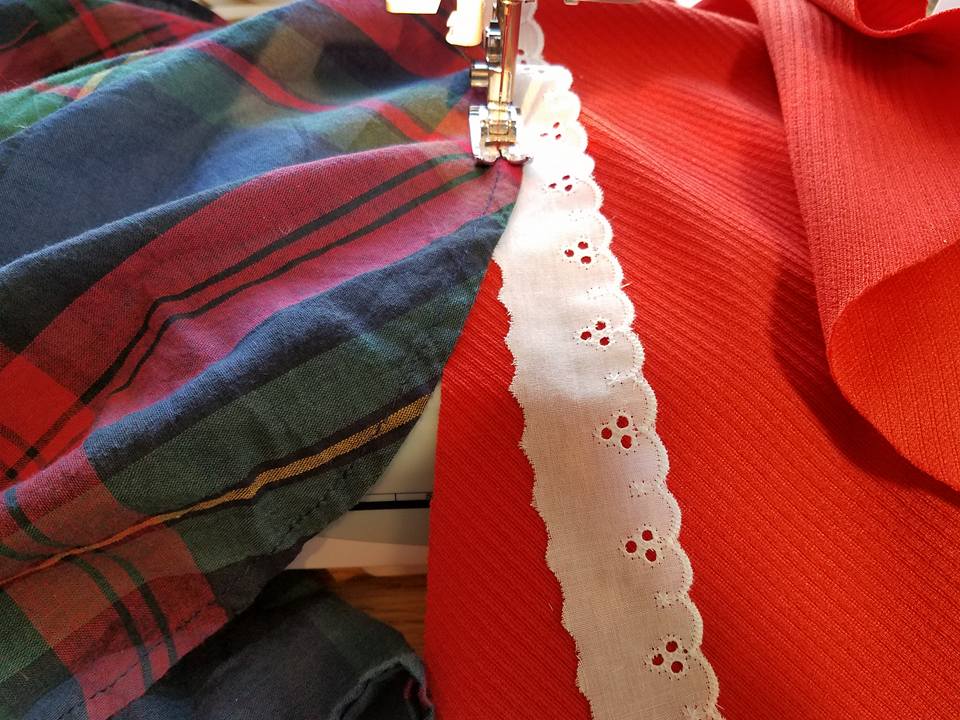
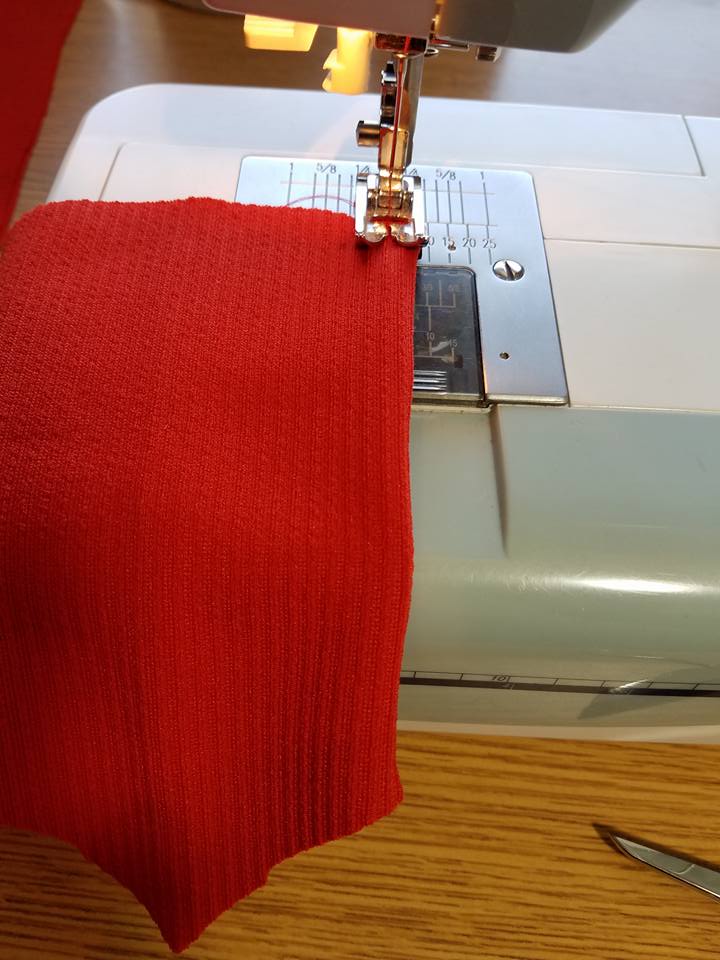
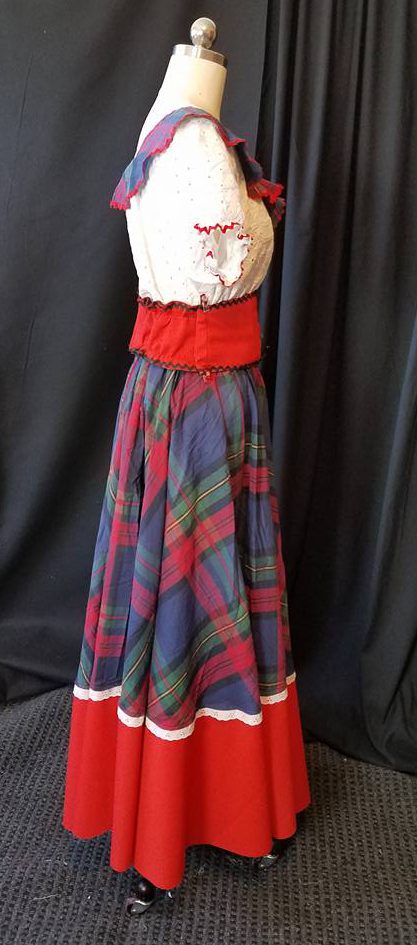
To make the bottom, I stitched the border pieces together to make one long curved strip. I inserted some eyelet into the seam as I went. The red is a knit, so no need to hem the bottom.

Now the blouse:
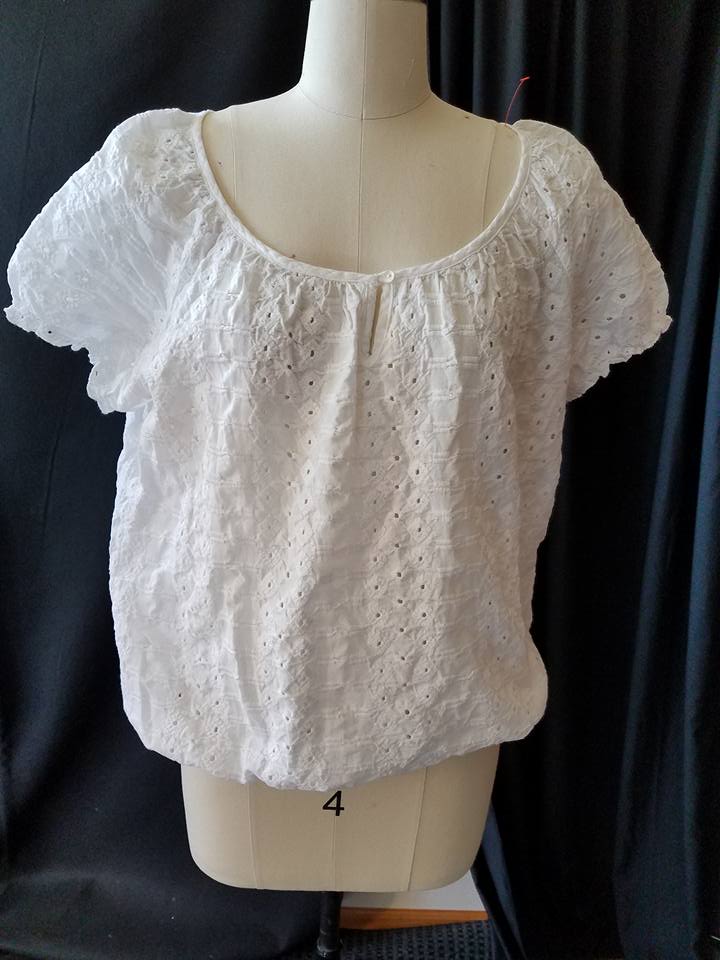
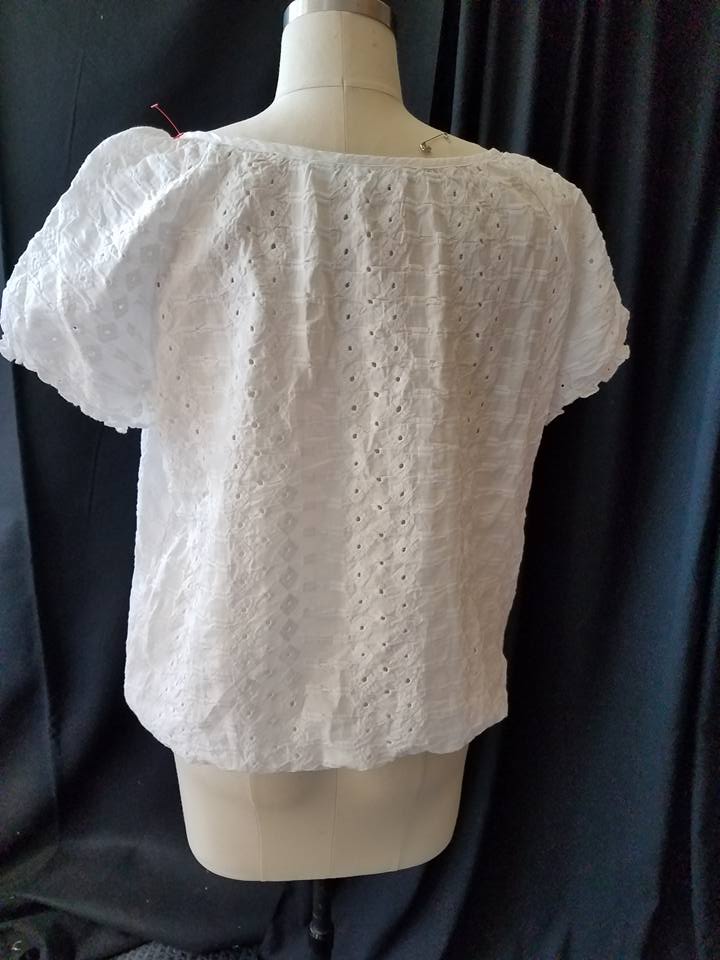
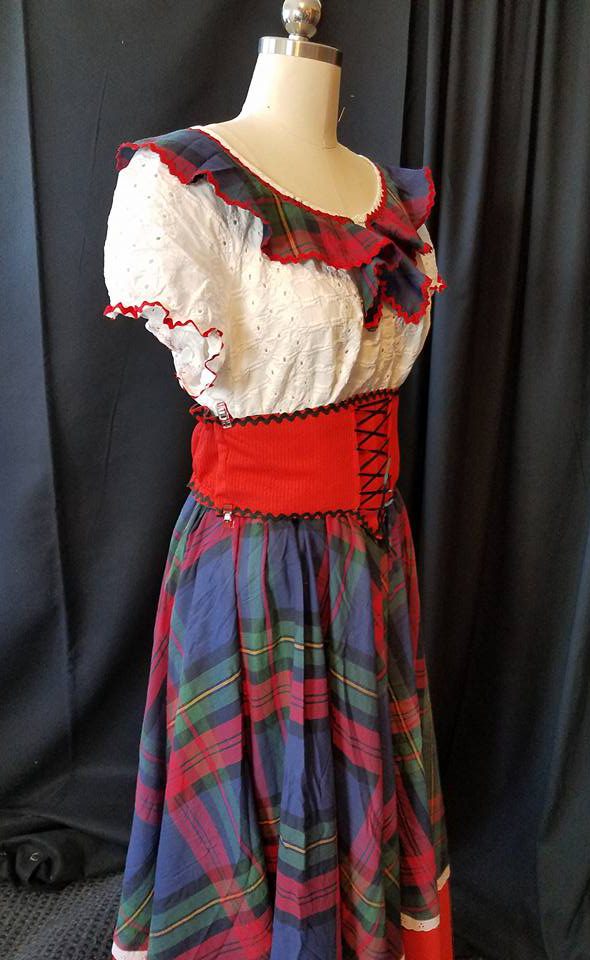
This was a simple peasant blouse. The neckline was bound and didn’t stretch. It had little cap sleeves with elastic, and eyelet fabric.
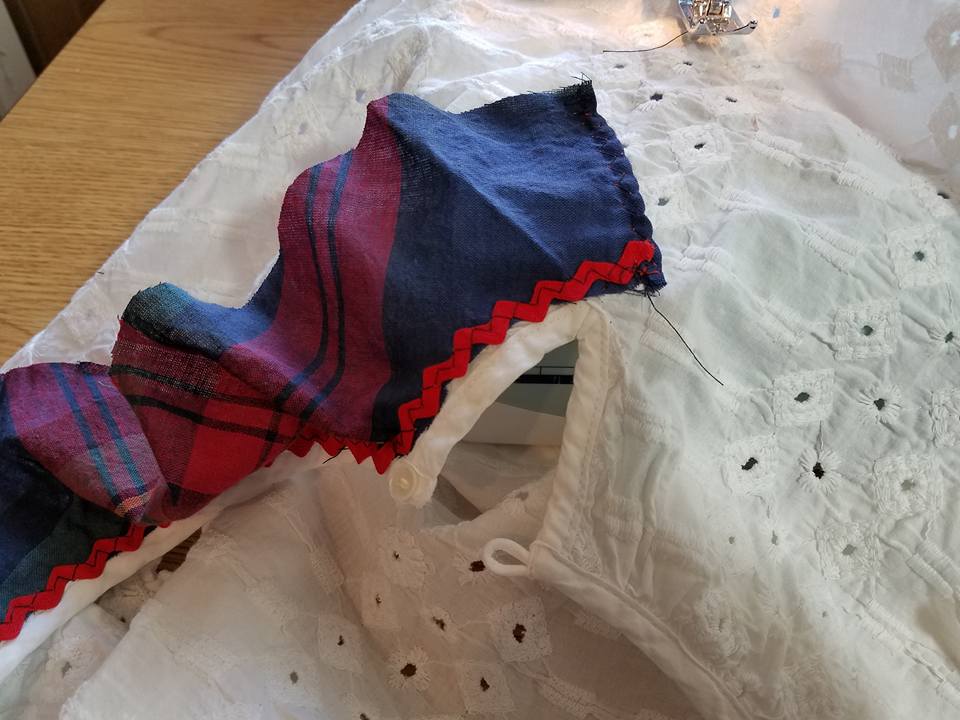
I took the discarded center circle and cut curved strips. I sewed these strips together, and then topstitched them on to the neckline, using some ric-rac on the stitching line. The strips will vary in how ‘ruffled” they are as the tighter inner circles make fuller “ruffles”. I divided the strips in half, and began at the center front on each side, trimming the excess out of the center back. I finished by adding a little trim to the edges of the sleeves.
The waistband:
I used the same waistband pattern I had been using. Instead of cutting it in one piece, I cut it in two pieces to make more efficient use of fabric. The longer strip I divided in half and added a “tail” on either side of the center piece.

Next, I made two parallel pleats in the center section to support the mock lacing. I had liked the look of the narrower lacing so made these pleats closer together than the earlier version. This meant I had to trim off a bit of the bottom edge to make the curve smooth.

Once I had the pleats made and the “tails” attached, I used this front piece as the pattern for the black felt lining. I added 5 pieces of sew-in boning to the lining.
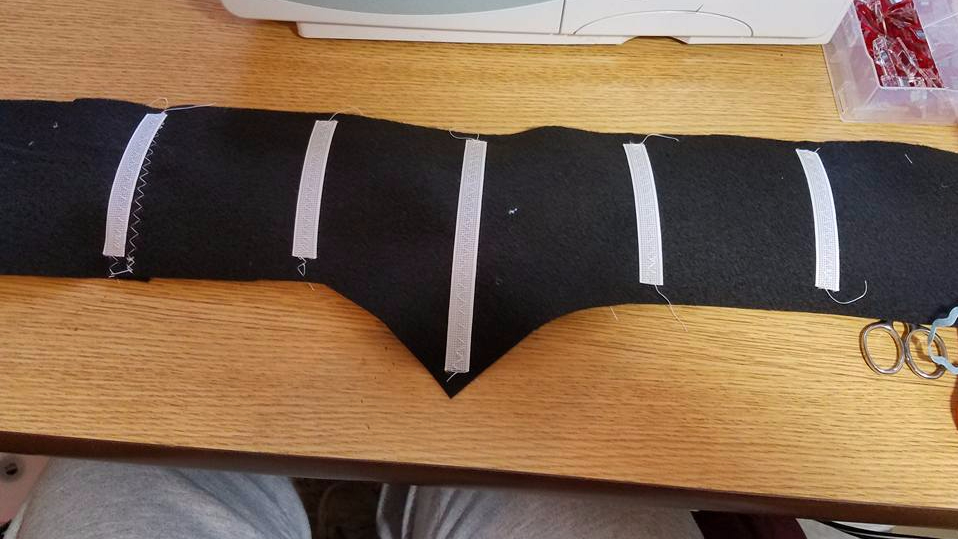
The front and back of the waistband were sewn together along the edges, and I trimmed it with black ric-rac. Hook and loop tape was used to close the back. Narrow black ribbon was threaded through the front tucks to create a mock laced look.
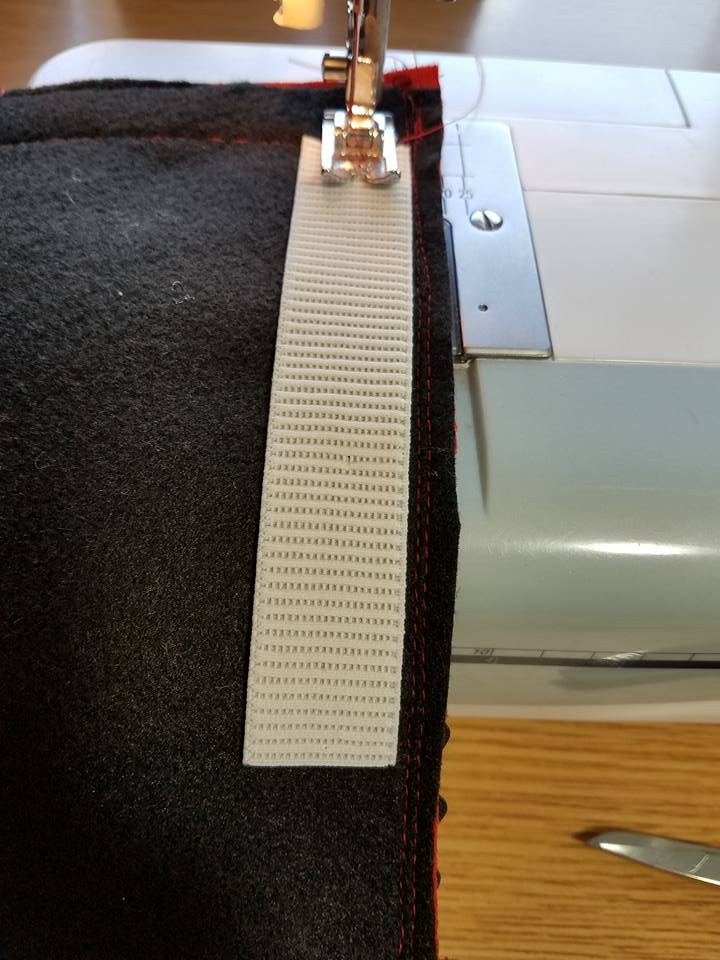
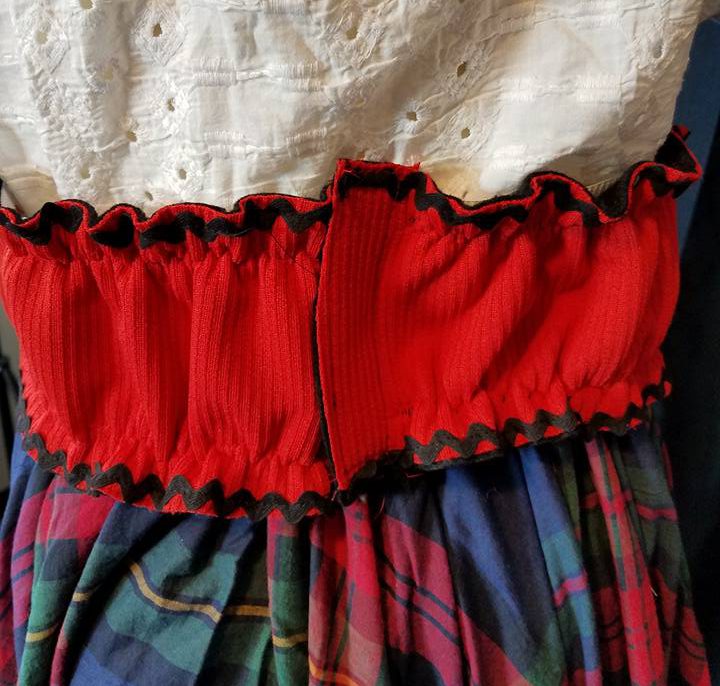
I was still determined to figure out a way to make waistbands with some sizing flex, so I went back to the elastic idea. This time I used two pieces of non-roll 1″ elastic. I stretched and zig-zagged them to the upper and lower edge of the waistband on both sides of the back opening.
This is how it looks when it is on a smaller model. It might not be ideal for a costume you intend to wear someplace “up close”, but from a distance, I didn’t think the gathers were bothersome.
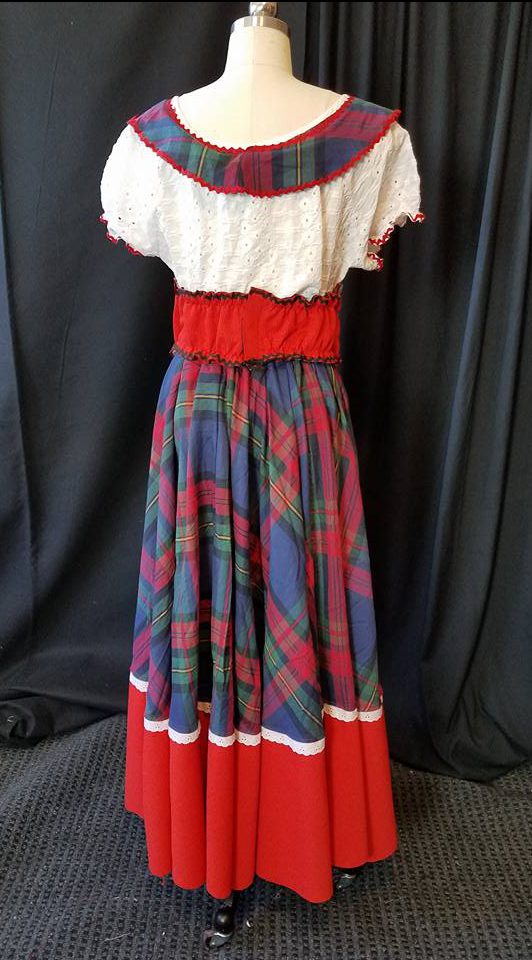
And that finished up the outfit.


Pingback: Young Frankenstein: Peasant Dress #7 | costumecrazed
Pingback: Dressing Baron Bomburst: Bombie Samba Jacket | costumecrazed