Wait? Was there a Red Dress #1 post? Well, sort of. It melded in with Gray Dress #2.
So . . . there was this really fun red skirt:


and this leftover top:


Which just seemed like something pretty easy to finish (a quick row of stitching across the bottom) and now it was time to create some different outfits:


The first is a cream peasant-style shirt. The lacy stuff is one of those crochet scarves that were so popular a few years back. It came from a Create/Exchange store owned by a friend of mine. Could the color have matched any better? Even my daughter had a few kind words as she wandered by: “I like THAT one!”! The detachable sleeves from the “Gray Dress #2” ensemble could also be used.
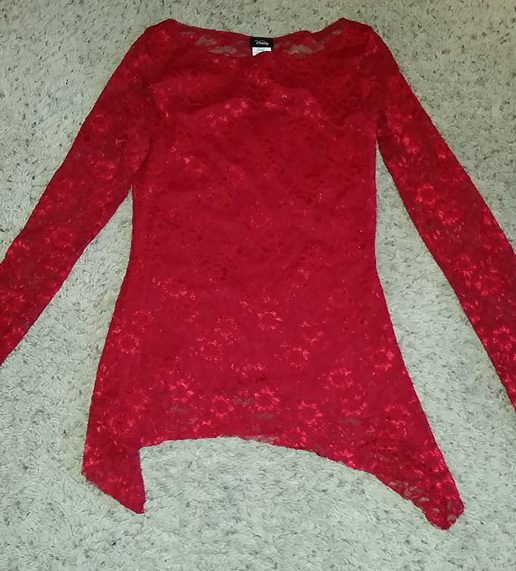
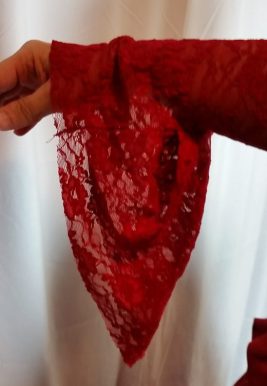
While popping out to get some groceries between rain clouds that afternoon (and just happening to find myself in Goodwill . . . . ) I found this red lace shirt:
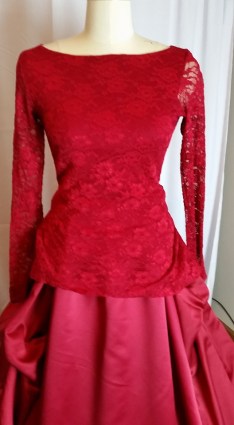
That sleeve problem that was discussed in the last post? Solved.
This shirt was made of a stretch lace. The sleeves were straight and tight fitting. It has a boat neck with a lined front. The back is sheer lace. The bottom is shaped with long “points” on the sides which seemed like they would be the perfect embellishment for the bottom of the sleeves. A pin was used to mark the waist level and then the shirt bottom was cut off. No hemming was needed.
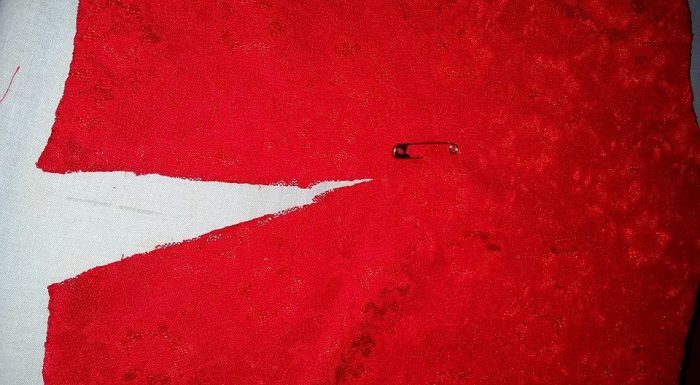
The sleeves . . . to be honest I totally messed up on how I had them conceptualized in my head, and ended up putting them together in a rather messed up way. I had this idea that I would insert the wedge into the sleeve so I started by cutting the lower part of sleeve seam. I also cut the bottom of the shirt in half along the sides (wrong part–if is “fixed” in the picture below). At that point it was like I had puzzle pieces that just wouldn’t go together.


Eventually the pieces were sewn together–it isn’t pretty, but it got the job done.
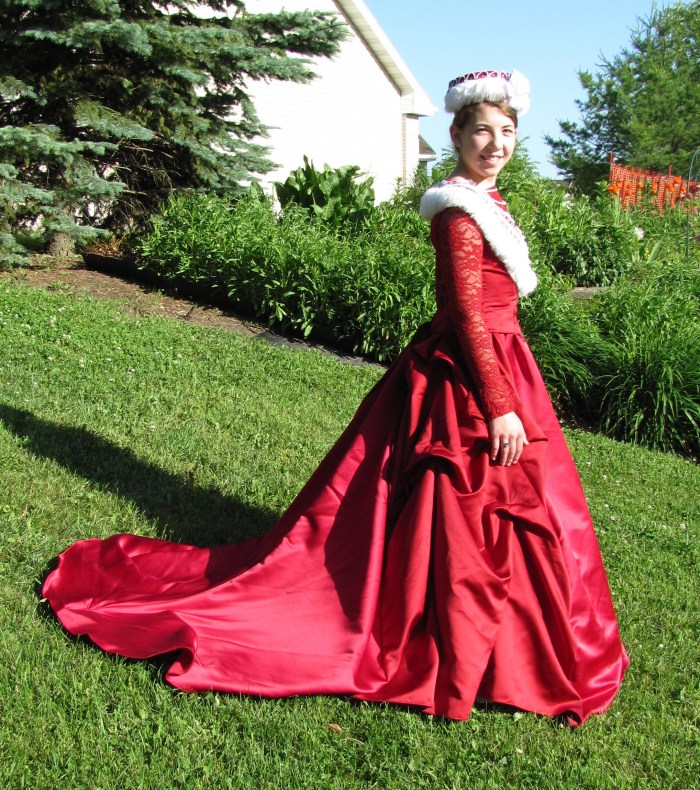
Clearly, this was shaping up to be a Queen outfit. Luckily, I had a dress tucked away for just such a need:
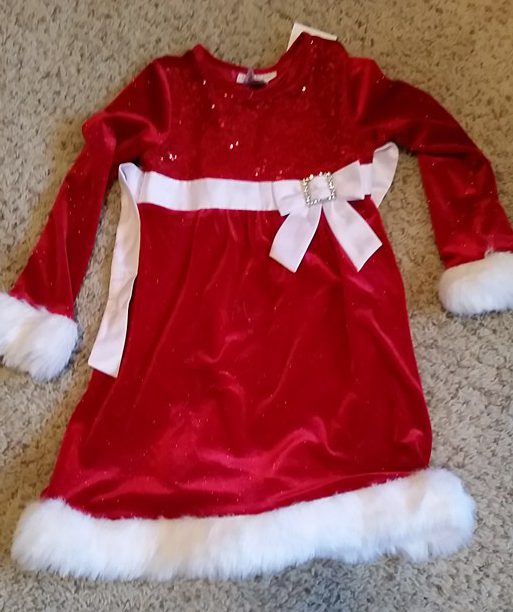
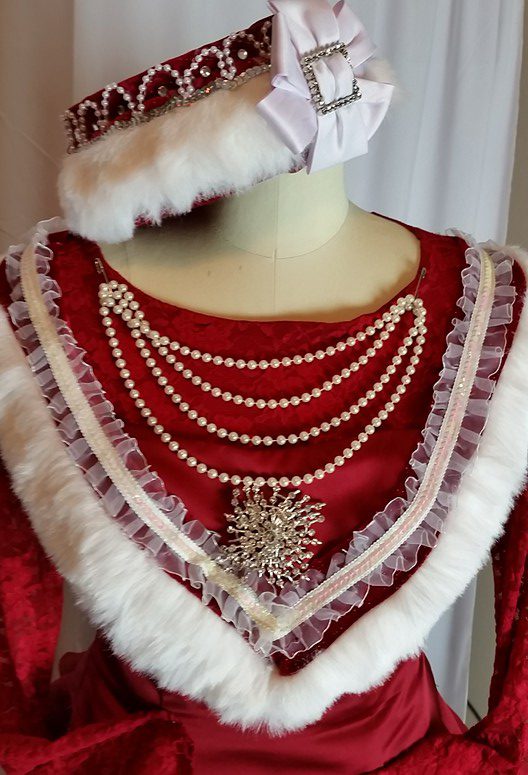
This is a 3-4T dress made out of a soft velour with a little glitter. It has fur trim around the bottom of the skirt and cuffs. It has some sequin fabric on the yoke. To start the process I cut the bottom of the skirt off with about a 3″ strip of red fabric. This ended up draping over the shoulders. A few tucks here and there, and a little bit of extra trim, and it made a lovely collar. The pearls and the brooch are pinned on for the time being. (I feel like I am missing a few pictures here, but you get the idea).
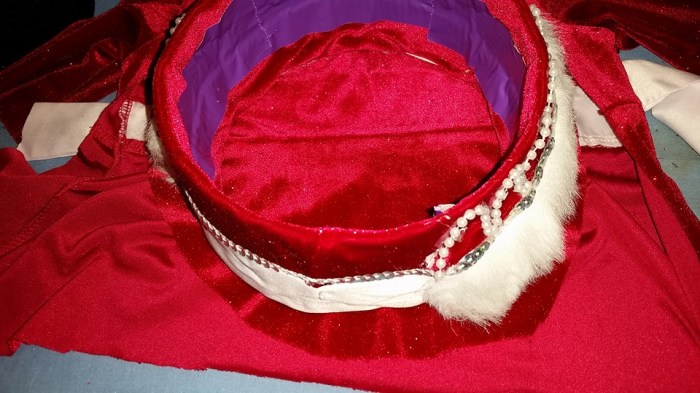
Every Queen needs a crown. This was a pretty quick-and-dirty one-hour-tops crown project.
I started with a 3″ wide strip of posterboard that was stapled together and covered with duct tape. Why purple? No reason other than I am trying to use up the remnants of duct tape flowers and the like from when my kids were younger. Duct tape makes a nice base. The disadvantage is that hot glue doesn’t stick to it well.
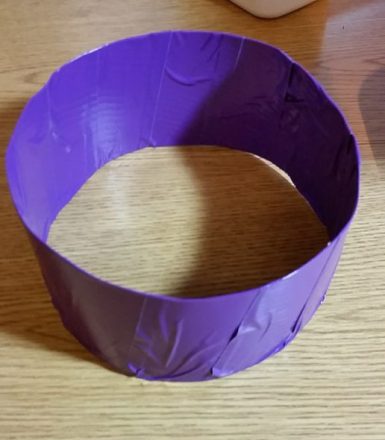
The first step was covering the form with a strip of red fabric cut from the dress. Without thinking it through, when the hot glue wouldn’t hold it in place, I used strips of duct tape to do the job. Unfortunately, once the crown was finished and tried on . . you could see it, so I suggest not making this mistake.
Second, the fur from the cuffs was glued on. There was only long enough to go about 3/4 of the way around, so in the back I put a strip of the white ribbon from the sash of the dress. It isn’t great, but, for this project it is OK. To jazz it up a bit I put some fake pearl loops on with some hot glue. A quick go-over with a blow dryer took care of the many “threads” of glue. The loops aren’t real even . . . but this was just a quick crown.

This still was a little plain looking, so some rhinestone crystals and irridescent string sequins were also glued on. The ribbon medallion on the front was made from the bow on the original dress along with a piece of the sash. It is glued over the seam between the two fur cuffs.
You can see the inside purple in this next picture. Why I didn’t think that would be visible, I don’t know. To cover it up, it seemed like sewing a “cover” in would be more period looking than any other option. It would need a little bit of ease so a circle an inch or so bigger in circumference than the crown was cut out of the remaining dress. I put the circle on a head form and then put the crown on top, which sort of held it in place. I loosely sewed the fabric in by hand. This wasn’t the easiest thing I’ve ever done, and it sure would have been easier to do before all the decorations and extra glue were on the hat. Sewing through duct tape gummed up the needle as well, but, the task got done.
The only thing that I will need to do is put a modesty panel in the back of the bodice. It doesn’t need to be great because the dress has a corset back with a heavy tie. I will use a piece of the bodice lining from Red Dress #1. Corset ties are really difficult for a costume that needs to be changed in any sort of quick manner. One option is to put a zipper in one of the seams (ie under the arm) and just leave the corset tied in place.


This was a pretty fun project.
Cost: Red lace top: $1.70, red Santa dress: $2 , pearl necklace $0.25, the pearl trim, sequins & rhinestone gems are from bulk packages, and the brooch and white trim were left from other projects.
Time: 2 hours.
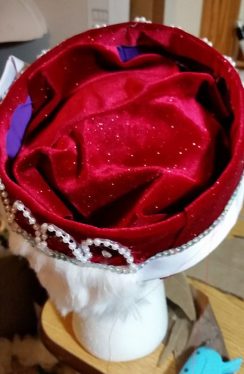
Addendum: We FINALLY had a good picture taking day! I was pleased to notice that the lack of fur in the back of the crown is not bothersome at all.