When this dress was donated my daughter and I immediately dubbed it the “Candyland Dress”. The large sequins and bright colors just make a person happy 🙂

")
The first thing we did, however, was very carefully cut the large sequins off. My daughter slit the sequins to the hole, and then removed them, being careful that the thread wasn’t cut. This dress was a little more A-line than I would have liked, and I really wanted to raise the skirt at the waist, however, that would have covered up a lot of the decorative beading. As a couple of weeks went by, and my standards for “GOOD ENOUGH” lowered, I decided the shape of the skirt would be JUST FINE. And truly, it is. I am glad I let it sit and didn’t try to do anything drastic.
I already had one plain pink dress:

(As an aside, this dress is basically used “as is”. I cut the majority of the petticoat net off the underskirt. I added sleeve poofs. That was pretty much it. Instant costume. This dress I purchased off a Buy/Sell/Trade page on Facebook. The Dad told me his daughter was 27, which would roughly make this dress 9-11 years old. He gave me a good price, as I told him what they would be used for. It never hurts to ask.).
Back to the dress at hand 🙂 I wanted to make this dress different from the above dress, even though it seemed to beg for sleeve poofs as well. Instead, I looked to the beading for a complementary color. I had purchased Dress #2 this fall specifically thinking that the sleeves might be good for upcycling:


I really liked the colors together, but, when I put the pink dress on top of the blue dress, it pretty much looked like two dresses on top of each other. After looking at the construction of the blue dress, I had the idea to bring one of the wraps down across the front. I also pulled the neckline open a bit. This idea met with daughter approval, so I forged on.
As I was deconstructing the blue dress, I found a ton of hand sewing. The fashion fabric was pleated and the zipper was hand sewn in to keep from crushing the pleats. The front wrap was also hand sewn together, and the fabric was really nice. I began to get the feeling that this was just more than your standard mass produced Mother-of-the-Bride dress.
A quick internet search found several very similar dresses either for sale, or on Pinterest.


Prices varied from about $40 to several hundred . . . so perhaps I shouldn’t have cut it up. But, by then it was too late, so, no regrets.
All of that lovely hand sewing DID make the dress easy to deconstruct. I separated the skirt from the bodice. I left the top of the zipper in place. I loosened the two overlapping bodice wraps, and detached them from the zipper. I opened the center front lining so that the fashion fabric could be pushed farther to the sides. Once it was all adjusted and pinned as I liked it, I stitched the two bodices together. Slow and careful stitching can avoid a lot of needle breakage. I also like to use a large zig-zag as the presser foot can sort of “ride” between the beaded and unbeaded fabric.

I hand whip-stitched the wrap across the front bodice. The second (hidden) wrap I cut off. I fashioned a bow out of the two pieces, and stuffed the loops with a bit of scrap petticoat net. I hand stitched these pieces in place.
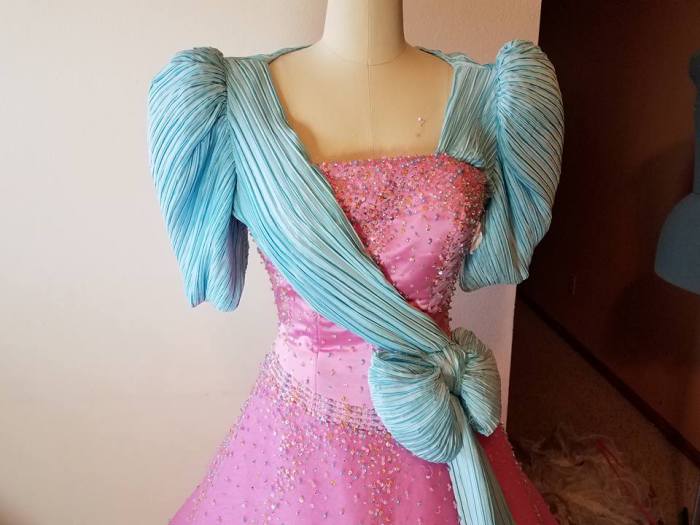

I opened the back seam of the blue skirt, and cut two long strips to make the “ties” of the bow.
The skirt of the dress was too long for my cast member, so I pulled up the top layers of net and petticoat net in six places and pinned. I later stitched these in place. If I were doing it again, I would not include the petticoat net. The bottom sort of sticks out like a cupcake.
I wanted more of the blue, so I measured the circumference of the pink lining, and calculated the width of strips I could cut from the blue. These I pinned in place and then stitched.
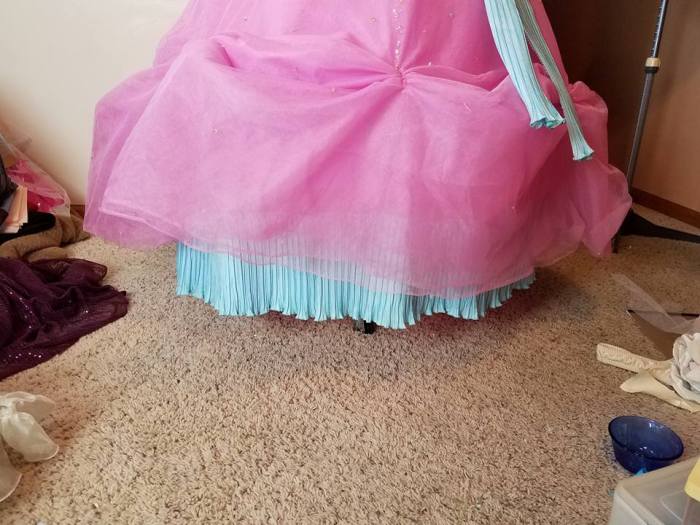
This was not completely successful as the pleats are quite tight, and they push the lining down.
I am hopeful that when the dress is worn, motion and centrifugal force will push the bottom of the skirts out, especially as the cast members twirls. If it doesn’t, I suppose I could stretch the lower edge and stitch it in place and see if that helps with the shape. However, while this bothers me, I don’t think it bothers other people based on comments I have recieved.
The finished dress, shown over a hoop:


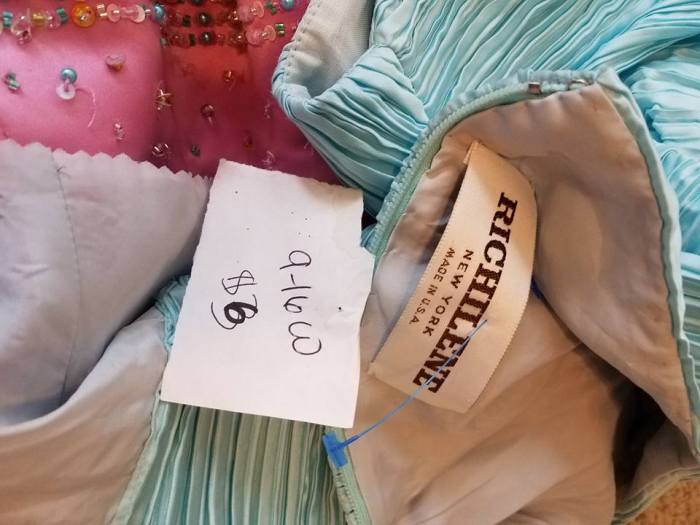
Cost: Pink dress: donated, blue dress: $6
Time: about 3 hours.
Overall I think this is a fun dress. I thought about adding little blue bows on the skirt, but thought that would detract from the big bow. This dress reminds me of the dress the mice made for the Disney version of Cinderella. This dress, too, is more “Fairytale” than historical, but, Cinderella is, after all, a Fairytale.


I am loving all your creations. I have been reading every post but am also in crazy busy crunch time between Christening season and Footloose.
When I did Cinderella I dug out our “Western Women Funny” dresses from King and I. They were stretch velvet bodices and taffeta puffed sleeves with a big full skirt sized for a hoop. I made a long narrow triangle piece from tissue lame in gold or silver and then put ribbons in a criss cross design across the triangle and then put ornate trim around the outside of the piece. Just sewing that piece on to the gown changed them to something that fit much more with Cinderella. It looks like a corset front. I have taken them on and off those gowns many times since then.
You say you are getting to the good enough is good enough stage but it sure doesn’t look it yet! Each gown is beautiful. I am just starting on my 80s prom dresses. Once I get a gown that fits a cast member then I will transform it. I don’t want to transform something that won’t fit once I am done. Certain people must be in the prom scene and for some it is optional. I think my next step is to tell them that whoever brings in an appropriate dress for me to convert will be in the prom scene. That always works!
LikeLiked by 1 person
Making them bring in a base dress would work, lol. It has been fun to try and utilize the dresses that were donated. Some of them were ones that I never would have chosen as a starter, but it has worked. Some I haven’t been able to use . . .I love those heavily beaded dresses done on silk, but, haven’t figured out a good way to use them/cut them up.
I am crossing my fingers on fittings. I just don’t have enough volunteer time to do as many fittings as I usually do. We are doing group fittings this week and I am hoping the gowns fit. I have enough girls I can probably switch them around it I have to. I have about 6-7 left that would like to upgrade . . . we will see if I get time. This week I need to work on “Charlotte” or my own daughter won’t have costumes, lol.
I love the idea of the removeable front pieces. I have played around with some component costuming, but, reality is, if I am not there, no one will know what the pieces are for. Stretch velvet would be a great selection for bodices . . rich looking, and yet, more flexible in sizing. So many good ideas!
LikeLike