Sometimes costumes have a way of creating themselves.
I fully started out intending to make a zombie/corpse bride costume. I picked a somewhat bedraggled wedding dress, and was all set to slice, dice, stain and destroy. But, the dress had different ideas . . .
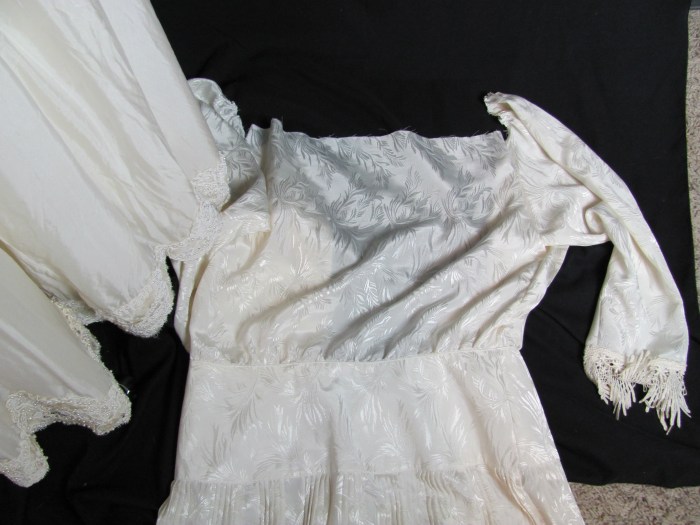
This was the original dress:


As with most garments, after purchasing this dress I washed it. I did so a bit reluctantly because it had copious amounts of pearls decorating the bodice, sleeves and hem. While I wasn’t exactly sure how old this dress was, I suspected the pearls were glued on, and experience has shown me that the glue is typically water-soluble. But, I don’t like later surprises, so I washed away . . . and so did a bunch of the pearls. Oh well . . . zombies don’t need pearls. I didn’t spend much time looking at this dress as I had every intention of destroying it.
Then . . . I put it on the dress form to take the “original” pictures. I noticed the gloriously full skirt in a lovely soft fabric I suspect is silk. The deep “V” front appealed to me. I noticed the back hem hanging a few inches below the front, and suddenly, the dress just begged me to put the bum pad underneath.
")
")

Things were changing. (OK . . true confessions . . . my daughter and I have been indulging in “Outlander” marathon sessions this week . . . 1740’s fashions are swirling around in my brain . . . time travel is real . . . ).
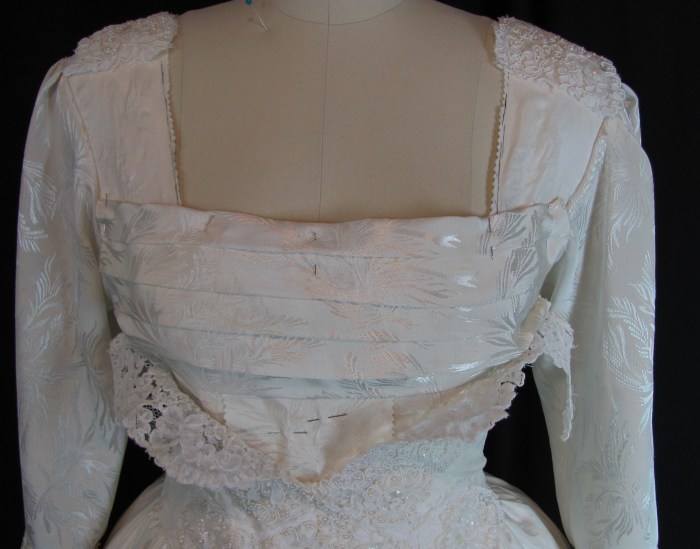
I took a closer look at the dress. Curiously, the back closed with a white plastic zipper, and one button and a few remnants of button loops remained.

The hem showed signs of alteration. There was a curious stain (from bustling? storage?), and a clearly-altered beaded edging.
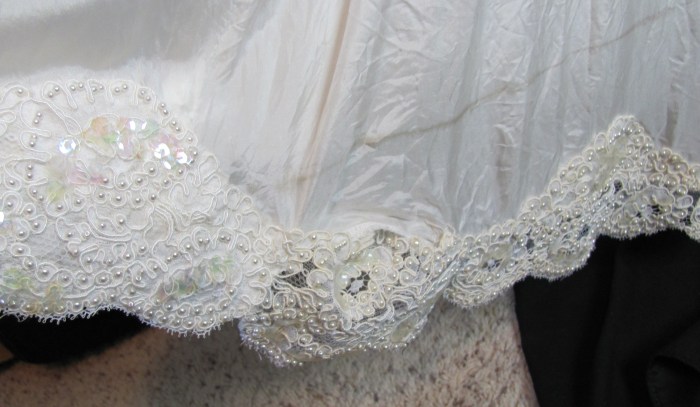
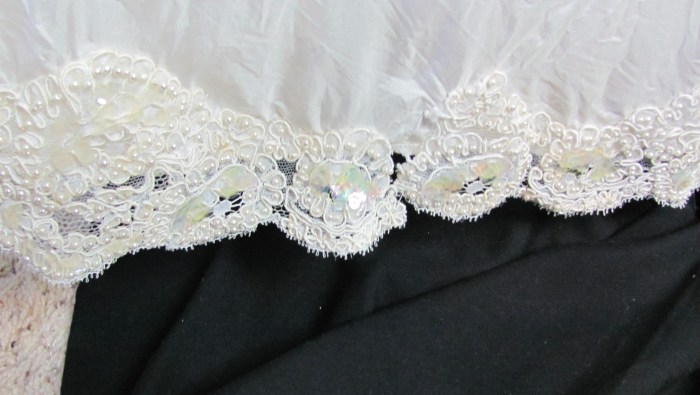
The inside of the dress showed other signs of alteration, and the lace appliques on the front were rather uneven and off-center. Clearly the dress had secrets.
The Upcycle (not a Zombie Bride):
The first thing I decided to do was to try to make the dress a bit bigger. I couldn’t zip it up on my dress form, and so any extra space would be welcome. I was able to gain about 1-1.5″. There was a bit more space in the front & back seams but that would have required taking off the lace, so I opted to settle for the easy inch.


Next I took the sleeves off. As visions of Rococo fashion flitted through my head, I wondered about using the sheer sleeves in place of lace to decorate new, tighter fitting sleeves. I also removed the lace from the top of the bodice.


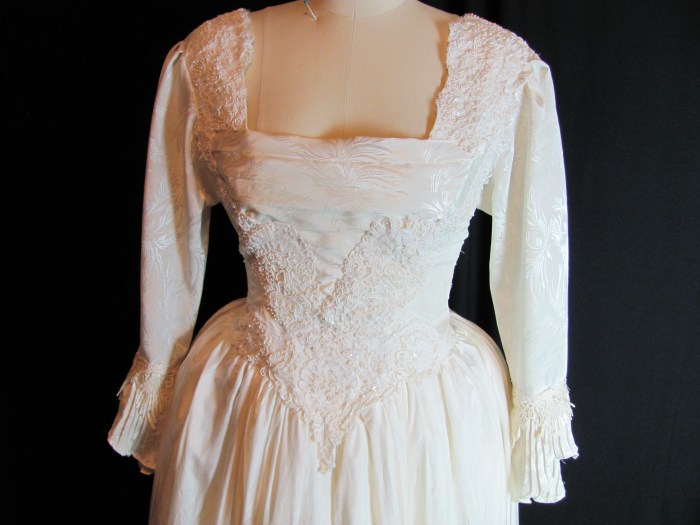
The dress clearly needed a new neckline. I made a pattern, and traced it on the dress.


I ran a row of stay-stitching along the line I had drawn, and then cut the new neckline out with a pinking sheers.


At this point I knew I needed something else to make sleeves. Cutting out some of the lining was a possibility. However, as luck would have it, sitting under my ironing board was a partially gutted dress I had dug out of the “parts-of-things” box when I was working on wedding-wear for “Cinderella”.
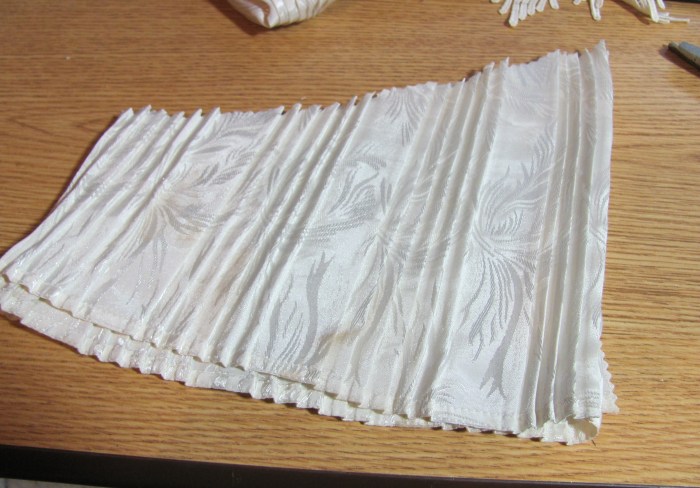
I had removed the lace collar, but the narrow sleeves (in a perfect color!) remained. The dress also featured a drop waist, a button front with decorative sewn-in pleats, and a skirt with narrow pressed in pleats. (I knew I was saving it for SOMETHING).
I wanted ruffles on the edges of the sleeves so I cut them out of the bottom of the skirt. I used as much width as I could get (limited by stains along the bottom). The straight edge is attached to the sleeve, so unfortunately I couldn’t use that nice hemmed edge. I turned the raw edge over and made a narrow hem. This actually helped hold the pleats open and make a fuller ruffle.
The sleeves were a bit long and a bit puffed, so I cut the underarm about an inch lower, and cut the top of the sleeve cap off. Sleeves attached:


I thought I could use the wider pleated panel on the front of the bodice, which was looking rather dull. This would also help to tie the sleeves in with the dress, and, would give the dress the illusion of a stomacher.

Panel pinned in place:
I used pieces of a second pleated panel to cut strips which covered the vertical edges of the neckline.
Next, it was time to start replacing the lace. I snipped and pinned until the spaces were filled in.


If you follow along, you know I try to avoid hand-sewing like the plague, but, I did have to hand sew all the lace down. Not only was I dodging pearls and sequins, but there were hard bits of glue that had once held pearls. It really wasn’t that bad . . .
While I was doing stuff, I went ahead and made a modestly panel for the back, mostly because the back is so non-period. I didn’t attach it, but snaps, velcro or pins would do the trick.


And . . . the dress was done.


I am just in love with this dress.
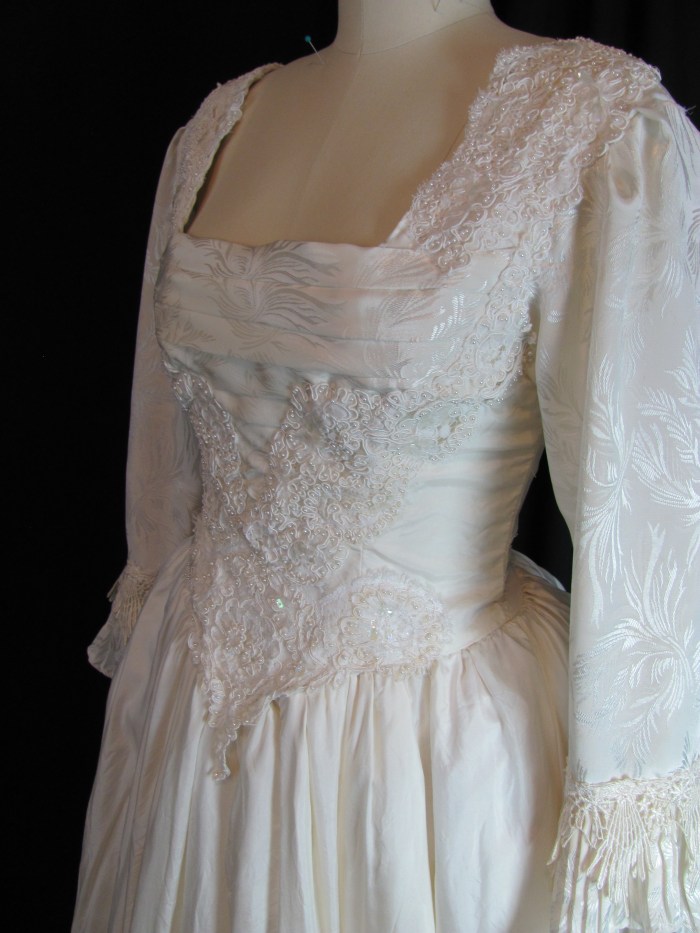
I was impressed with the lace at the waist. It extends down several inches below the actual waist line, but it really gives the illusion of an extended corset top.
The sleeves are not as tight as they should be, but, the shortened length and the frill at the bottom draw your eye away from that. Even the rather bedraggled bottom doesn’t bother me any more. I did tack up a few places where the trim was particularly loose, but, not really much.
Now all it needs is a HAT!
Here is the companion Youtube video post.


Pingback: A Garden Party Hat (part 2) | costumecrazed
Dear Costumecrazed Writer: I stumbled across your site when I was directing Pirates of Penzance (performed last month). As is the case with many school productions, I, myself, became costume mistress and head seam-stress(ed). I LOVE LOVE LOVE what you have done with your projects, and now that my play is done — AND I get to finally settle into retirement– I hope to “travel” through your articles for fun and learning. Like you, I feel so successful (and thrifty) when I’ve managed to turn something into something else…like a ladies coat into the Pirate King costume. We have a thrift shop nearby that actually donates things that could be useful, so we are blessed that way.
Anyway, you are way more inventive and quicker at the machine than I am, so I hope to learn a few things from you. Thanks for sharing!
Maria in Ontario
LikeLike
What fun! I’m glad you found it helpful. This was such a fun upcycle . . partly because it just directed itself. I wish WordPress allowed photo comments because I would love to see some of your creations. My unit (I am a neonatal nurse) has been crazy busy the past few months . . . and with no pressing costume needs, I’ve been working at that job, and not doing much creating. Hoping that changes soon and I can write some new posts. I have a stack of projects just waiting to be created and shared. Thanks for your comment, it really makes my day when I know I helped someone figure something out. Liz
LikeLike