This project started out in a round-about way. I have a friend who runs a thrifting craft store called The Create/Exchange (http://www.thecreateexchange.com/). I wish I lived closer because I think I would LIVE there. The concept is cool . . you bring in your extra crafting/DIY items for credit, and can trade for/purchase items that other people have brought in.
The last time I was there she had TONS of those crochet ruffle scarves, with multiples that matched. . . and of course it was a challenge to think of how to upcycle them.
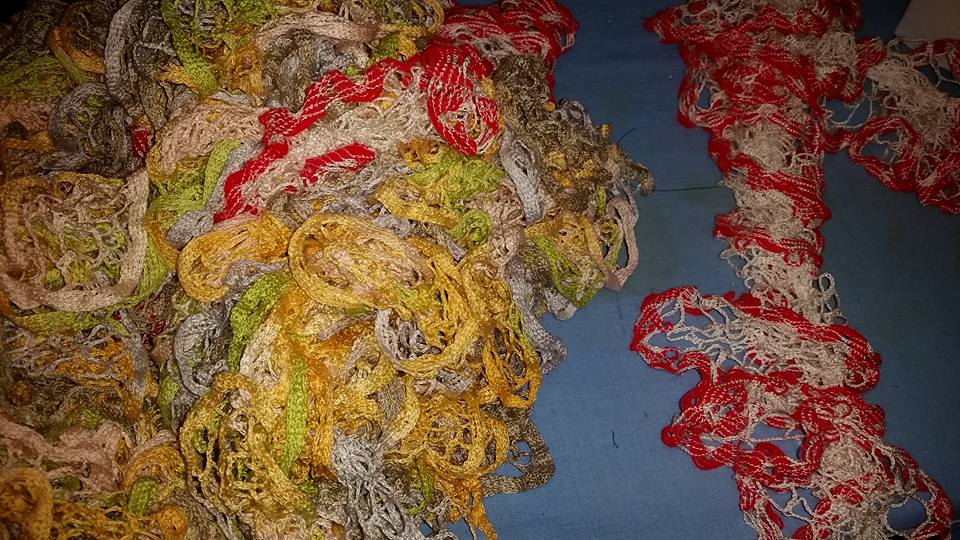
I had recently seen a show that had a 1960’s/70’s Hippie-genre costume and the bell bottom jeans had ruffles along the bottom. I thought “I bet those scarves could be ruffles”.
So, I purchased a pair of used jeans (and actually found bell bottom ones . . so I didn’t need to do that part), and I also found a long crochet sweater vest . . . I was sure I was on the right path. And then, I pinned the ruffles on the pants and they looked . . . .limp . . . and wrong.
So I ignored them (sort of). For a couple months. But they sat there. Staring at me.
Then, my daughter and I went to a show and they had Conga Dancers. They were great costumes. Brightly colored long-sleeved shirts, with ruffles on the sleeves, worn with white pants. Very simple. Very effective. I thought “Hmmmmm . . .ruffles”.
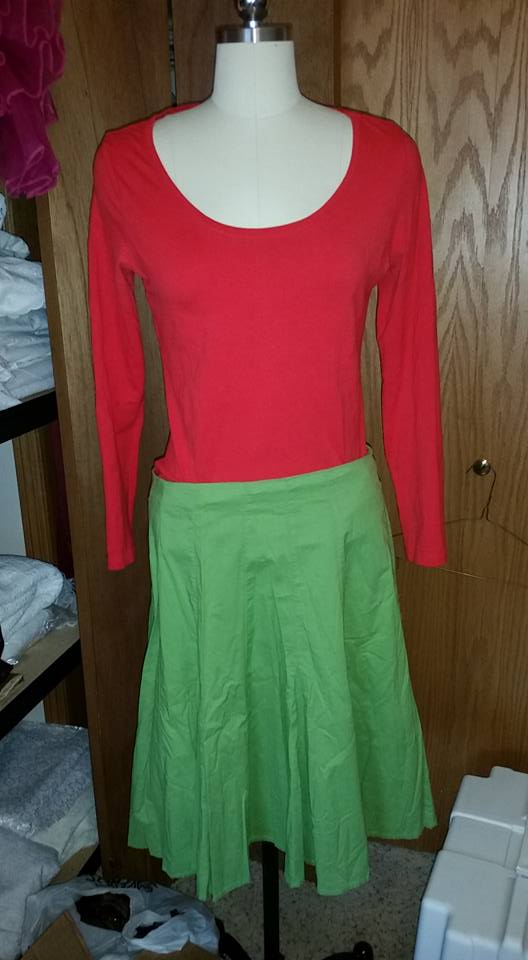
I went thrifting and found a red long-sleeved t-shirt and a green skirt that I thought would coordinate with some of the scarves that I had.
THE SHIRT
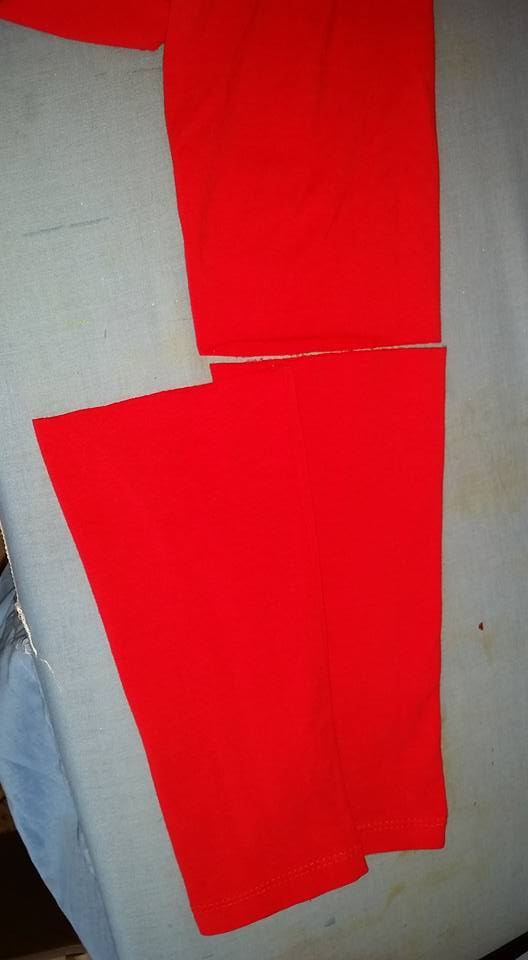
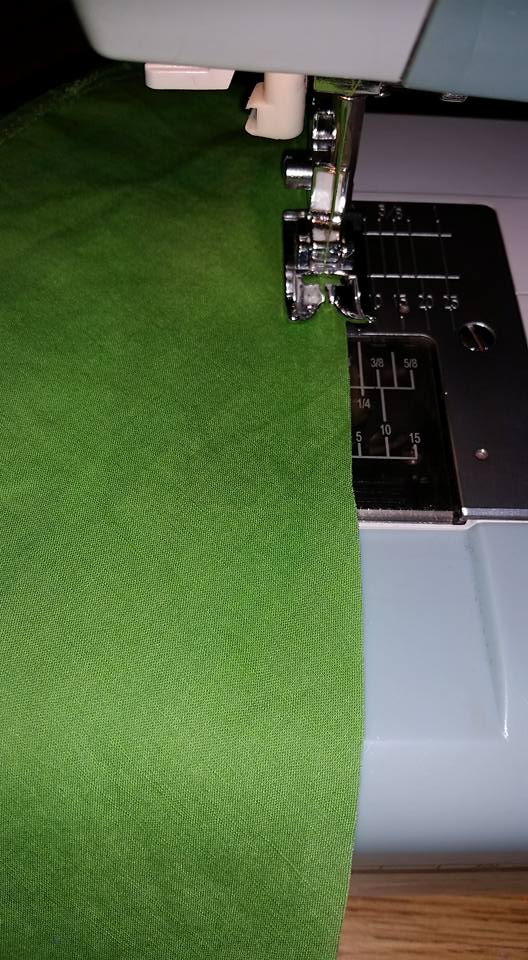
The first thing I did was to try to sew a ruffle scarf on to the sleeves of the shirt. Great plan. However, the sleeves on this particular shirt were too narrow to fit on the free arm of my sewing machine. Since the scarves did not lend themselves to cutting into pieces, I wanted to sew them to the sleeves in a spiral going up the sleeve.
Solution: cut off the bottom of the sleeves. First I cut off one, then I used that to measure the second one.
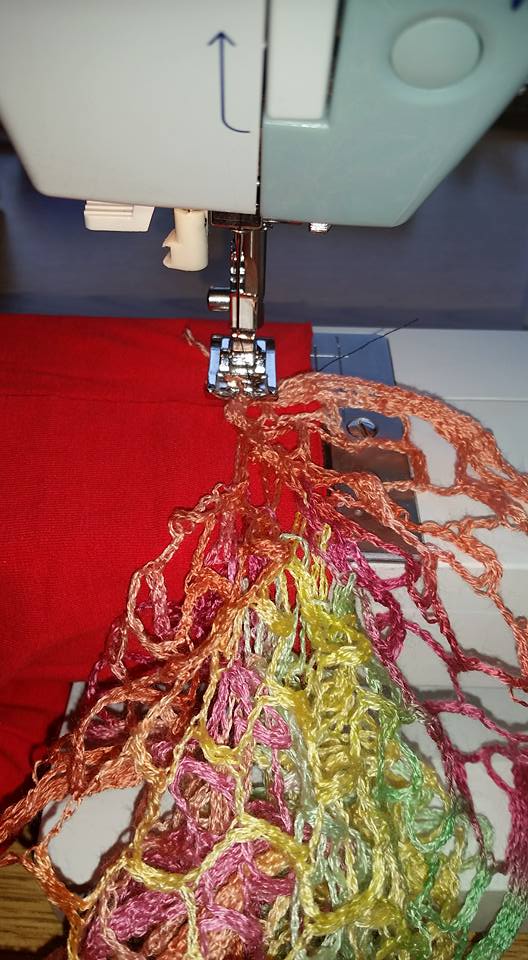
Now to sew the scarves on. Let me tell you, these scarves are MISERABLE to sew on. First, when I “imagined” doing this, I thought I would be able to untwist the scarves so that I would have a straight line to sew, and the ruffles would sort of fall around . . . nope. The ruffles really do spiral around the center, and I couldn’t figure out how to untwist it. That meant I just sort of folded the scarf in half along the center and zig-zagged the ruffles down as they happened to come along. Second , all those loops! They caught on EVERYTHING! On the presser foot! On the edges every screw, lever and loose edge on the machine! (and there are more than you think). I was soooooo frustrated. (Updated addendum: see note at the end of the shirt section).
It took 1 1/2 scarves to do a sleeve. Honestly, after the 1st sleeve was done I emailed my friend and said “Those scarves? Forget it! I declare defeat! They are horrible! And they look stupid!”
But . . . by the next evening . . . I felt like I had to try again.
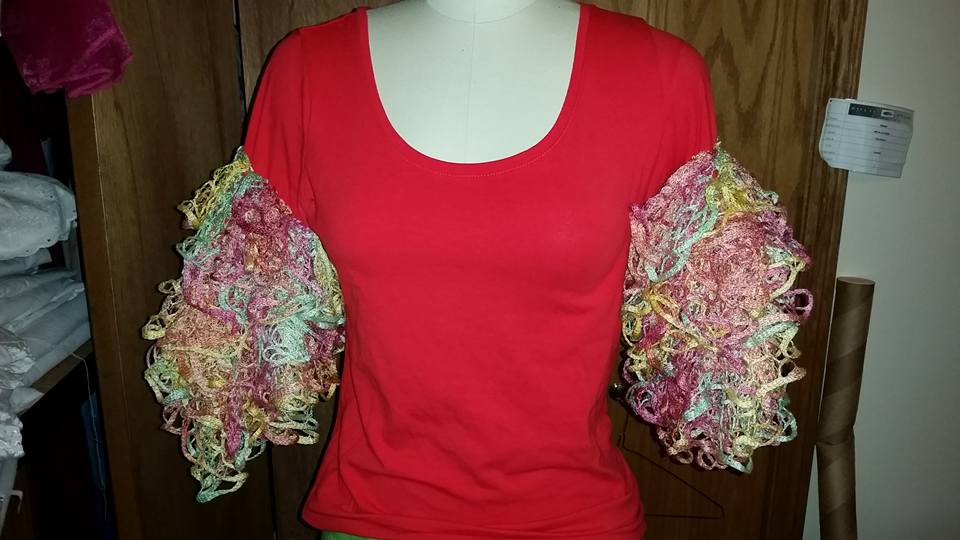
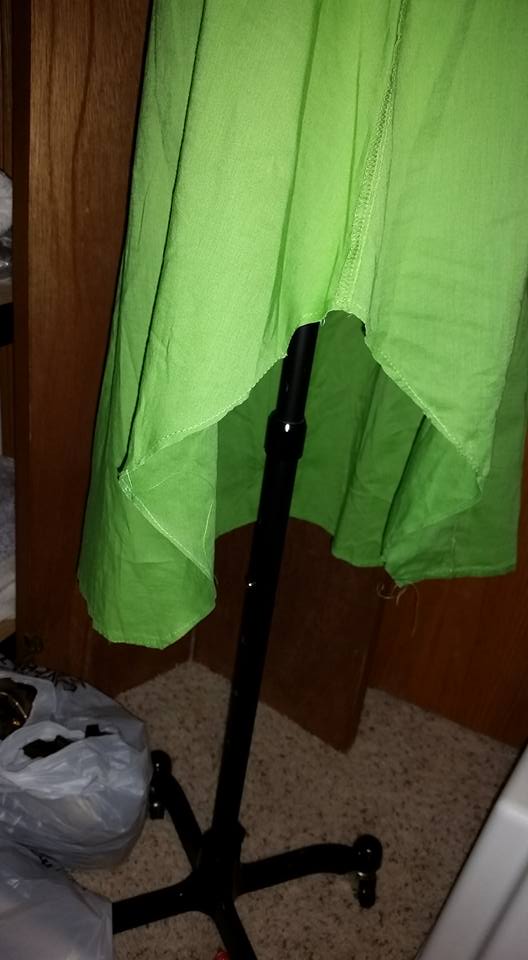
At this point, if you wanted to, you could cut the bottom of the shirt off to your desired length, and maybe put some gathers, or a tie, at center front to make it more of a crop top. I opted to leave it this way because 1) I thought it was horrible and 2) if it was used for something like a high school Homecoming theme day . . body coverage is important.
Updated addendum:
Ruffles out of scarves. There is nothing like laying in bed at night to make you see the error of your ways. You CAN move all of the ruffles to one side of the scarf . . however, it is much easier to do not-sitting-at-the-sewing-machine as you need to twist the REMAINING scarf tail.
This is how they look:
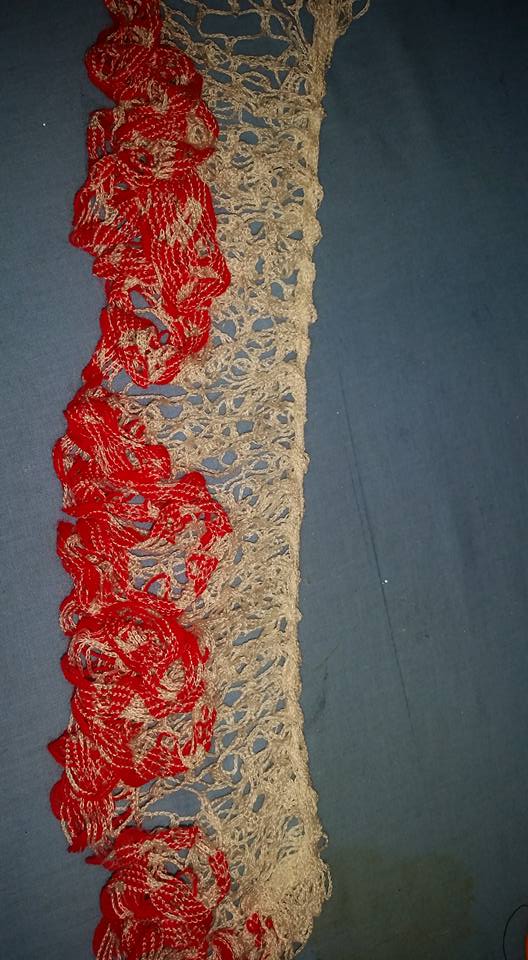
This is how I had originally imagined it in my head. I am not sure why I couldn’t make it happen the first time. The TOP edge is now a twisted band. If I were going to try and use this I would try to press it, or pin it, or something, because it wants to untwist. This would be time consuming to do while sitting at the machine as you would have to untwist every few inches. BUT, it can be done, and for something short, like trim at the edge of a shirt sleeve, this would work.
This is how I sewed them on:

Other than the fact they caught on everything, it was very quick.
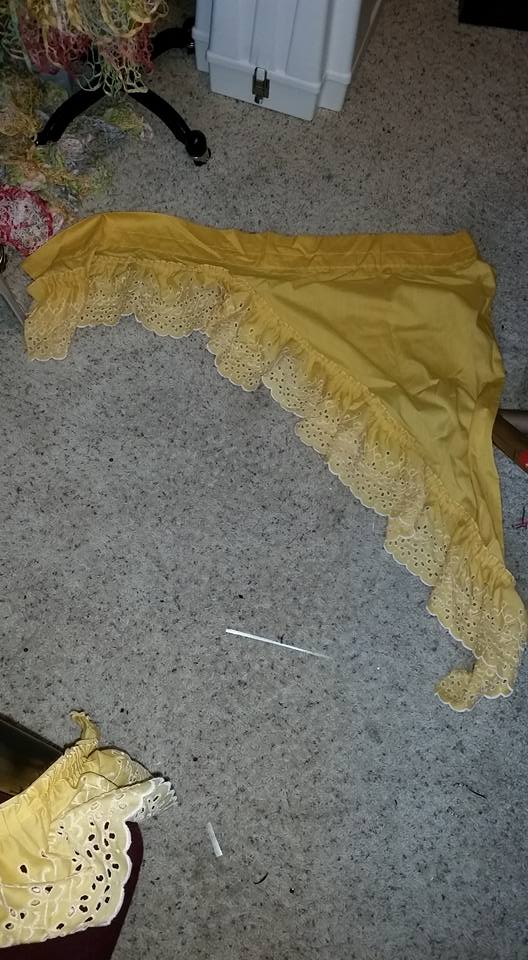
THE SKIRT

skirt
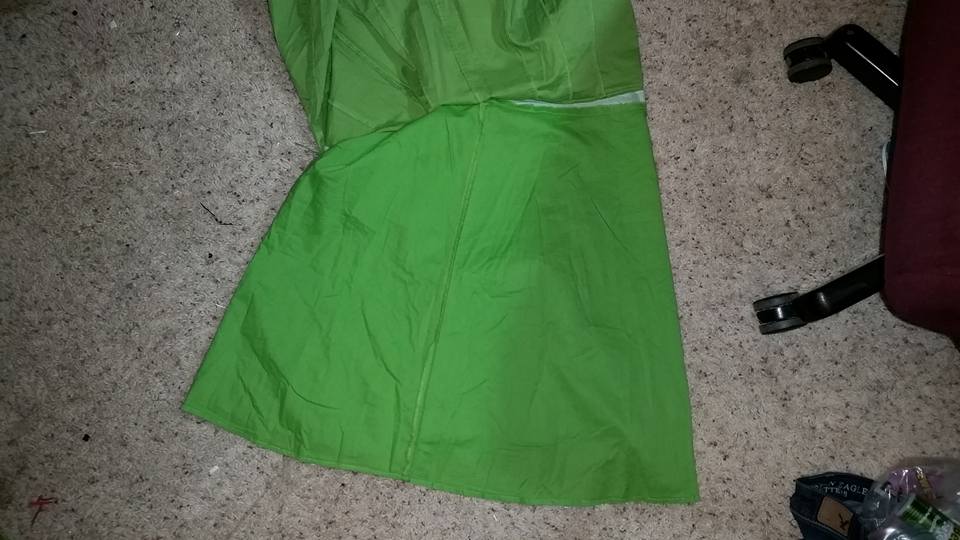
skirt flipped out, lining showing
The skirt was full, gored, and had a matching lining. Initially I bought it because I thought I needed a full skirt. But, after looking online at some Conga Costumes, I decided that I would go with the lining as the base skirt and maybe use the top for ruffles.
You can see at the top of the picture that there was a strip of stiffer interfacing, and then the lining was attached. I needed to cover that interfacing. I decided to cut the outer layer off and turn the edge under. I just cut around the zipper and topstiched the fabric down.

cutting the outer skirt off
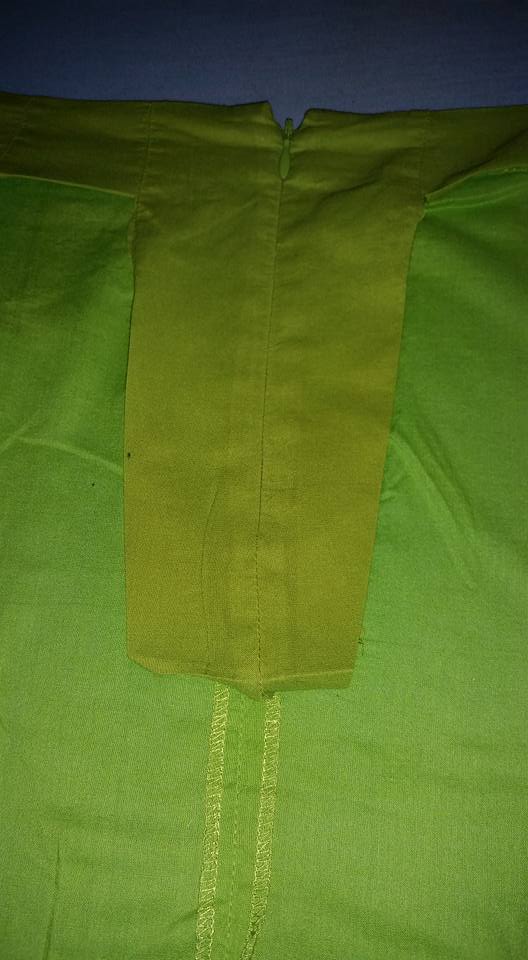
topstitching around the zipper
I wanted the skirt to have a hi-lo look on the side. I very unscientifically cut a piece out of one side.

I then stay-stitched that raw edge as it was on the bias and I didn’t want it to stretch.
I wanted the opposite side longer, so I hemmed the wedge I had cut out, and then sewed it to the opposite side (upside down–so the long straight edge attached to the bottom of the skirt, lining up the side seams). The bottom of the skirt isn’t really even, but, you can’t really tell. I could have evened it out if I had cared.
Now, because the lining was now the outer skirt, the seams were inside out. Well, when faced with visible seams, what’s a girl to do except cover them with SEQUINS! I sewed string sequins on using a large zig-zag. I covered the seams, and also made a few extra stripes.
I then sewed the last matching scarf to the bottom. It JUST, and I mean, JUST fit. Purely by chance. Truly.
At this point . . I thought this was the most horrible costume I had ever made. I sent a picture of it to my sister and she said “Ummm .. what is it?”
After sulking a bit, I went back at it. I would not be defeated by a stupid costume.
I added another scarf to the bottom. That helped a little. Unfortunately, I was out of matching ones, so I had to use a similar one. Had I sewn that one on first, it would not have been noticeable and the matching one would have covered a lot of it.
I decided a hip wrap would help. I found this curtain in my stash:
I cut off the eyelet, hemmed the edge and added some sequins and it looked like this:
So . . not the best costume, but, not as horrible as it had been.
THE HAT
What says “Conga” more than a fruit hat?
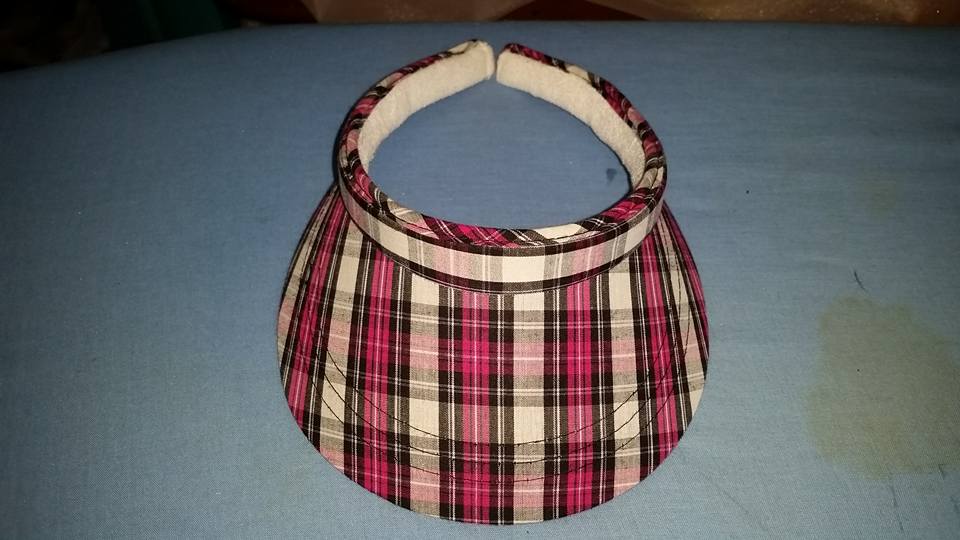
I deliberated on what to use to make the base of the hat. I wanted it to have some height, and I wanted it to be stable on the head. I thought about a baseball hat . . and as I flipped up the brim . . .I thought “FRENCH HOOD!”
I had a visor I had purchased to use to make a French Hood:
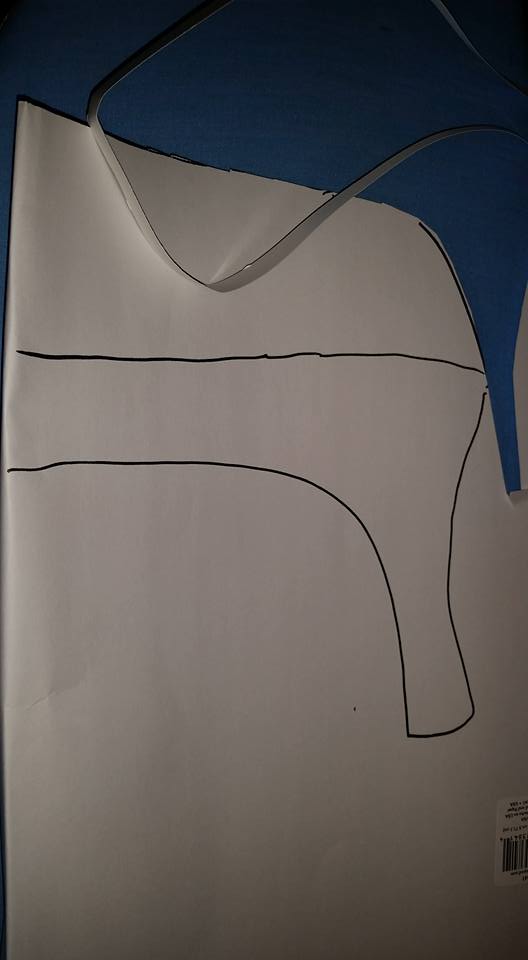
I cut out the paste:
I covered it with duct tape (French Hood) See the previous post for more details on how to do this.
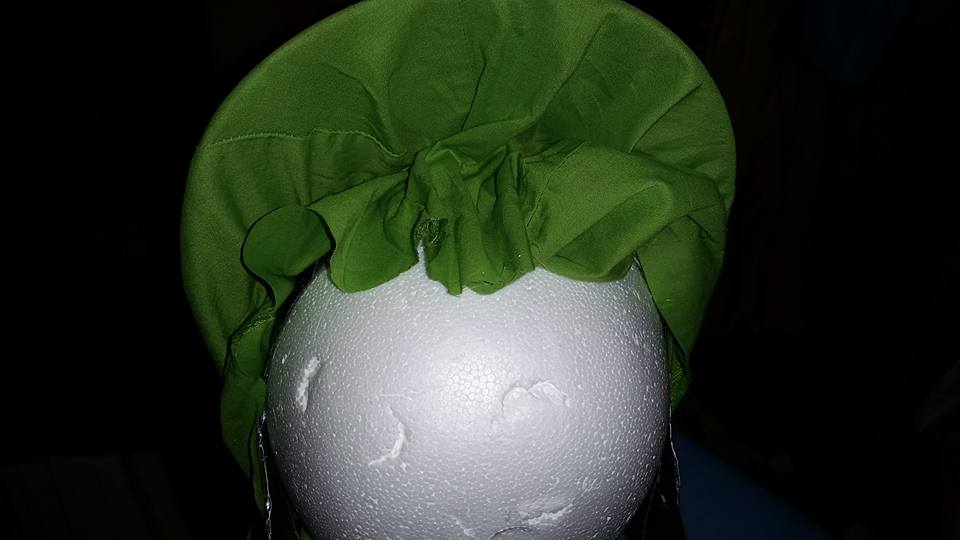
I then put a long strip of duct tape on my styrofoam head and stuck the paste to it, and then put the visor on top of that.
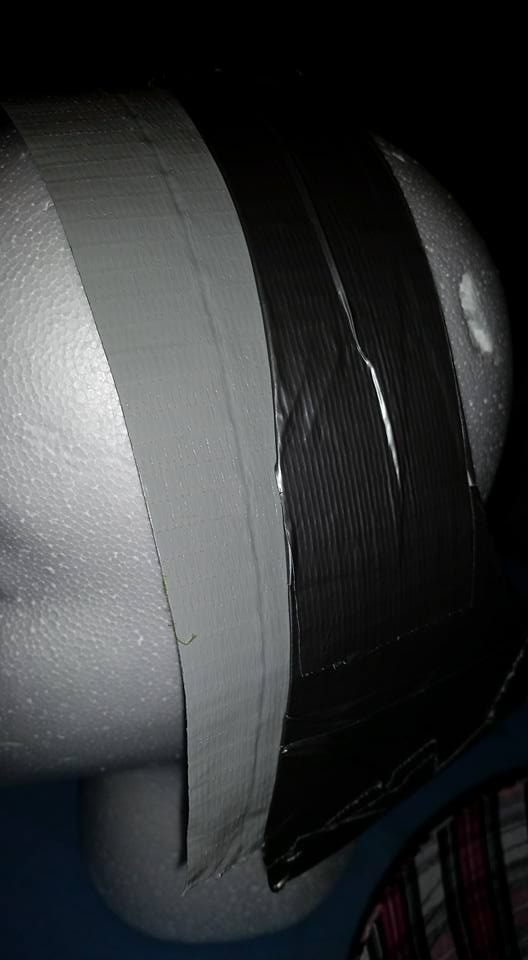
I slit the duct tape and folded it up on to the visor to attach them together.
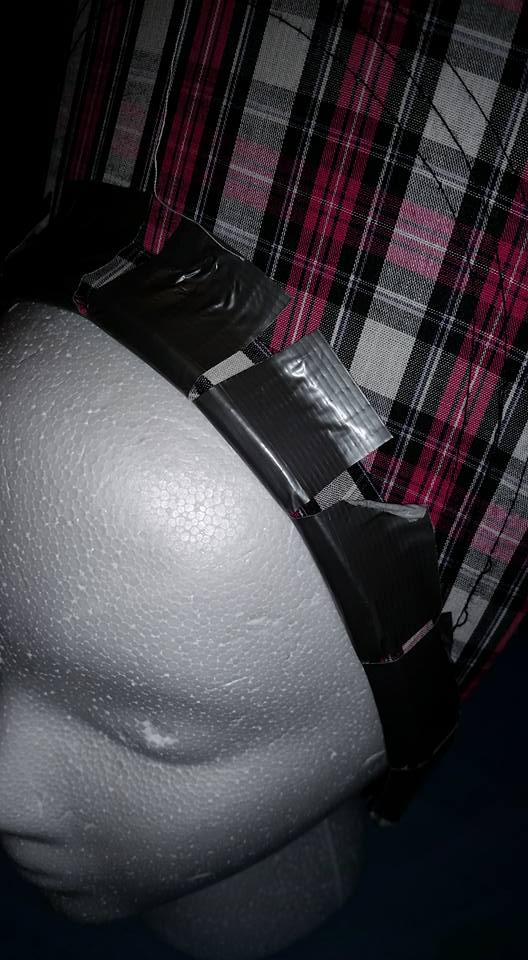
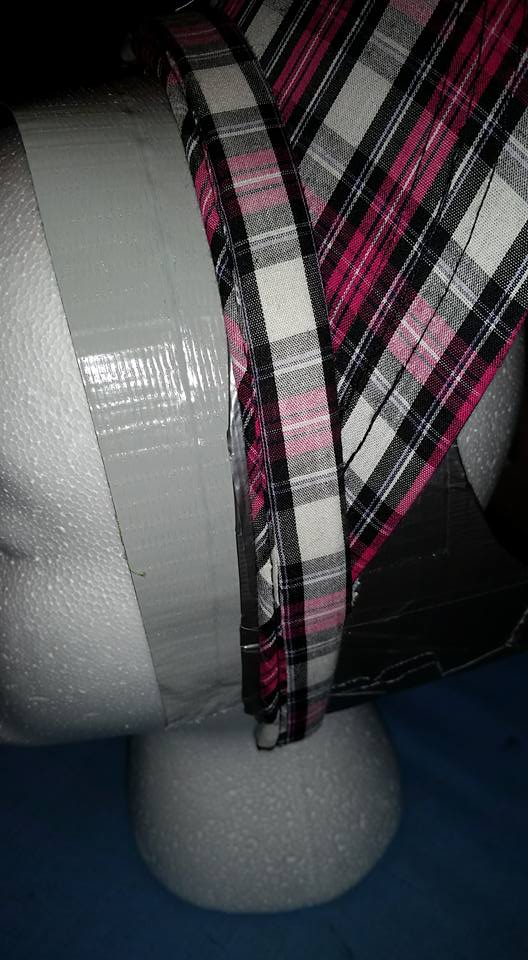
I added a few reinforcing strips of duct tape to hold it down, and to tape it together at the bases. I then sloppily glued some green fabric from the outer skirt to the top.
Glued to front (weird sepia? )
tucked around the back and quickly glued down with hot glue
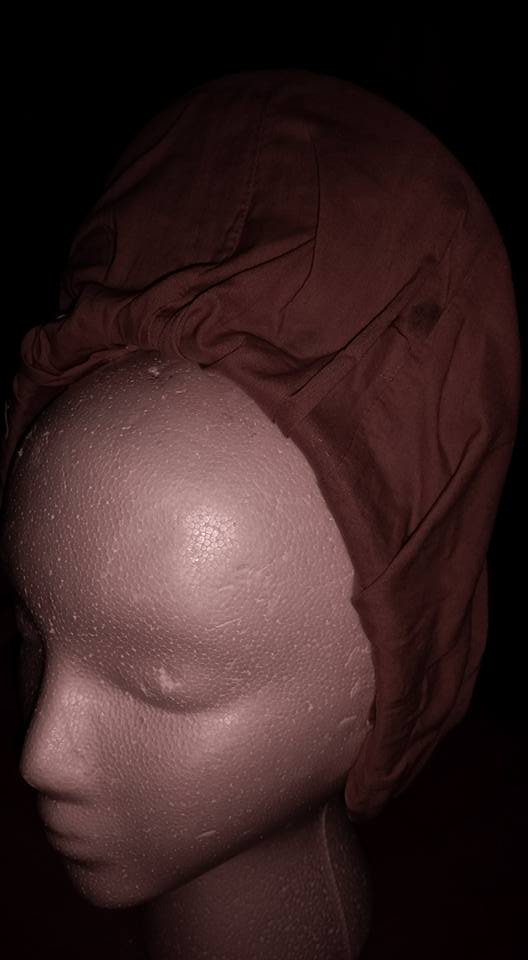
Before gluing that fabric on, I had “eyeballed” a piece of the skirt to attach to the back like a “veil”, with the plan that it would twist and come around to the front to make a head-wrap looking thing. I had cut that piece off, so I was not worried about conserving fabric. That piece was somewhat triangle shaped–using the natural gored shape of the skirt.
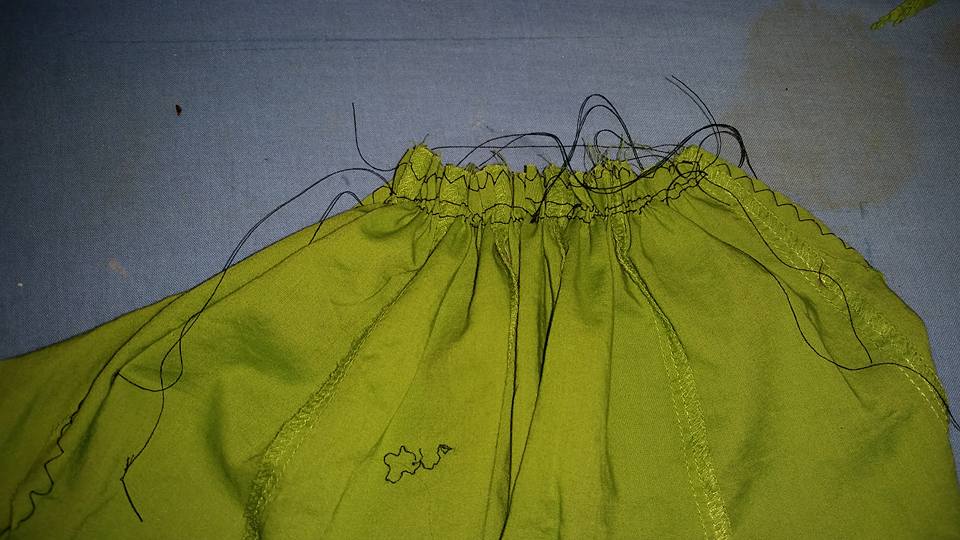
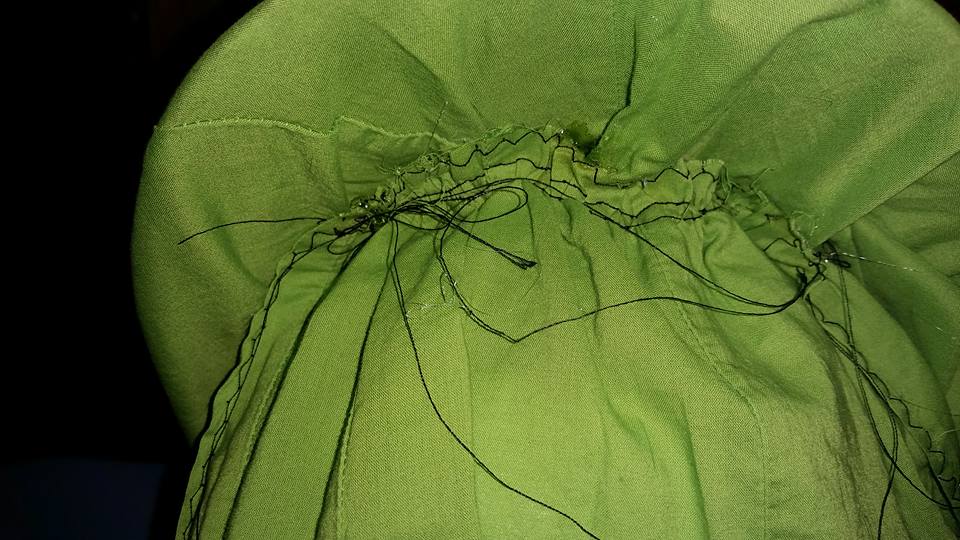
For the “veil”/”wrap”, I hemmed the edge (with poor tension), gathered the top edge, and glued it to the back. I was not concerned about threads showing as I planned to cover it with fruit.

Next, I covered the top with fruit. I learned a number of things. The first is that fake fruit is VERY heavy. If you are going to do this, try to find styrofoam or cheap plastic fruit that is as lightweight as possible. The second is that hot glue doesn’t stick to the plastic/vinyl that fake grapes are made out of. It sort of powders off, and the glue gets almost crumbly. It was very weird. I ended up sticking them on with a combination of straight pins covered in hot glue, and small strips of green fabric wrapped around the stems and then glued to the fabric. For the pear, I resorted to sticking a piece of duct tape onto the pear itself, and then gluing that to the hat.
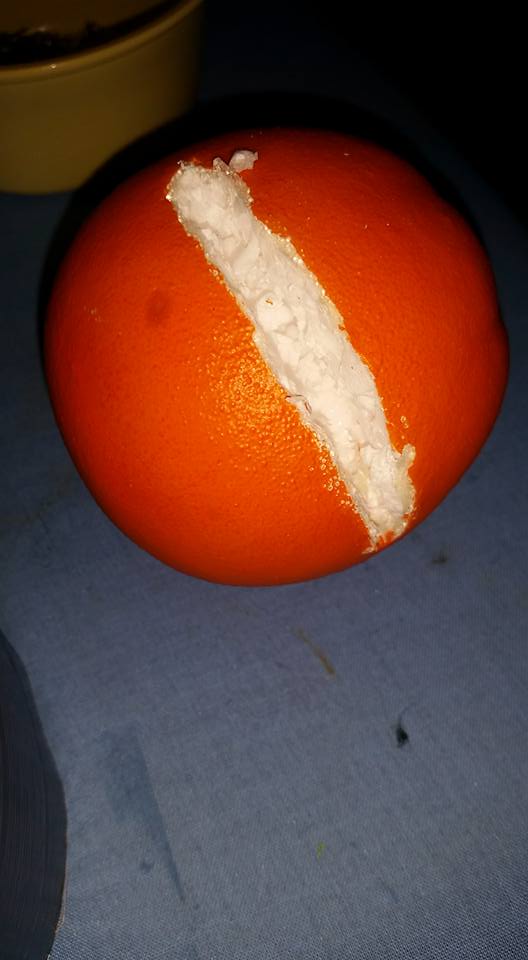
The oranges were by far they easiest. They were styrofoam, and so I cut wedges in them and glued them to the edge of the visor.
The hat front & back:

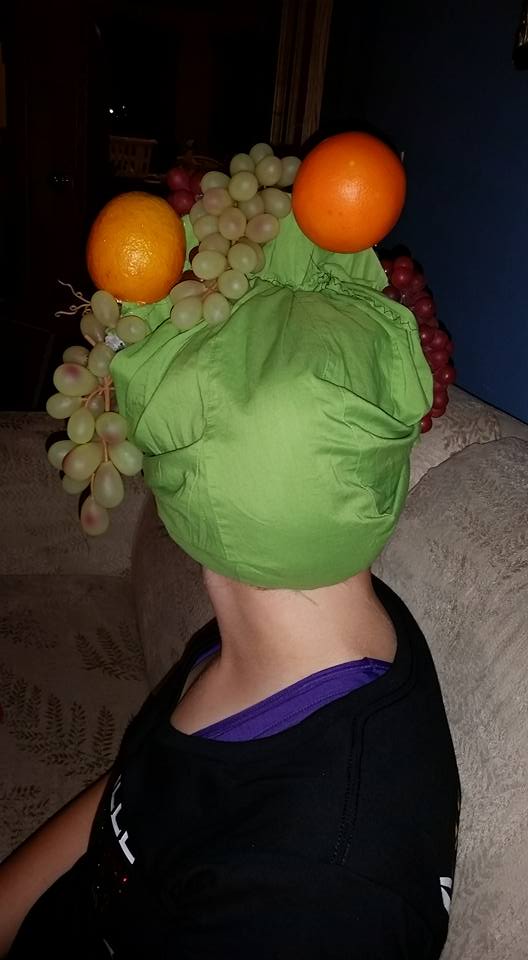
The paste helps to hold the hat in place. I closed it in the back with a pin so it is adjustable. My model also has a pony tail in which sits right above the paste and helps hold the hat in place. The long edges of the veil are twisted under to shape it to the back of the head, and then wrapped to the front and tied. This makes it very flexible for different head sizes and/or hair styles.
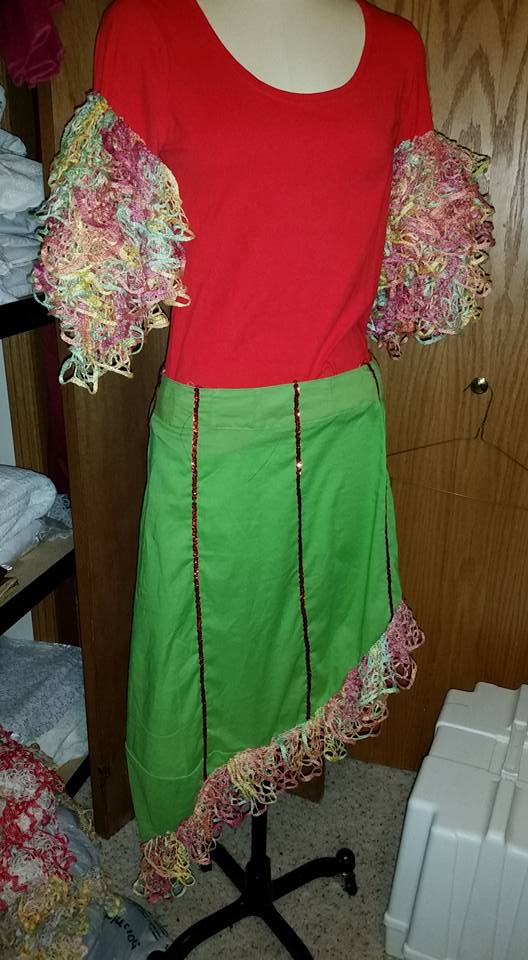
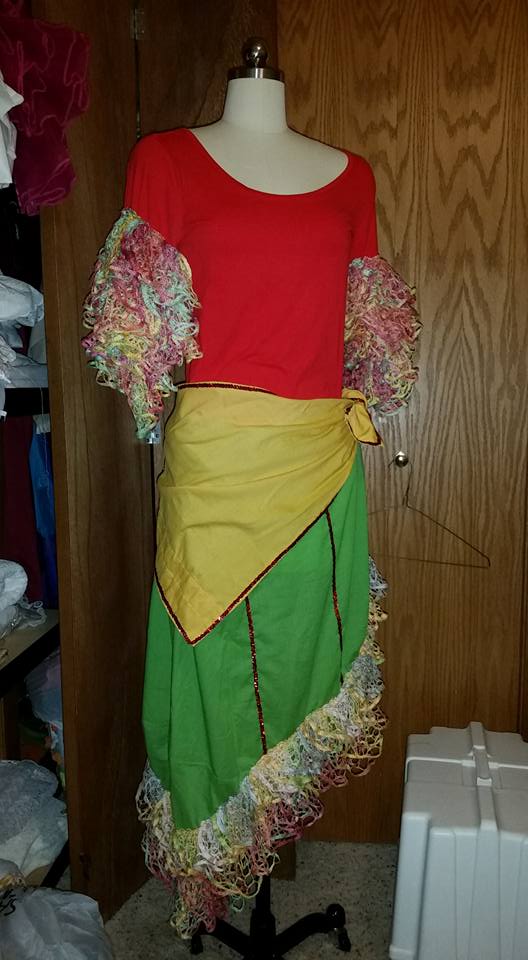
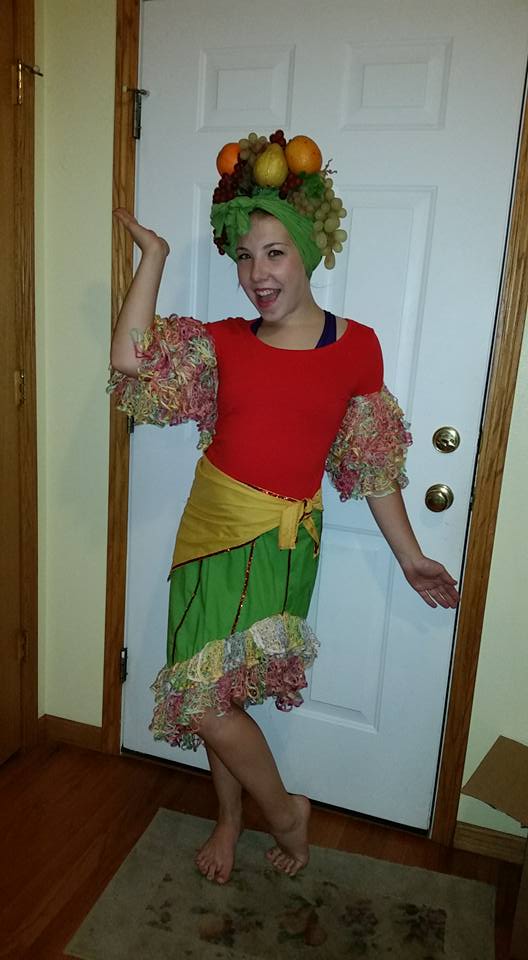
The WHOLE OUTFIT:

Cost: shirt: $1.60, skirt: $3.39, curtain: $0.25, fruit: $2, scarves: trade, visor: $0.50, sequins: from a large roll.
Time: 2-3 hours, including the hat.
Evaluation: I hate ruffle scarves and don’t plan to ever use one again (but don’t let me stop you from trying!)* A fairly straight skirt works fine to make a Conga-type skirt, especially if you are using something else for ruffles. The contrasting hip wrap adds a lot. The hat worked REALLY well, aside from the weight. Who knew a fruited-french-hood was even a thing? I also realized, that if I had wanted the skirt to sit asymmetrically on the waist, I should have put the sequins on at an angle. Since the lines of sequins are straight up and down, if you tilt the skirt sideways they look really stupid.\
*see my addendum above. Ruffle scarves will never be my favorite go-to, but, they might have their use.


