For our upcoming production of “Cinderella” my Director wants a brighter show, but not “Disney”. So, I have been considering different looks for the Villagers and trying to decide what components are most important for the mood and the message of oppressed Villagers seeking social change. How bright is too bright? Is it a question of color, or a question of style? What role do headpieces and hats have? Does the ensemble need to reflect one social group, or would there be a variety at the market?
I don’t have a good vision yet, and, I suppose part of that will be defined when I find out how many cast members are in the chorus. So, in the meantime I am doing a little bit of exploring and experimenting with concepts and colors.
I have the Fairytale “Folk” Outfit with No-Pattern Peasant Shirt (v.2) that I made awhile back. I thought if I wanted to use that, I should have a few other skirts with borders around the bottom. I have some plain circle skirts from “Grease” and have been considering the possibility of modifying them to use for this show. From that thought, this project sort of snowballed on itself until I was done (for better or worse!)
The Skirt:
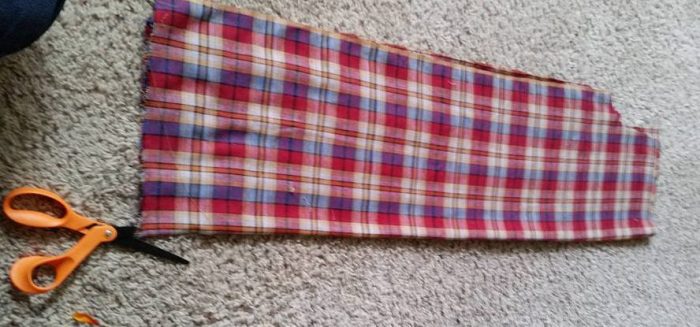
I started with a plain medium blue circle skirt with a self fabric ruffle (a “Grease” style 50’s skirt, although to be honest, I bought it after the show, just because . . . . ) I really wanted a darker fabric for the bottom, but I didn’t have anything that I liked. I did, however, have a piece of flannel with a burnt orange plaid. It has the forest-themed colors I was thinking of for the Villagers, so I thought . . why not?
I added a strip along the bottom, with a little bit of white eyelet (this may have been a mistake as it is very WHITE). I thought it needed a bit more detail, so I used a thin strip of fabric folded over on itself to trim the ruffle.
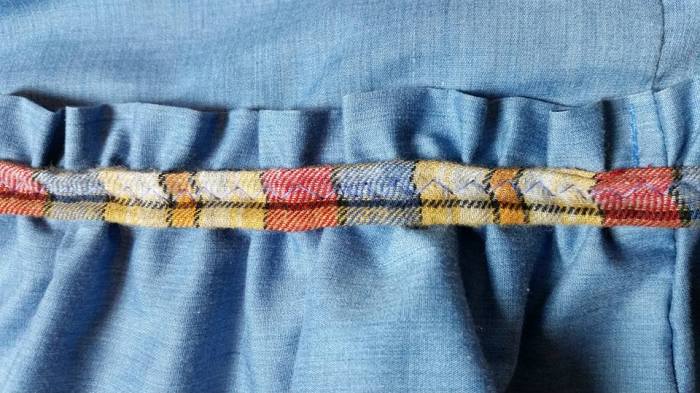
I still wasn’t happy, so I added some cream-colored trim that had been rescued from a comforter (before it become quilt filler). This was a fairy quick upgrade, as it was all straight seams. I tore the flannel fabric to make the strips, so that wasn’t time-consuming either. I wasn’t terribly thrilled with this as it seems to say “Oklahoma” more than “Villager”, so I was kind of on the fence about whether I really liked it. It is, however, wonderfully fully and just begs to be danced in, so that part was successful.

After I had my meeting with my Director I sent her the picture, and she thought it looked OK, so I decided to soldier on.
The Shirt:
My daughter and I had been to see a neighboring schools production of “Cinderella” (the old version) a couple of weeks ago. They had an eclectic collection of costumes from all eras. They had obviously borrowed a set of costumes from someone who had done a “Romeo & Juliet”-esque 1300’s production–lots of high waists, flowy sleeves and tunics for the guys. One of the costumes had some really nice triple puff sleeves, and I REALLY wanted to make those. This is Fairytale, right? Mix and match what you want.
I found this pattern and thought perfect! Until I opened it up, and the person who used it last had cut the sleeve pattern off to make the short sleeve, and thrown away the bottom, so I had no idea how long the pattern was. I held a tape measure up to my arm and measured down, and then added some length. I added WAY too much. First, I think I measured from my neck, and the sleeve is farther off the shoulder. Second, I just added way too much for the puffs. The next time I will probably try about 2″ for each puff and see how that works.


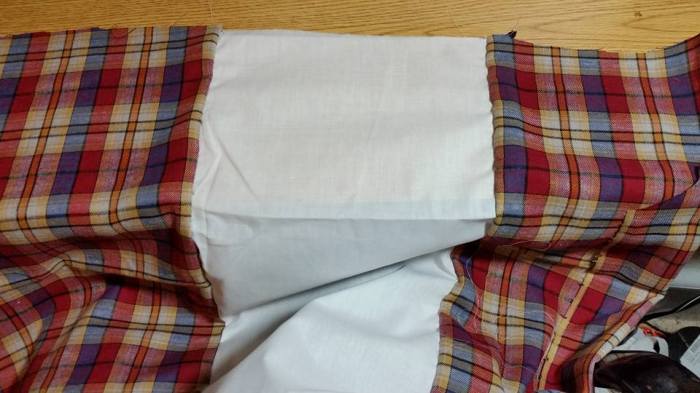
I wanted to slit the sleeves to make it look like a chemise was being worn underneath. The white fabric goes from the top shoulder to where I planned to put the lower elastic for the sleeve. The plaid fabric extending below will make a little ruffle on the bottom of the sleeve. I cut the fabric 10″ wide.
I didn’t have enough length left to cut out the front and back, so I refolded the fabric the other way, and used what length I had. If the shirt ended up too short, I figured I could always add a strip of scrap fabric at the bottom. I didn’t care if the plaids didn’t match.

To make the sleeves I folded the sleeve pieces in half lengthwise and cut along the fold.
The white fabric was inserted into the opening.
The sleeve was folded in half again, right sides together, and the original fabric was resewn below the white, with the stitching line making a right angle and closing the white fabric. A narrow hem was made at the bottom of the sleeve.


The pattern directions showed using bias tape to make channels for the elastic to make the puffs.
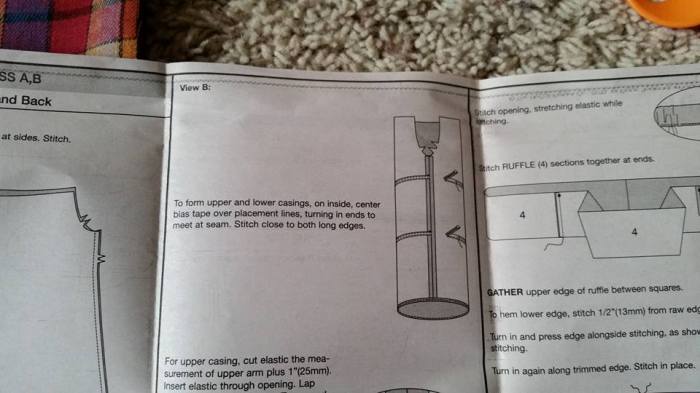
I had the bright idea (not so bright as it turns out) to eliminate that step, and just sew the elastic directly to the sleeve fabric. IF you were making this top for only one person, and you were able to measure the elastic to fit reasonably snuggly, it would probably be an OK method. However, it is unadjustable, so if the person who will wear it has smaller arms they just slide down…oops. About the only thing would be to take tucks in the back of the sleeve to make it tighter. So . . my shortcut ended up not to be a good idea.
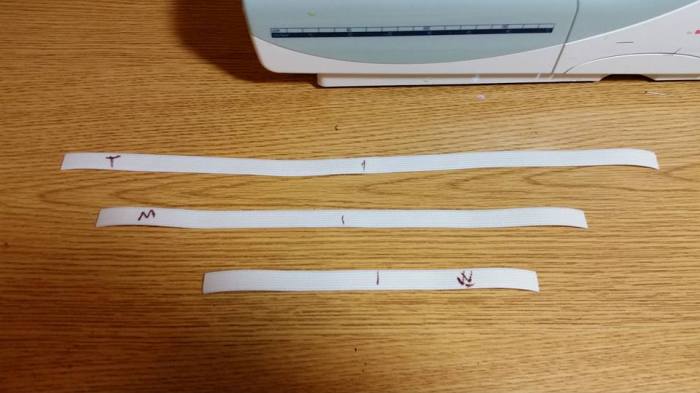
If you want to do it this way, cut elastic to fit the upper arm, middle arm and around the wrist. I did this, cut a matching set, and labeled them.
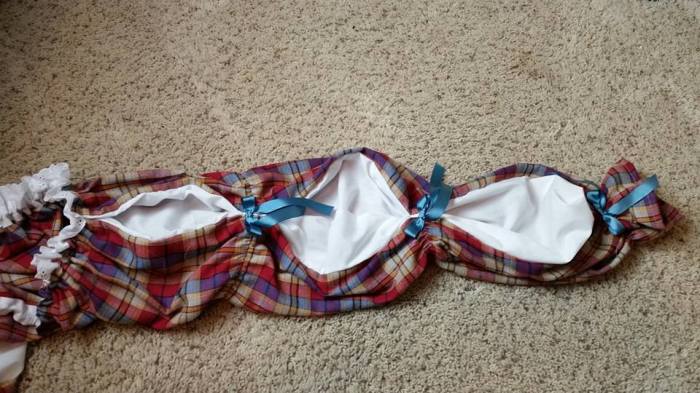
The first one I stretched and sewed across the back, skipping over the white section. I found it is much easier to sew from the outside in. The first picture shows the elastic pinned on the edge of the sleeve and the center. Then it is stretched and sewed in place with a zig-zag. The third picture shows the weird lump of white (FAIL) on the outside of the sleeve (should have seen that coming, lol). The final picture shows snipping the elastic so that the white can go to the inside.


After that, I cut the sleeve pieces of elastic in half and sewed them on separately. The wrist piece was sewn on directly under where the white fabric ended.

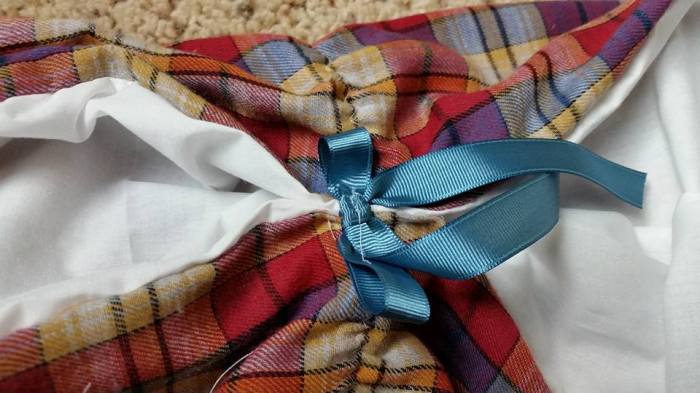
To finish, I pinched the elastic edges together and sewed them on the outside. I later sewed a blue bow on top of these pinched areas to simulate that the sleeves were secured with ribbons.

At the top of the sleeve, the white part was folded in half and then pleated down and basted in place.

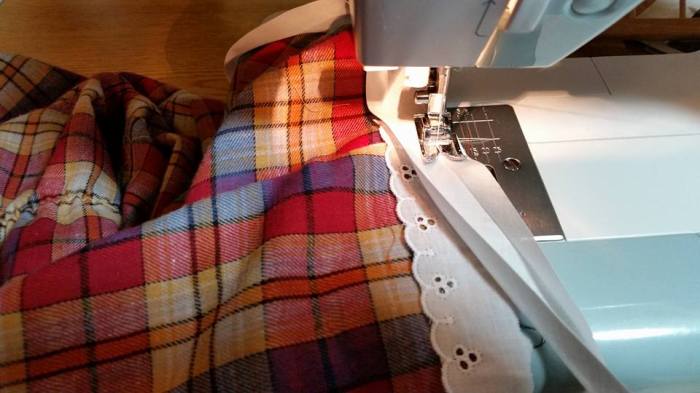
I sewed the bodice and the sleeves together as the pattern indicated. These directions had you turn the top edge under to make a casing. The plaid fabric was fairly soft, and so I was concerned about the elastic pulling out. I opted to use bias tape to make a casing, and while I was at it, I added some eyelet trim in the neckline.
Once this was sewn on, I turned it to the back and opted to add a row of stitching along the top edge, and then made the casing, and threaded elastic through. I finished the bottom of the shirt with a row of zig-zag stitching to help prevent fraying and raveling, but didn’t bother with a hem.
The Corset:
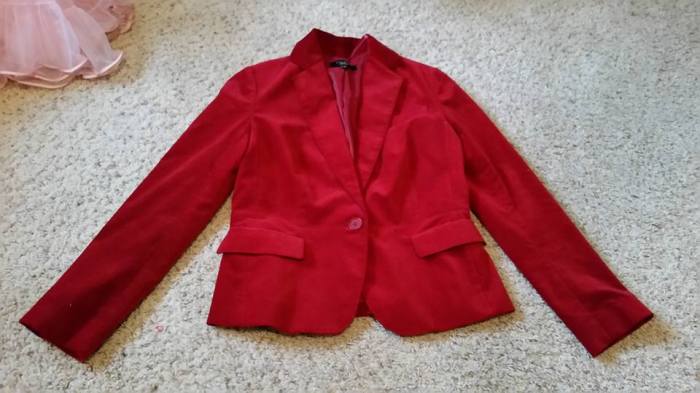
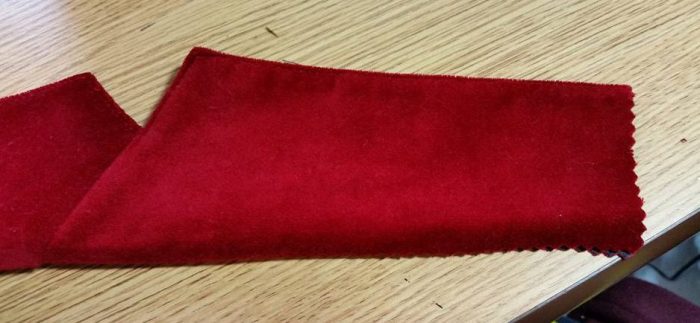
I had the second jacket I had purchased as a Nutcracker Prince possibility laying on my floor, and some of the plaid scraps happened to land near it, and I thought they looked good together, and so decided to upcycle the jacket into a corset. I had done some similar upcycles before, and thought this jacket was a good candidate.
In the past, I have zig-zagged around the shoulder seam and just cut the sleeve out. Since the blouse I made had rather puffy sleeves, I thought I would rather have a larger armscye. I marked out my armscye with pins, and then transferred those measurements to the other side, by measuring the distance to the pins on one side, and transferring it to the other side.
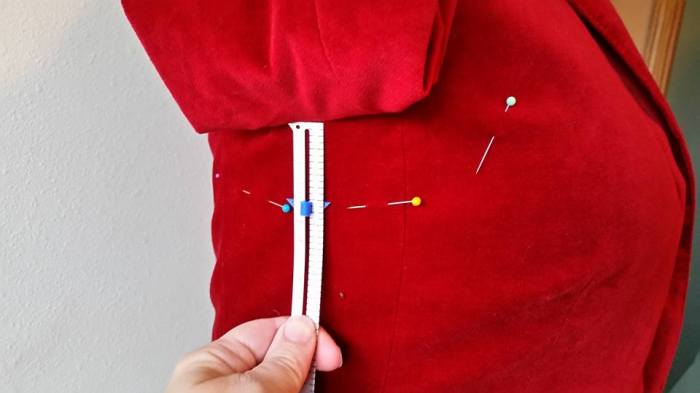
Using the design details of the jacket, I decided to use the front dart that shaped the lapel as the edge of the new front opening. I sewed a line of zig-zag stitches along the pin line around each sleeve, and then around the front. Even if you plan to finish the edges with something else, like bias tape, the stitching at this point helps to secure the lining to the fashion fabric before you start cutting.


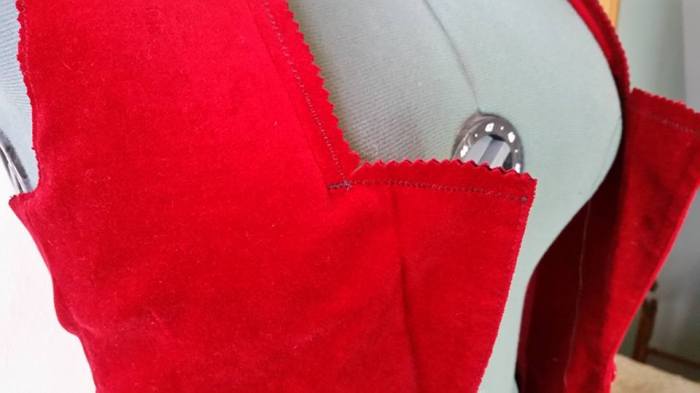
And then I just cut away the undesired fabric along the stitching line. I used a pinking shears because in the past when I have done this, even with running a row of tight zig-zag, I have had some fraying issues. I was a bit undecided on how to finish the edges, so this seemed like a back-up plan, even though I didn’t really want to just leave the edges as is. This particular project I probably could have just cut the fabric as it didn’t seem to fray. Although, no guess as to what would happen in the wash!
Front and back:


I wasn’t real wild about the high neck back, so, using some back darts as a guideline, I ran a row of stitching on the back and cut a new back neckline.

Since it seemed like this fabric was not inclined to fray, I just turned the edges of the armsyce and neck under and stitched them down.


I wanted to reshape the bottom a little bit. I ran a row of stitching along the seam line between the body of the jacket and the peplum (to secure the lining to the fashion fabric). Then I cut the bottom off.
I wanted to keep the curve on the front and to make a little “circle” ruffle. To do this I measured 4″ in and marked a stitching line, and sewed along it (to keep the lining and the fashion fabric together. 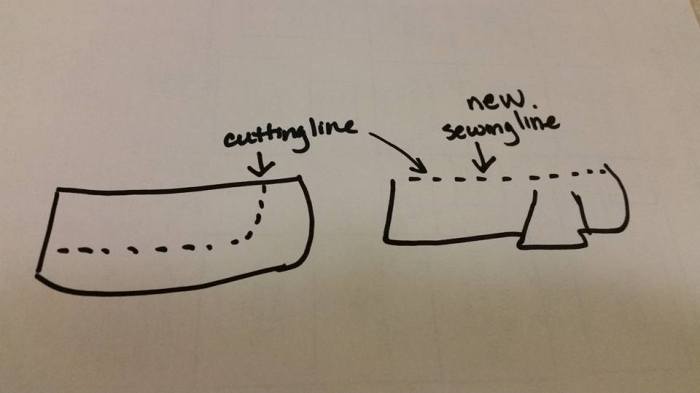
Next I cut the new ruffle off, and re-sewed it on to the corset body. The ruffle was a little bigger than the corset, so I put in a pleat. Top-stitching finished this part. The ruffles aren’t quite as even as they could be. One of the curves I cut I should have taken a little more care. But, for my purpose, it is fine.
I wanted the corset to have mock lacing to make it easy to get on and off. In my experience working with teenagers, many of them have trouble with lacing strings. I would think that it is the same as lacing a tennis shoe, but it isn’t. (They also often have trouble tying a bow behind their backs–obviously a lack of aprons and dresses with sashes that tie in the back!). If you need to do a quick costume change, having to lace and unlace can also be problematic.
The solution is to use mock lacing. We have made some waist-corsets that have sewn in lacing on the front and velcro in the back. The most recent ones have real lacing in the front, but also have velcro in the back. This way you can adjust the lacing to fit and tie it off, and get in and out with the velcro. The disadvantage to the velcro in the back is that it requires a second person to do the closure. I decided to try adding it the front.
In lieu of grommets, fabric/ribbon loops, plastic lacing D-rings, or strips of fabric can be used. For this project I decided to go back to strips of fabric. I knew I would need a strip of “firm” fabric to support the strips on the velcro side. Picking through the scraps I found the discarded collar and thought that would work well.
After cutting the edge off, I cut two narrow strips of fabric, folded them in half and stitched them (for strength). I then attached one to the garment and the other to my little piece of fabric. I made four lacing spaces by stitching across the fabric strip.


Next came the velcro:


Add a little lacing thread:

Front and back views:


I am not totally happy with how the neck line lays. I think the lining is pulled a little bit. But, I don’t think I could fix it, and messing with it would probably make it worse, so I am just leaving it as is.
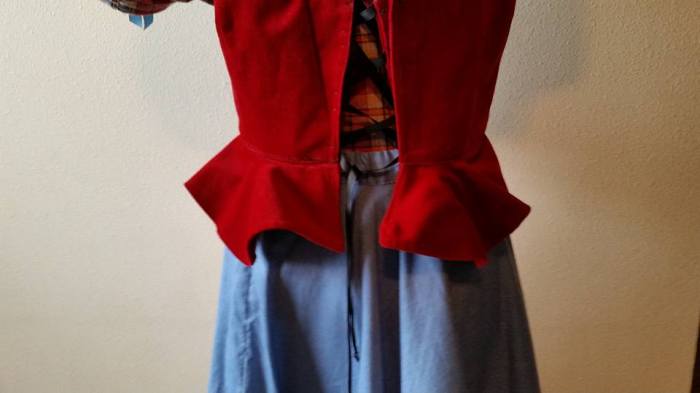
The Outfit:


I have the back of the corset and the skirt pinned as this outfit is a bit too big for my dress form.
Overall, I think the outfit turned out reasonably well. I am not sure it is useable for “Cinderella”, but, we’ll see. My daughter really liked it, which is always a positive, even if it was too big for her. I do like how the sleeves turned out, even if they are too long. The white insert could be narrower. If I do something similar, I would use bias tape for channels in the sleeve so that the elastic could be adjustable. What I would probably do is sew one side of the insert in, and then sew the underarm seam.
Cost: Skirt $3.50, plaid fabric $1, trim, ribbon, white fabric & trim–scraps and stuff I had, jacket $2.75.
Time: About 1.5 hours for the skirt, 2 hours of the blouse, and 2.5 hours for the corset.


Pingback: Leather Split-Sleeve Peasant Jacket: Upcycle | costumecrazed