What would YOU wear to cover your ball gown when going to the ball? Well, a voluminous, flowy cape of course!
Knowing it would take a TON of fabric to make a floor length cape to cover a ball gown, and having a real dislike of doing more work than I need to . . . I set out on an internet search for tablecloths. Tablecloths are really my new love. I have a TON of ideas of how to use them for making costumes. But today, I am making capes. Well . . .actually my Mom made the capes . . but I came up with the idea, lol. I get credit for SOMETHING.
I found 132″ diameter round pintuck satin tablecloths for $17.99 at bbcrafts. I chose light pink, hot pink and maroon for Madame, Gabrielle and Charlotte.

I picked 132″diameter tablecloths because I wanted the capes to be floor length. Dividing the diameter in half gave me 66″ (or 5.5′) to the center of the cloth. Based on the height of my cast members, I knew this would work pretty well.
The tablecloths arrived in all their anticipated glory. The best part about them is the edges are already finished!
To make the cape, we used the nape-to-floor and neck measurements that we had taken during fittings. The nape-to-floor length was how long we wanted the front opening to be. The back isn’t so picky–it can flow and drag on the floor a bit if need be. If you had someone with a nape-to-floor measurement longer than 66″, you would want to make the neck hole in the direct center so the cape wasn’t shorter in the back than the front. Probably the most important thing it to make sure the tablecloth is carefully folded so that the neck opening ends up along the midline, so that the sides are even.

line for neck hole on the cape
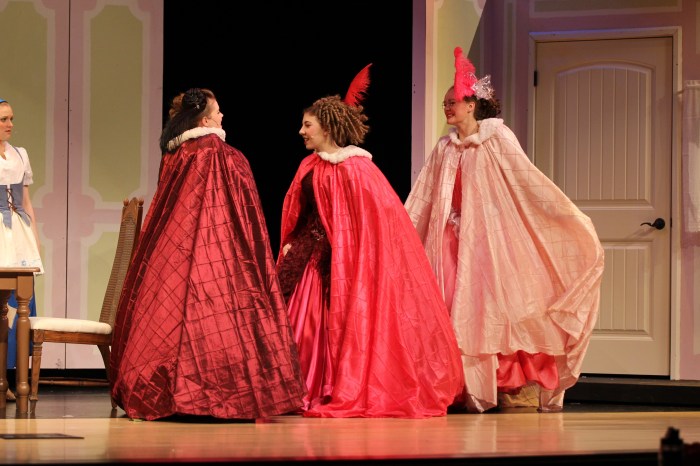
Once you know where you want the front opening, you will want to mark that on the tablecloth and carefully slit the fabric to that point. Next you will need a hole for the neck. There needs to be a bit of gathering at the neck to help the cape ease over the shoulders. How much is personal choice–just remember that it is really easy to cut the center hole too big. I would suggest starting small–you can always cut it larger. Another idea would be to make a sample “pattern” using some trash fabric or an old sheet. Make sure to make the hole is a circle. It seems to make sense to make an oval because of the shape of a persons shoulders, but that pulls the sides up (you can see this on the pale pink cape in the last picture).

I wanted the capes to have a collar. I thought “fur” would have a rich look. I had found a curtain with some swirly rosette velour trim and that seemed to fit my vision.
The inside of the collar was finished with bias tape. You can see the neck is gently gathered .
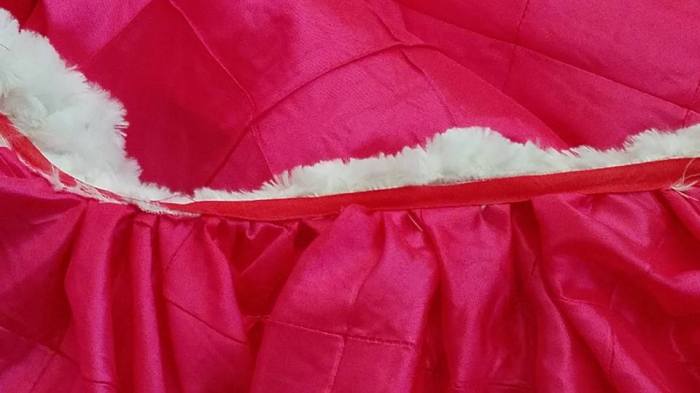
After our first rehearsal, I tacked the collars down in the back so that it was easier to tell the right side from the wrong side. You can see the short line of white stitching above the neck opening.

The capes close with a button tab made from the discarded neck opening fabric. We decided against velcro because it makes a horrible sound that is picked up by the face mics. A cape can close with velcro if it will be opened off stage after the mic is turned off.

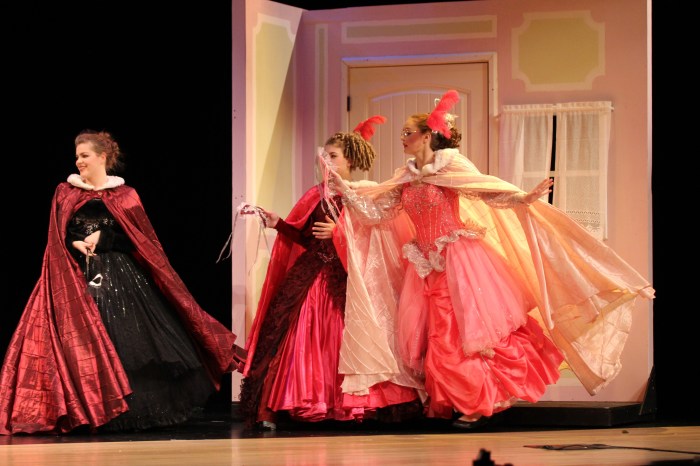
They looked awesome on stage and the girls loved them. I doubt anyone would guess they were wearing tablecloths!


 Cost: $17.99 plus s/h for each cape, one $2.59 curtain panel between the thee of them for the white trim. Button donated.
The capes were wonderfully flowy and fun. I appreciated the pintucking for some added visual interest.
Thanks to my Mom for taking on this sewing project!
This one shows how the pale pink one pulled up a bit in the front due to the oval neckline. Sharing our mistakes so you won’t have to make them!
You can see the pale pink one pulls up due to the oval shape of the neckline. On stage its wasn’t a big deal, but, something to make notice for the future


Pingback: Dressing “Charlotte”: Cinderella (Broadway Version) | costumecrazed
Pingback: “Cinderella” (Broadway Version): Dressing Ella, Part 5 (Capes) | costumecrazed
Pingback: Dressing “Gabrielle” (Cinderella): Ball Gown | costumecrazed
Pingback: Wedding Wear for Madame (and the rest of her costumes, too) (Cinderella: Broadway Version) | costumecrazed
Pingback: Young Frankenstein: Peasant Girl #4, with circle skirt musings | costumecrazed